New Nightshirt

.

This feels a little like showing pictures of my underwear. It’s quite decent though really. It’s a modest garment and I’m not even modelling it.

Some people like pyjamas, some people prefer nothing. I like voluminous white nightgowns. I find them comfy, and I can pretend I’m a historical figure or a character from a book :-).  I’ve been making them myself for years, because although one can buy the sort of thing I like, they are jolly expensive. My current favourite winter one is just a loose, ankle length shirt. So I decided I’d make another like it. It’s my standard shirt pattern cut a little wider under the arms and with the side seams angled out to use the full (only 112cm wide) fabric width. I’ve learned finally not to put lace on the hem, it ends up too bulky to be comfortable. So this is just a shirt tail hem with the back intentionally a bit longer.

The fabric is a flannelly cotton/linen blend (or so I presume, it’s certainly cellulose fibre and feels very much like some cotton/linen I had years ago). It feels a little heavy initially but goes beautifully soft on working.  I have a bolt of it from a warehouse closing sale. So if I like it, I have a lifetime supply of winter nightgown fabric.

If I’d thought more about the lace placement before I made the button placket, I’d have done a matching point. Oh well. Ah yes, the placket is a different fabric, a plain shirt weight linen. I was concerned that the flannel would come out too bulky with all the folds that this sort of placket generates.

I must say, applying that lace at the end of the cuff, enclosed in the seam was a rather more complicated affair than I expected. I’m happy I made it work though there was a bit of unpicking and changes of plan needed before we got there.

IMG_0824

a few steps back

but a decision has at least been made on the lattice patchwork. I’d stalled for a week or so, trying to finally decide whether to use the sun block or not.  I was never sure it was the right thing and for some reason a couple of the edge pieces refused to line up. Then I found that I had stuffed up and made it about 7mm too small in both dimensions. That’s it. Three strikes and you’re out. Three bits of dubiousness or disappointment and that element I’m trying to make work is rejected. I won’t throw it out, I’m sure it will find a home in another project eventually.

So. The new plan is to replace the sun area with more lattice blocks. Not a huge issue and I’m feeling much happier about this. I just need to make 16 extra blocks, which I’ve just cut the fabric for.  I now need 196 blocks in total, of which I’ve made 160. 36 to go. Quite doable.

IMG_0809

Raspberry Sauce and Jam

.

I reserved a kilo of locally grown raspberries months ago but only picked them up on Saturday. However, I’ve turned them into bottled things within 48hrs from then.

The sauce is a version of one I’ve made before. This is my first ever raspberry jam though. So I looked about for recipes. I’ve used bits from each of these two. The first one uses a neat trick of including a juiced lemon half in the mix until it’s come to the boil, for both flavour and pectin I suppose. The second precooks half the volume and puts that through a sieve to reduce the seed content. I’ve done both of these things, the latter for the sauce also. So this looks really fiddly, but a) I’m doing two recipes at once and b) you could omit the sieving part if you want.

Prep:
Take 500g raspberries, add juice of one lemon (reserve half the juiced lemon*) heat until mooshy, mash, boil/simmer 5min, push through a sieve.

Sauce:
Take half the resulting liquid, add half the remaining whole fruit(250g) and about a teaspoon more lemon juice. Heat until mooshy, mash. Add 250g sugar. Heat over low heat, stirring until sugar dissolved. Boil gently 5min. Bottle**.  This is wonderful on icecream, or pancakes, and many things I expect.

Jam:
Take the other half of the liquid and the rest of the whole fruit. Heat until mooshy, mash. Add the juiced lemon half and 450g sugar. Heat over low heat, stirring until sugar dissolved. Bring to a rolling boil until set. For me that was only 5-10min. Bottle**.


*which I put into the weighed sugar ready for the jam until I got up to cooking that. I don’t know if that had any effect or not.

**sterilised containers of course.


Paisley Printed Pinwhale Popover

I’ve enjoyed wearing this dress so much that I wanted one for winter. I had 2.1 metres of this great paisley printed pinwhale cord, so I decided to squeeze as much dress out of it as I could.

.

I cut the bodice then an eight gore skirt from the rest. Yes cord has a nap. I’ve gone with the trick of using one nap direction for the front and the other for the back of the dress. The little scraps from the neckline etc were used to make pockets. There are only tiny slivers of fabric left!

The bodice is lined with a gorgeous spotted rayon:

.

All was going well, until I realised I had miscut the skirt and the waist diameter was too small. Oh no! I could either take in the bodice, or cut the skirt shorter. Being winter, I wanted knee coverage so I boldly put some casually placed under bust darts in the bodice. It’s now barely big enough to pull on, but still works.

From a distance, the fabric reads darker than I would like

.

Still. It works, and I can accessorise it with brighter things. I’m pleased too that it makes another outfit base to go with these cute and comfy boots.

.

Here it is on. Loose and comfy and fun.

.

Tamarillo Kasundi

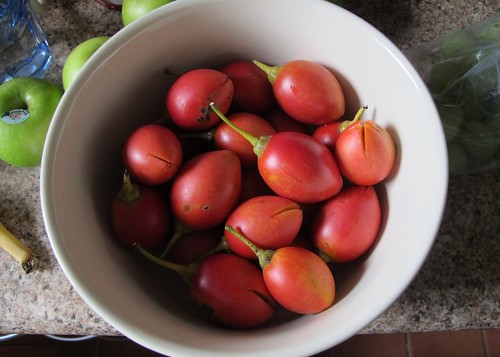
10 days ago, more random free fruit came into my life. In this case, 800g of home grown tamarillos that needed a good home. Now I am really not familiar with tamarillos. I think I’d only ever handled and tasted one once before, around 20yrs ago. I had a vague memory that they were a bit like tomatoes. So I thought I might make a chutney or something from them. A bit of reading confirmed the tomato similarity. In fact they are called “tree tomatoes” in some places. That made me smile.

Here is my lot, with their ends slit prior to being covered with boiling water and peeled.

.

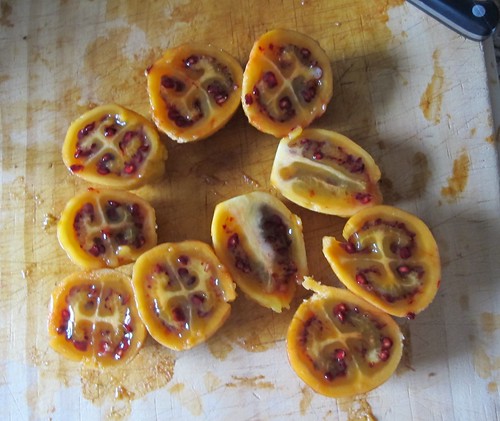
See, they do look tomatoes inside, though the outer flesh seems a bit starchier. Here are a few peeled and halved:

.

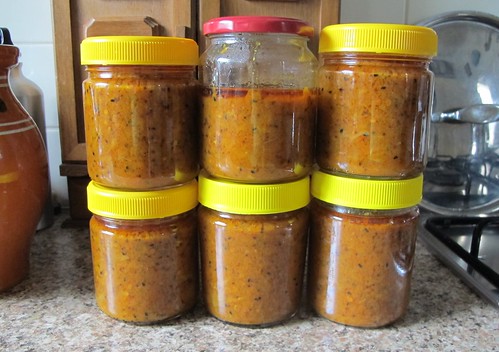
Then yesterday, a friend was talking about the indian pickle “kasundi”, usually made from tomatoes. Add to this that there was a preserve I used to love that was sold as “Indian tomato pickle”. I’ve long thought that might have been a kasundi relative. So I started looked for recipes. I couldn’t find a straight tamarillo kasundi recipe, but this recipe suggests one can use tamarillos as a substitute for some of the tomatoes. I decided to use their recipe as a base, and bravely make it up with my 800g tamarillos plus white grapes and green apples to make up the other 700g. Well, one can substitute all over the place with chutney, so why not try?

So I’ve used:
800g tamarillo flesh (peeled, destalked and cut into eighths)
~500g white grapes, halved
~200g green apples, peeled, cored and chopped
hing powder instead of the garlic to make it allium free (3 good shakes from the jar)
20 of my tiny thai chillis
crushed ginger from a jar

Otherwise, I’ve followed the recipe attached above.

Below is the mixture after all was in the pot, before bringing to a simmer.

IMG_0740

Those apples refused to break down and needed to be mashed late in the cooking. The grape skins also didn’t break down as well as I’d hoped. Still, it smells amazing and if I make it again, it will most likely be from tomatoes, unless more tamarillos materialise.

.

Patchwork piecing progress

I suppose I’m writing this more to celebrate the piecing progress than to show you anything much new. I’ve now made 160 of the 180 coloured blocks in the plan. Again I’ve run out of papers, so it’s back to assembling the 16 block sections. Below are the first four sections laid out. Woo Hoo!

.

Here is the fifth section nearly completed

IMG_0719

and the latest stack of blocks waiting assembly.

.

I’m still loving the look and enjoying the process. Just as well eh? All those hours, and many more to come.

Resurrection

Isn’t it nice when a plan works? My thoughts on how to best resurrect that well worn coat were enacted pretty much exactly. First I removed the lining. It was cut away from the sleeve slits and cuffs. Only the front and neck facings were unpicked. My take on unpicking these days is very much to minimise it. If one can get away with cutting the unwanted parts away, then do. Life is too short and my arm’s work capacity is limited.

Then the wool outer was washed, gently.  Then I dyed some of the fine but strong and hard wearing beige wool suiting in stash to a nice green. It didn’t go quite as dark as the forest green would have liked but the hue is really good.

.

Then I cut a deep facing for all the edges (except the hem)from the newly dyed cloth and applied it by machine except for the hem finishing. This will be fine for it’s intended use and the whole refurbishment still took me about a day of labour spread across three. Oh and I top stitched down all the seams because they are no longer protected by a lining. Plus I added straight grain reinforcing for some seams, such as the shoulders. It won’t last for forever but should do another couple of years.

From this:

IMG_0574

To this rather more respectable version:

.

The owner is pleased. As he should be.

Save

Cold Shoulder Cardigan

I’ve worn this cardigan for several winters. It’s wonderfully soft and warm, but I’ve been finding the colour really boring.

.

It was bought as a man’s cardigan from a factory outlet in NZ. After a few wears, I cut a bunch of fullness out of the shoulders to reshape it for me. This is the excised portion, shoulder seam at the top, sleeve seam at right.

IMG_5556-1

Now I’ve added some colour for fun using my food dyeing tricks. In the process, I discovered just how much water can be drawn through wool overnight. Capillary action I’m told. I’m so glad I put the red end in a bowl!

IMG_0615

Here it is dyed and dried. I’m pretty pleased, though I think it’s felted a little in the dyed sections. Still fits though, thankfully.

.

For extra fun, I overdyed some grey yarn to match with the intention of making a hat to go with it.

.