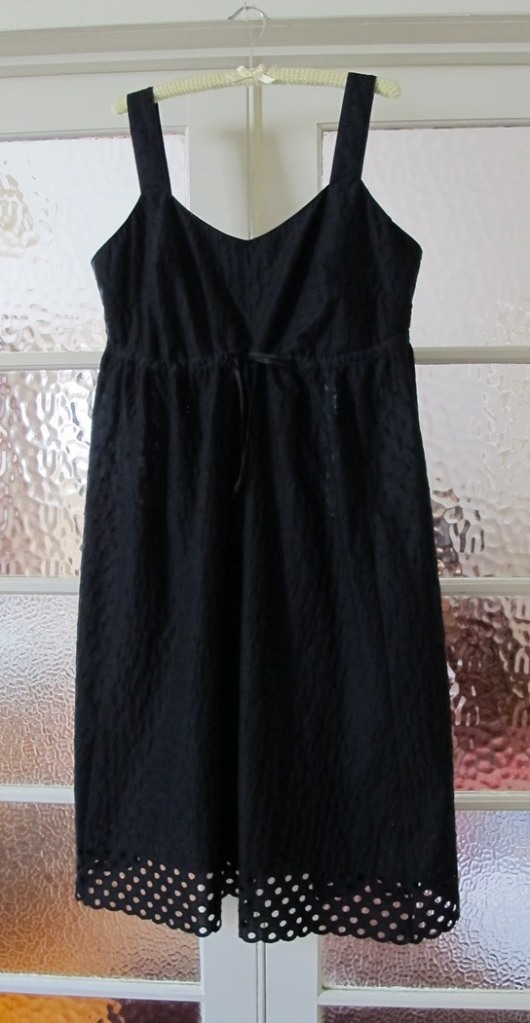
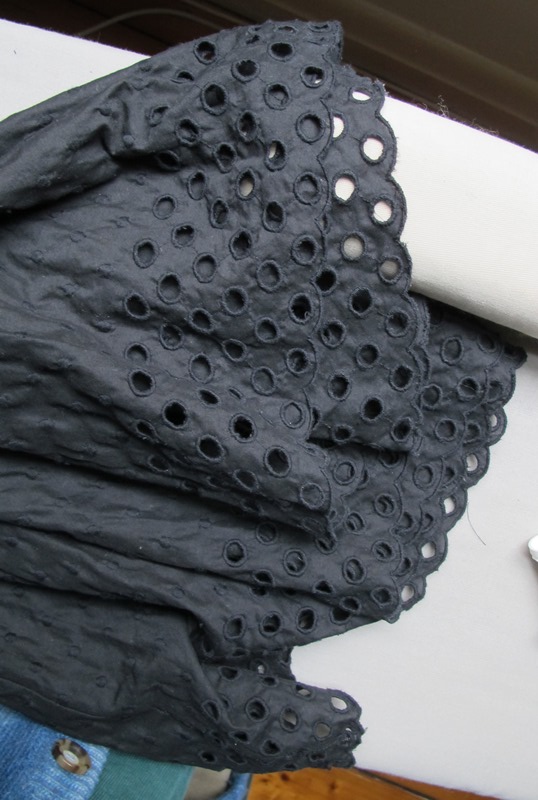
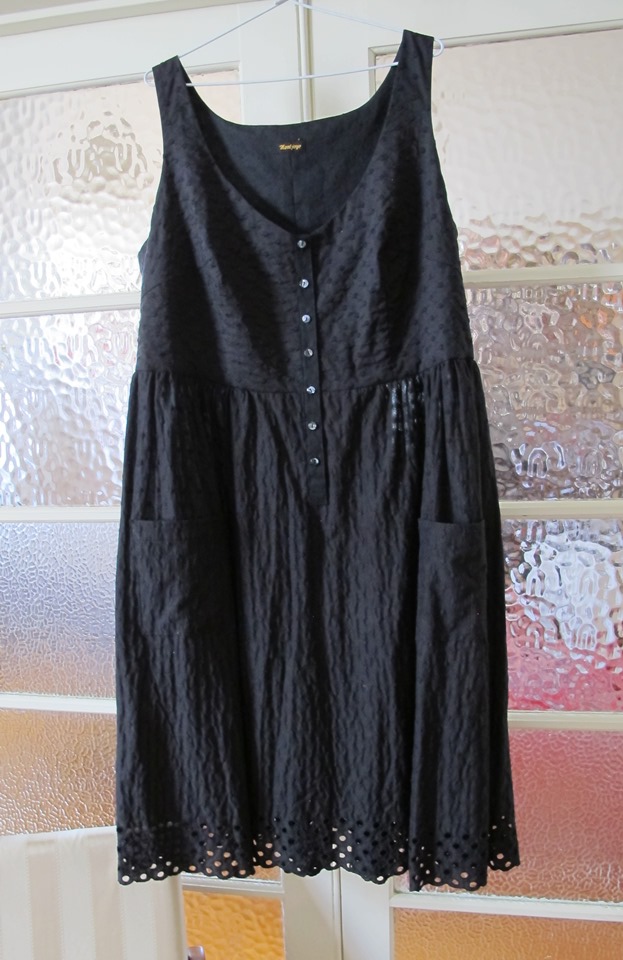
Back in late 2016, just after I started this blog, I made a dress out of a lovely piece of black on black dotty all cotton broderie anglaise. I don’t seem to have written it up here sadly, but there is a pic below. Sort of a petticoat dress. About “5 minutes” later the bodice didn’t fit. Yes I’m exaggerating the short time frame but I can’t even remember whether I even got a wearing out of this first incarnation.
The fabric was way too nice not to remake it, and I found that I had enough leftover cloth saved that I could cut a whole new bodice and pockets as well.
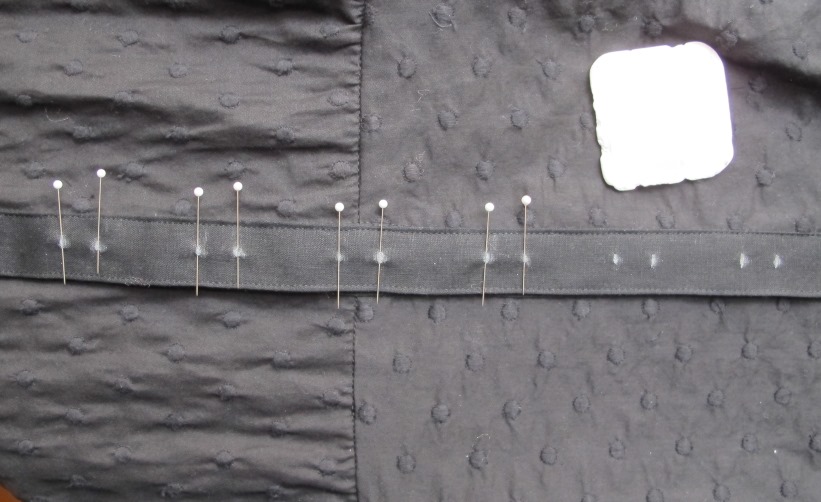
I didn’t take many progress shots but thought this one was worth sharing. On dark fabric you can mark the position of things like buttonholes using pins which then provide a nice defined hard backing to get quite an accurate chalk mark. On pale fabrics I use a soluble marker instead.
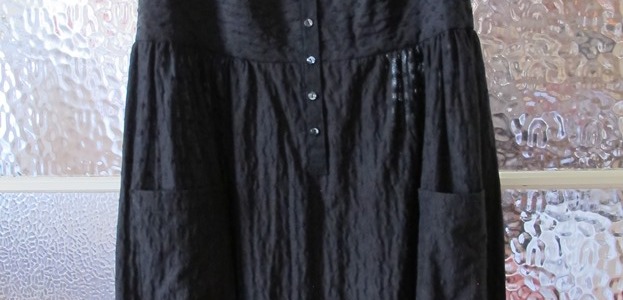
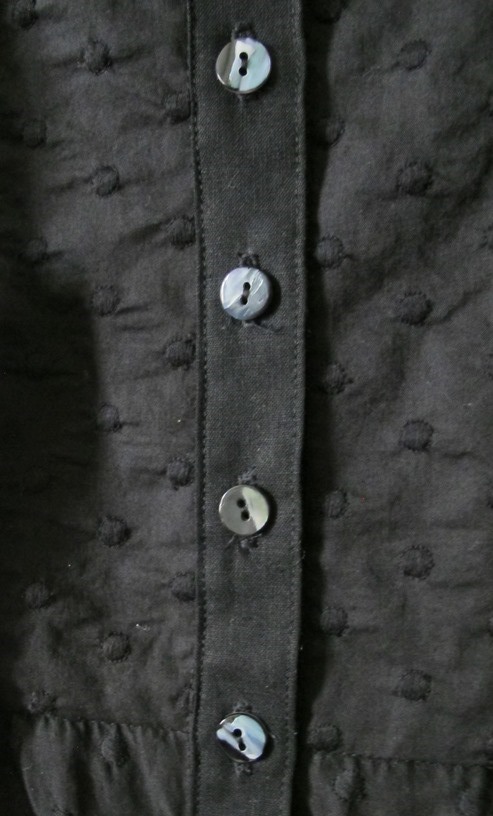
Obligatory button shot. Shell buttons, part black, part nicely irridescent. Prettier in reality, so hard to photograph.
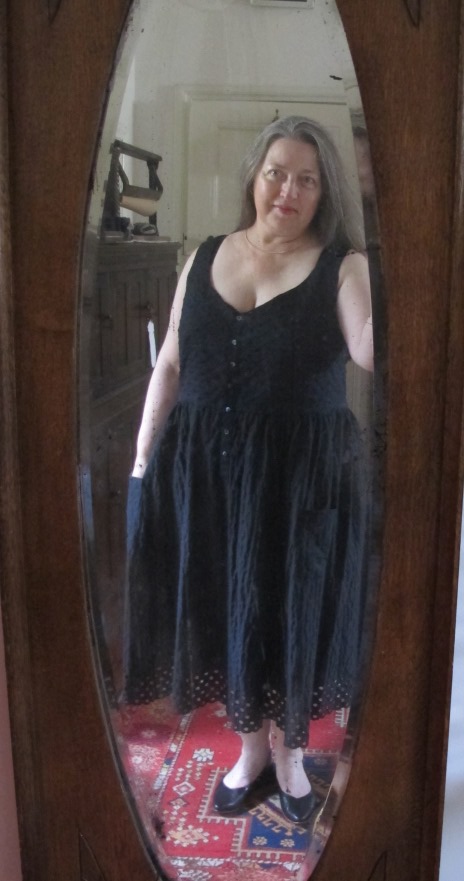
The new bodice is a different shape, longer, less fitted, though it is gently darted.
I stuffed up and cut the neckline too low. I could wear it as a cool party dress but I’d have to be feeling bolder than usual. Wearing a camisole is an option but would make the outfit warmer.
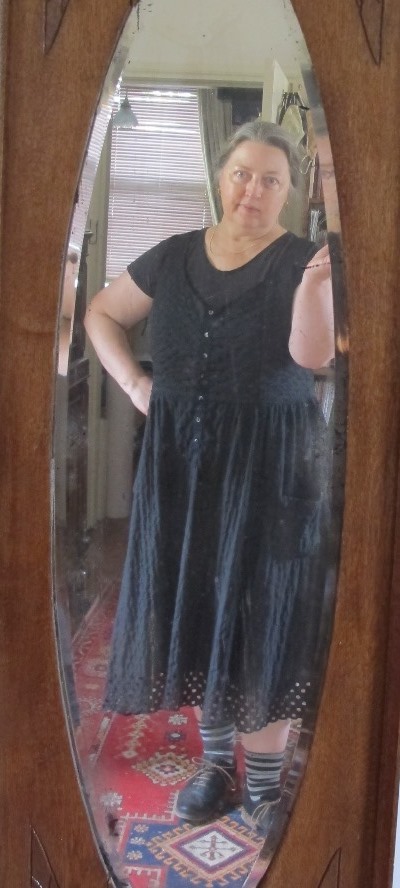
It’s likely to be styled more like this pic below most frequently. As a pinafore over a tshirt with socks and stompy shoes. That weird expression is what happens when I realise I’m not smiling, am not in the mood but try to anyway. Ha!
Back in 2014, 2 years prior to the advent of this blog, I made a fun skirt from scraps to wear to a folk music festival. Made mostly from sheeting and quilt backing leftovers. Full, colourful, and swirly. Foolishly I made it with a firm shaped waistband made from leftover half square triangles. Only a couple of years later I couldn’t wear it anymore. Big boo to perimenopause.
It’s been languishing in my wardrobe ever since. Too much potential to get rid of but unwearable as was. Today I finally got around to redoing the waist. I combined this rescue with my intention to experiment with the way I’m told 18thC underskirts worked. Splits both sides and ties from both halves of the waistband. Tie the back section in front of you and the front section in back. The size is hugely adjustable due to flexibility in the amount of overlap. I’ve designed this to have detatchable ties for minimising knots in laundry and with a 6cm overlap both sides for my current measurements.
I’m pretty happy with it. It’s a great experiment though not the most flattering of garments. It makes me look rather stumpy and dumpy, but everything kind of does ’cause I kind of am. This photo isn’t too bad but believe me it was very much the best of an unflattering bunch.
But the skirt is very fun and very huge. It’s way over a full circle.
WordPress tells me this little blog of mine has just hit 10,000 views. Yay? That’s probably not very much for the 5 years it’s been running. Still, I thank all of you who read this.
I don’t normally buy merchandise but I’m a fan of Laura Kampf and her YouTube channel. I’d wanted a “Let Glue Dry” shirt for ages. Not only would buying it support her, it is nicely subtle merch plus I regularly need that reminder for my own woodwork. Sadly when I decided to order, I found that all the clothing was only available in straight cut styles. I’m curvy and pear shaped. Straight cut so doesn’t fit me! However, I’ve several times successfully altered large sized straight cut shirts to fit me better. I need a big size to get the width in the body. The only garment left in XXL was the logo hoodie. Never mind, I like the logo too.
Eventually it arrived. Hurrah! Here it is straight out of the post bag, wrinkled and of course the wrong shape for me.
I tried it on and found these problems that needed remedy, most expected: -Too long in both body and sleeves -Too narrow in the hips -Too wide in the shoulder -I dislike the central pocket and besides, it’s too low -I can’t stand the hood. Feels like it’s strangling me and conflicts with my default hairstyle of a single bulky plait.
This is ok. I can deal with all these. So, unpick the pocket, cut it off carefully where it joins the ribbing and slice it in half:
Chop a lump off the bottom:
Cut the sleeve off and take a slice to move the armhole inwards. This makes the armhole too deep but I need the width for bust circumference so I’ll put a piece in.
Unpick the side seams to the waist, try it on to see how much infill is needed:
Then chop the hood off, leaving enough for a collar. The rest of the hood provides fabric for the infill pieces:
Then to sew it all back together. I started with the collar. I wanted to keep the eyelets, and the cord with it’s aglets for interest. The hood was lined, so I had the two layers to form a new cord channel. So I folded the collar edges inwards and sewed them together. Then ran another line of stitching to make the channel.
Then I sewed the pockets back on near the sides, attached the infill pieces, redid the side seam and set in the sleeves. Later on I top stitched all those seams with a twin needle to imitate the original finish but I forgot to get a picture of that. I also top stitched the shoulder seams with woven tape underneath to support them and help the the garment keep it’s shape.
Then it was time to deal with the hem. I didn’t have enough ribbing to do a full width hem of course, but I could cut the old hem in half lengthwise to give a half width hem finish.
All done! It still looks like a real thing but now it fits me. Hopefully the mark from the original pocket position will go when I wash it. This was near a day’s work plus a bunch of thinking and planning. I say it was worth it.
and right next to it’s old self though possibly not quite the same scale
On me to prove it works. Front and back. It’s very comfy, a bit baggy but that is nice I think.
I had all sorts of plans for making clothing for myself this summer, but none of it happened. I got distracted by a bunch of other projects. This little plan was firmly stuck in my head however and I had a packet of navy dye that needed using before the water soluble enclosure succumbed to humidity.
This tiered frilly skirt was a 90’s Jigsaw brand number that I loved and wore a lot. I don’t wear this sort of warm colour combination any more though and besides, it no longer fit. I nearly consigned it to the opshop bag but the fabric is really lovely, fine and close woven cotton, near Tana lawn quality and all those gathers were already constructed. Surely I could rework it?
I pulled out the leftovers from the shirt featured in https://montjoyeblog.wordpress.com/2020/03/29/yoke-wrinkle-solved. Irish linen, orange and grey shot. Really lovely stuff. Stiffer than the skirt fabric but a bodice is allowed to be different. It tones with the skirt so hopefully they would work together after dyeing.
I then put them both through the navy dye bath with a bunch of other things
Happy with the colours. I cut a bodice from the linen, black facings from the leftovers of a different shirt. I chopped off the original top tier of the skirt, which yielded a piece to make the visible part of a button band to tie the two fabrics together and add interest. Hmm, somewhat wonky sewing there. I made a bunch of mistakes in cutting, all of which were retrievable. I’m peeved that I screwed up by making the button band the “wrong” way around, buttonholes on the left. No one else will notice, but it will annoy me.
Here is the whole dress. Of course I put pockets on!
and on me. Maybe I’m too old to wear this many frills? I don’t care. I love the new dress.
Remember the Midnight Forest Hat? https://montjoyeblog.wordpress.com/2020/07/14/midnight-forest-hat/. It turned out that AdventuresInFelt was right and despite feeling wonderful in my fingers, it turned out to be too prickly for my forehead. I’m blaming the corriedale content. So, in order to be able to wear it I needed to make it a new edge in something non-itchy.
I’m in another phase of trying not to buy any materials, I have so much! I knew I didn’t have an exact match for the colour but I wanted to get as close as I could. I had some dyed black merino and some brown alpaca/merino tops that I thought might come close if I spun them together.
I’m really pleased with how it came out. If you squint, they almost look the same colour. The new spin is a bit thicker, which isn’t ideal but still workable.
It works nicely I think. Reads as the ground in the picture. Obviously I also changed the style of the edge. I wanted to use a bit more of the new yarn without adding length. I spun about 40g and used about 20g.
Another pic with it opened out. It does feel better on, though the weather hasn’t been cold enough to wear it for long. It’s ready for next winter.
Somewhere around 6-7 years ago, I bought some beautiful and pricey satin striped linen with intentions of making a skirt. 5 years ago something possessed me to make a dress out of it instead. It was quite lovely when I made it. A simple T shaped bodice with a fairly slim six panel A-line skirt which used very close to all the cloth.
However, it didn’t get worn much. The fabric is really a bit heavy for a sleeved dress, the neckline is a bit low for decency when worn alone and I felt a bit like a marshmallow in it. I don’t think it made it out of the wardrobe last summer, so it was ripe for a remodel.
I chopped out the sleeves
Then cut an extra pocket and some bias strips for binding from the excised cloth. The original had only a tiny pocket due to fabric shortage, which I had sewed on the left side by mistake. Frustrating! So now I have a larger pocket on my preferred side as well. Much better.
I sewed that lot on and put the whole thing in a black dye bath. It went purple, which wasn’t what I wanted so I tried again with more black dye and some yellow for colour correction. Now I have a long black singlet type pinafore frock, which I haven’t ironed, as is obvious.
Here is a detail of the neckline which I rather like, with a bit of the original fabric to show the colour change.
A pic of it on, and don’t I wish I could look like I did 5 years ago? but the years roll on whether we want or not.
About two years ago I knitted a capelet. “Laced with Leaves” by Liz Langford Knits.
Really pretty but it so didn’t fit me like the image on the pattern. That looked like it came down to waist level but on me it very much did not. I am probably rather larger than the dummy in the pattern pic.
I only wore it twice and found it annoying. Very warm shoulders, cold everything else. I dubbed it the ‘Stupid Shoulder Frill” and started thinking about how I could make it more wearable, which basically meant longer. I even thought of just pulling it back and reusing the yarn. I decided to start by pulling back just the bottom border, but when I tried, the halo fluff got all jammed up and it wouldn’t frog. Instead I ran one of my tiny circular needles around at a nice identifiable row, then pulled the next row out half a stitch at a time to get the edge section off.
I had some of the original yarn left, with which I knitted another round of the leaf pattern with needles a size up from the pattern. That didn’t make it long enough, so I overdyed some merino yarn that was near the right colours but not quite.
Merino beforeMerino overdyed with added possum/merino yarn
The resulting colours melded much better with the original variegated yarn. I also added in some hand dyed possum/merino yarn leftover from https://montjoyeblog.wordpress.com/2018/07/25/colour-coordination-win/ . Bonus, that hat should now look fine worn with this garment, whatever you want to call it.
With this I added a scalloped border and an extra band at the neck of the turquoise possum yarn to help tie in the stronger colours. Overall it is now about double the original length.
pinned out and in the sun to dry
I liked the extra weight of the beads in the edge of my last shawl, so I beaded this one too. Oh so many beads.
I am so much happier with it now. I suppose though it will go into the cupboard until I have somewhere to wear it. Ruddy virus.
This post was written with much frustration as I tried to figure out the new WordPress editor.
Another cardiganisation of a jumper too good to get rid of. Too pale, too high contrast, felt too formal. Barely worn, but beautifully soft merino cashmere. Had to try something to make me happier wearing it.
So I put it through a black dyebath and cardiganised it
I didn’t use enough dye for it go properly black but I quite like the soft blue grey.
It has front facings made from leftover black merino knit with only the merest allowance on the center seam so as to retain most of the argyle pattern.
Button loops are made from wonderful thick vintage silk buttonhole twist.
and on. I’m much happier with it I think. The skirt is an old reworked one in striped merino knit that got dumped into a similar dyebath and shortened. It has become a new favourite
I bought this possum/merino jumper three years ago now, despite knowing I hate zippers in such things. I loved the colour and the almost weightless soft warmth. I bought it while on holiday in New Zealand and it’s one of the few garments I paid full price for. Because of that, it’s taken me until now to be willing to pull it apart to change the zipper for buttons.
Before:
After:
Now I can wear it with just the middle few buttons done up as I usually prefer. It’d look better if I pressed it, oops.
It took a little while but was made easier by having a facing down the front as part of the original construction. So lots of unpicking, make cord for loops and position them, hand sew it all back up and sew buttons on. The button loops are plaited from the possum/merino yarn that I dyed to match this for making a hat a year or two ago. Pretty oval shell buttons from Eliza Fabrics. Interestingly I nearly used some round paua shell buttons but felt they made it look old fashioned in a dowdy kind of way. Whereas these oval ones have a neat toggle like kind of feel. Much more appealing I thought.
I have a huge blue cardigan. A most useful garment in the cold months, works like a daytime dressing gown. I’ve worn it most winter days since I bought it…5ish yrs ago maybe? I gave it a wash and a thorough depilling at the end of last winter so it was ready to go another season but I was getting really tired of the pale blue colour.
So I tortured it with string, beads and elastic bands as is my wont.
I used Earth Palette dye again, but this time in navy, which I hoped would give a truer blue than what they call “blue”. I bought a 500g lot and used about 150g for this. I did a better job of dissolving the dye this time. Add dye slowly to hot water, not the other way around. I poured the fresh hot dye solution straight onto the dampened garment. It seemed to take pretty much on contact, which made for a fairly blotchy effect. In this case that is fine as I wanted interesting varigation. Next time I might cool and/or further dilute the solution before using.
I think it came out well. The new darker blue is the colour I hoped for, hurrah, and I like the pattern. I shan’t be modelling it today. Our weather peaked at 43C and is currently still 37C outside. Not good for wearing woolens but a great dye for drying them. Doesn’t it look all welcoming on the little sofa though? I’m now looking forward to wearing it when the weather cools sufficiently.