Crab Apple Dyeing: Part 3.

.

I was tired of the remaining dye bath sitting about. I nearly threw it out without further use, but then I thought of something to do with it. I still had the white merino rib jersey left over from the Paua Inspired Cardi . I didn’t want to use it white, so I skimmed and reheated the dye bath, washed and vinegar rinsed the jersey, combined the two for an hour or two and got this nice yellowish creamy colour. The ungenerous might call it beige. Anyway, I like it. I’m hoping there is enough to cut a long sleeved Henley top. I could even use the crab apple dyed silk from Crab Apple Dyeing: Part 2 for trim perhaps. This exhausted the dyebath (almost no colour left in the water) so I could pour it away and clean everything up without feeling I’d lost an opportunity.

Lattice! she is a thing.

Whew. One large square hand pieced lattice patchwork quilt top is done. 1.6 metres square. Only took 7 months. That’s a faster pace than I expected when I started but I got rather obsessed with it.

.

That’s the patchwork part of this project. I DO like it, but I confess I’m a bit over it at the moment. The last few weeks has been an exercise in “just get it done”. I’m going to let it rest while I do a few other things and hopefully recover some enthusiasm for this. Then I need to figure out how I will attach the border. Then layer, quilt and bind.

Blue almost-jeans

I made a trouser pattern in a hurry in early 2016. I was pleased with the method, maybe more on that later. However, the fit of these was really quite baggy. I’ve worn the original of these (and the only dark blue pair) so much that they are now gardening trousers rather than worthy of being seen in. I was just going to make more to the same pattern, but decided to improve the fit. Gah, trousers are hard to fit! so many interrelated curves in all sorts of directions. I can’t buy trousers of any sort to fit me though, including jeans. So the effort is worthwhile!

This is not a true jeans pattern. It has darts at the back and patch pockets at the front. If I end up with a version I’m happy with, I might try converting it to more classic jeans construction. Then I’ll most likely change shape again eh?

The light is dim today so the pic on me is not wonderful.I’m cautiously excited by the fit I’ve managed though. This is heavy wool/cotton blend twill (denim? drill?) with no elastane. The fabric is really nice. I’ll be heading back to the shop tomorrow to see if I can get a little more for a repeat pair later.

.

I have fun with the decorative sewing on pockets. The designs are free hand drawn in chalk and then stitched freehand with a twin needle. This is my current favourite design. Gentle arcs are easy to sew. After taking the picture, I realised that these still needed the stitching run across the top, which I then went and did. I use a straight grain tape under the top folded edge to minimise stretching.

.

My fitting changes in the tummy/hip/bottom seem to have made the vertical leg seams twist, so I’ll have to fix that for the next pair. Not cutting any more until I’ve worn these though.

.

I feel I must add that testing fit in an underheated house in winter is tedious! How many times have I had these on and off in the last couple of days. 6 maybe?

Pink!

Some months ago, my niece pointed at a picture in a book and said “I want that one”. I didn’t see the picture, but I’m told it was a bag made from a pair of pink jeans. I needed to organise a present for her and this is something well within my capabilities. She may not even remember the picture, or the wanting, but I hope she likes it anyway.

An opshop provided a pair of size 8 ladies jeans in brilliant pink. I chopped them below the fly, inserted a rectangular base and handles, cut from the legs.

.

I then put a coordinating lining in.

.

I left the button and fly functional for fun. Then I realised that gave access to the space between bag and lining for the putting of things, and a five year old would. So to prevent the inevitable struggle of having to get them out again, I sewed through to catch the placket closed. Pity I didn’t think of this until the lining was in, so that stitching shows on the inside. Oh well. If I ever make another I shall try to remember.

And the backside:

.

I reckon it came out quite well. It occurs to me that my old jeans would make good grocery bags made up like this with a squarer base. I wonder if I’ve kept any?

Orange merino jersey

.

I bought this length of orange merino jersey in Wellington over 2 years ago. I’ve had at least 5 different plans for it. When I got it out recently, I realised that there was less of it than my faulty memory had been telling me. Enough for some sort of long sleeved top and no more. I have need, or at least want, of orange clothing for this coming Saturday, so I settled on making a button necked pullover. I could have just made a skivvy, but that felt too boring. So I added a neck opening and buttons. Not my best design decision ever. Pullover + buttons + long hair = trouble. Oh well, I like the look and I have a long standing fondness for Henley type jersey shirts.

I put a lot of thought into the construction method. The fabric is medium weight and very stretchy. I have a poor history of getting machine top stitching to behave on such fabric, other than my standard twin needle hem. I was right to worry. I got the neck facing sewn down but not as neatly as I would have liked. I tried applying the first button loop by machine but it did so not go well. The rest got applied by hand.

The button loops are made from a simple three element braid of “tapestry” woolen yarn in appropriate colours. I plaited it, then steamed and cooled it to minimise unravelling.

.

Here is a close up of the neck. The grey shell buttons have previously done service on another shirt.

.

And on, both buttoned and un.

IMG_1437

.

Not the most flattering shots. I was suffering from tshirt hem build up. I have another skivvy of the same cut, plus a short sleeved cotton T under that. It’s cold!

Crab Apple Dyeing: Part 2

IMG_1377

I had made a dyebath, but what to dye? I decided to do a test first. So I put a couple of tablespoons of the dyebath in a strong glass, added small scraps of a variety of fabrics and boiled it several times in the microwave. This pic is before heating:

IMG_1382

Here are the results after rinsing and drying. Original fabric and dyed scraps. From left to right there is cotton, linen, silk, wool fabric, wool yarn.

IMG_1384

I was not surprised to see that the protein fibres took the colour best. I still didn’t know what I wanted to dye in quantity. Sleeping on the decision meant I lay awake turning possibilities over in my head. Argh.

The dull gold colour didn’t seem that exciting, but not horrid either. I came up with two plans. One, that I would dye a portion of the 100g white skein Bendigo Woolen Mills sock yarn I bought on a whim several years ago. I’ve split that skein into four, with the idea that I might have a go at some other natural dyeing and make socks from whatever colours result. The other plan was to take some of the silk I bought cheaply from a warehouse closing sale and do a variety of shibori folded resist patterns. On the left is silk crepe, enough for a dress. Two different folds that should deliver a stripe and a spot/check. Plus a plain piece for trim. Then the sock yarn. To the right is a selection of folds in a plain weave silk habutai, enough for a shirt, or something.

.

In the dyepot. I brought it to the boil, then added the fabric bundles. I let that all sit with a certain amount of poking and reheating for a couple of hours. Silk doesn’t really like being boiled, so I backed off from the “boil for an hour” instruction.

.

Then I pulled all the cloth and thread out, rinsed it in warm water and hung it out. This is the fine plain weave silk. The patterns are there, but pale.

.

Here is the silk crepe. This took the dye a bit better. All this fabric is still sopping wet, except the thin white piece above which I took out early because of cardboard failure.

.

Darkest of all was the sock wool yarn.

.

So some success. I’ll be interested in the look of the dry cloth and how fast the colour turns out to be. There is still colour in the dyepot, so I might put something else through tomorrow.

I will say that cardboard compression pieces are less than ideal for the shibori. They go soggy, fall apart and don’t do their job. I will look out for better stuff for use in future dyeing experiments.

Crab Apple Dyeing: Part 1.

An exercise in backwards project design. In stead of starting with the desire for an end product, I found myself with a raw material that I hadn’t planned for, and decided to work out a way to utilise it.

It all starts with my planting a crabapple tree in a too small space. I was pruning it each year to try to limit the size. I eventually did some research and concluded that I was just causing it to send up long unproductive growth. Basically it turns out that one can’t heavily prune a crabapple and still get fruit. Bother. So I decided to work towards pulling the tree out and replacing it with something more civilised.

IMG_0654-2

I had hacked off all the small branches and was enquiring as to which of my wood working friends wanted any of the sizable pieces. Another friend spoke up, saying that one can use the bark and twigs for dyeing. Oh, well then. I figured I had to try that.

I found this site which had something of a recipe. Happily, it didn’t seem to need any special mordant. I collected as much coloured bark and small twigs as I reasonably could, then filled the bucket that I was using with as many of the leaves as would fit. That little collection then sat on my back verandah for a couple of months. Then I looked at it and decided I simply must proceed, so the poor plastic bucket could be retired inside away from the nasty UV light.

Next step then was to boil up all that saved vegetation in water. I didn’t have oregano flowers, but I included some oregano sprigs just in case it helped. The recipe site also talks about doing the preparation in a copper pot. I have copper pots but they are all lined with either tin or stainless steel. So I sat the outside of a small one in the boil in case that was important.

.

I loved making “witches brews” out of random things in the garden when I was a small child. This process touched that nerve, in a good and grin making way.

Here is what the liquor looked like straight after I put hot water over the veg mass. I reckon we will get a yellow dye, not a red one as the recipe says.

.

This is after an hour simmering:

.

Then leave it sit for a week, strain off the liquid which becomes the dyebath.

IMG_1377

There is certainly some pigment there. There is also a bit of mould, which I figured meant I had to get right on to trying the actual dyeing.

To be continued…………..

Shiny sheer/satin striped silk shirt

I felt the need of a few more evening friendly garments. This shirt is a remake of an old favourite I made for a friend’s wedding many years ago, but in a rather different fabric. It’s a silk/cotton sheer ground fabric with silk satin stripes. Rather challenging to work with! It’s floppy, slithery and doesn’t take a crease well.

It’s my basic shirt again, with the wide plain rectangular collar. I thought the frill was a mistake when I’d only just assembled the front bands, but it is behaving better than I feared now I have the whole shirt together.

.

Here are a variety of ways one can wear the collar. I won’t be wearing the first version with this shirt. I decided to tackle the too big neck hole issue and overshot. I can do this collar up while wearing it but it’s way too tight for comfort. Never mind, the other two versions are still appealing and in reality, I rarely fasten the top button of a collar except during laundry!

. . .

In the end, my disappointments with this shirt are both about the collar. Aside from it being a bit small, I got confused and used the under collar as the upper collar. This mattered for two reasons: The under collar is pieced down the middle because the was barely enough fabric, and I had carefully cut the upper collar to have a satin stripe on the edge. Oh well, it’s not very noticeable.

The cuffs are gathered to work with the gathered frill. Also, this fabric takes a gather better than a pleat. I used shell buttons as usual.

.

Here it is on. When I cut this shirt, I had in mind the new “corporate” pinafore from this blog post so here is a pic showing it on with that. I must say, the fabric feels really nice against the skin. I rather think I shall enjoy wearing this.

.

William Morris Shirt

Or “Mama shirt stage three, the real thing”.

IMG_0709

This post is just me showing I did make up that lovely William Morris fabric for Mama, mentioned in my earlier posts Mama shirt: stage two, trial shirt  Mama shirt: stage one, the pattern

Also skiting* about my best ever pattern matching effort across the front.

Thankfully, she likes it, and has even collected a random compliment already.

.

*hmm, it turns out this is local slang. Means boasting, showing off.


Serious Warm, Serious Remodel

Wanting to capture this project on the blog, I’m converting a bunch of small FB posts to one simplified blog entry.

.

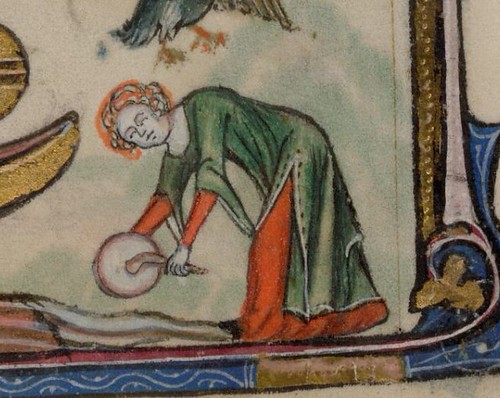
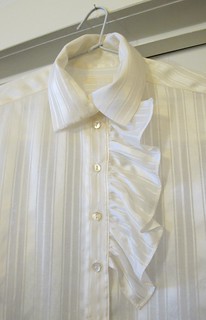
I love the garment on the right*, pictured above. In the cold evenings at a recent event, I decided that a version of it in seriously warm cloth would have enhanced my life. The garment on the left is seriously warm cloth (heavy wool coating with a strong nap) but I hated it. It was ill conceived and I didn’t wear it. So I chopped up the garment on the left  into rough pattern pieces and split it into two halves, meaning to dyeing each pile a different colour.  Two colours because:
1. The gear I have won’t allow me to dye the whole thing in one go, and if I don’t, the two halves won’t match.
2. Particoloured is a perfectly authentic option
3. If I can’t have stripes or some other interesting cloth, bright particolour is about as fun as it gets.

If the whole transformation were not to work, at least the huge pale coat will still be out of the wardrobe. If it does work, I’ll have the toasty warm particoloured gown that I want without having to buy the fabric.

IMG_1018

I really love dyeing stuff. It’s so transformative. The seriously warm fabric took up dye really easily too, so even though I did two dye baths for each half, I still got it all done in a little over 3 hours. The simple red and green I started with came out too bright and candy like. So I softened them with additions of yellow and black.

The first try was using 2 bottles red, 1.5 bottles green, both Queen brand food dye (all I had). I wasn’t surprised that these came out too stark for what I wanted.

IMG_1056

To soften these I added half a bottle of yellow and a small slosh of black to the red. The last of my McCormick blue and two sloshes of black to the green. Much better.

IMG_1084

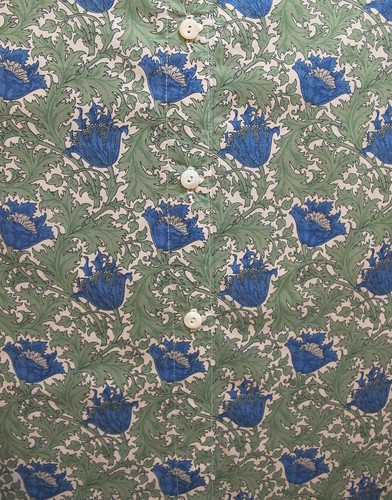
I’m fairly pleased with these colours. The green is less even than the red, due to rapid uptake of the red parts of the black dye. My choice of colours was influenced by what I thought I could achieve with these dyes in large volumes, plus what I want to wear and what might be plausibly medieval.

Then I had to cut out the proper pattern pieces. Sadly I didn’t manage to be as clever as I would have liked. Cutting a particoloured garment from fabric with a very definite right side has pitfalls. I anticipated some correctly, so the fronts and backs make a proper set. However, I switcheroonied the side panels front to back and the sleeves left to right. Wrong side out was completely unacceptable. Random colour placement was not welcome either.

I managed to fix my idiocy by swapping the back and front pieces. This was made possible because I had enough offcuts to recut new upper back pieces to give the needed width and higher neckline. Just a few extra seams needed.

IMG_1108

Here is the new gown all assembled. Not finished. Lots of hand sewing still needed. Ideally, I’ll get rid of the overlocking and whip all the seams down. Eventually. I dared not forgo overlocking against all the handling needed for the dyeing. I thought I’d be able to lose it in the cutting out, but fitting the pieces into available fabric was tighter than I’d thought it would be.

Bit of a transformation eh? Once I decided it had to go, that pale coat was just raw material. I have a silly fancy that the finished shape of the serious warm is rather Dr Seuss.

.

and here it is on so you can see the fit. My take on these gowns is that they need to fit well in the upper body and arms to capture both the proper look and maximum elegance. Not full 14thC presentation, the stretch skivvy is fully anachronistic.

.


*an early 14th C overgown based on several from the Taymouth Hours.

taymouth8