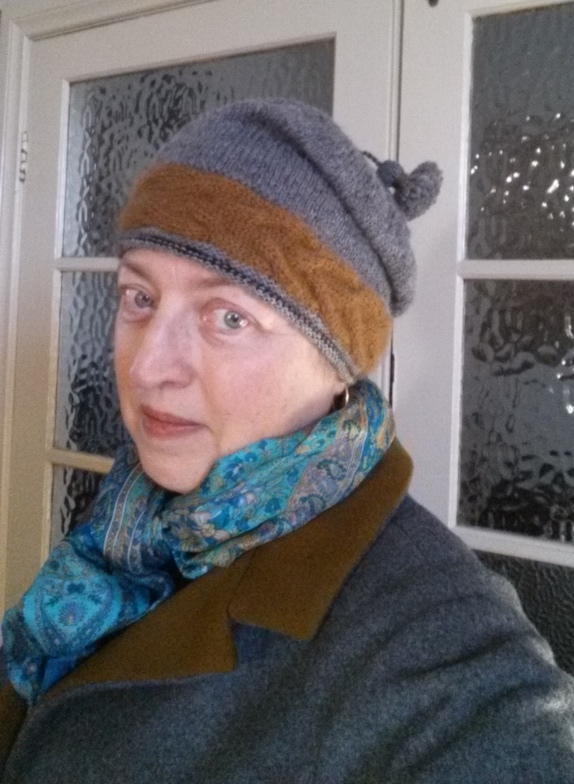
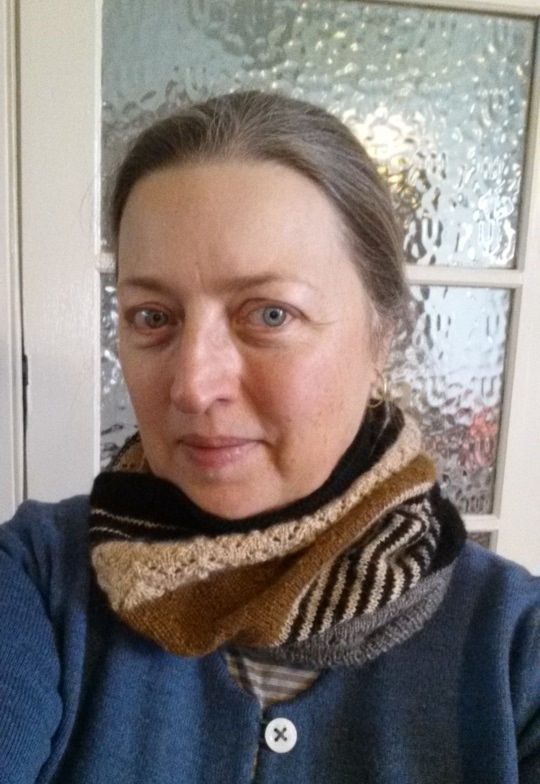
Handspun Hat #2

A pretty hat!

IMG_1536-1

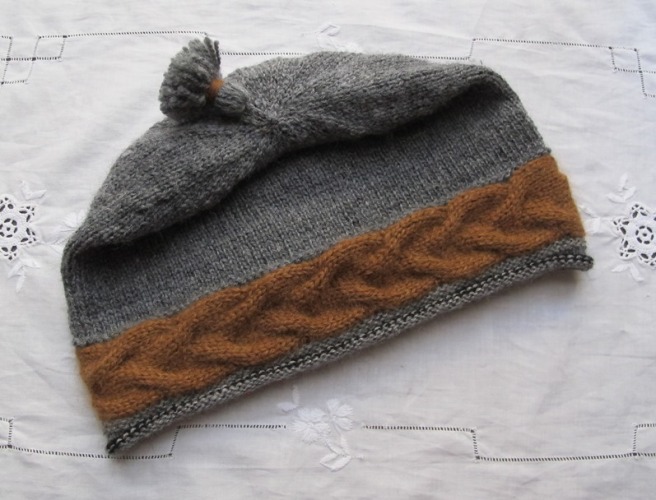
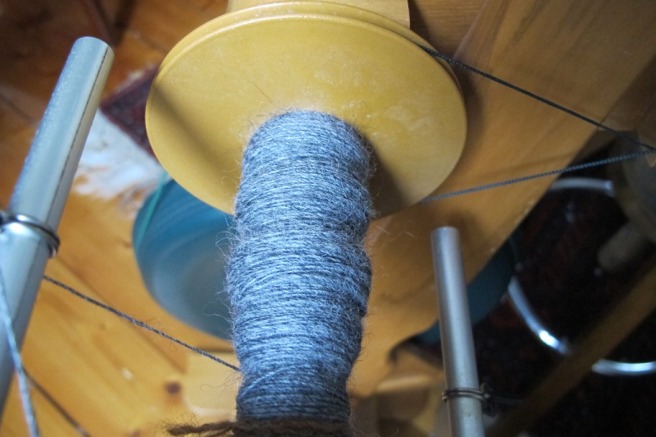
It’s made from leftovers of the beautiful fine alpaca I’ve been writing about recently, and the grey “Australian Wool” posted as New Wheel, First Spin.

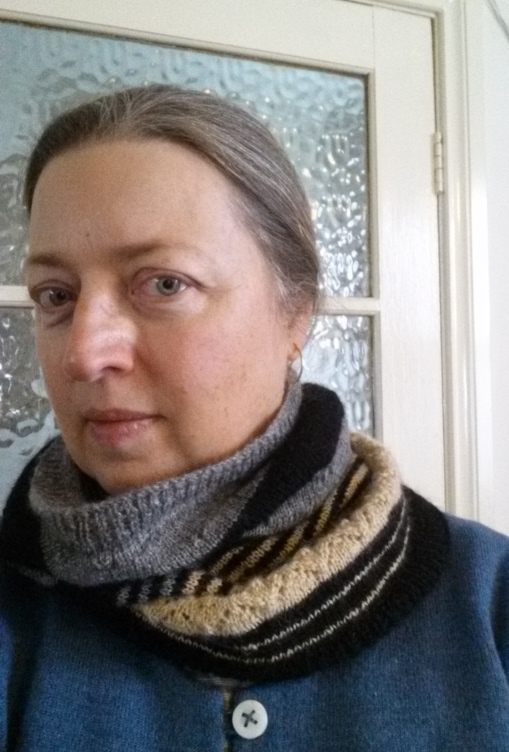
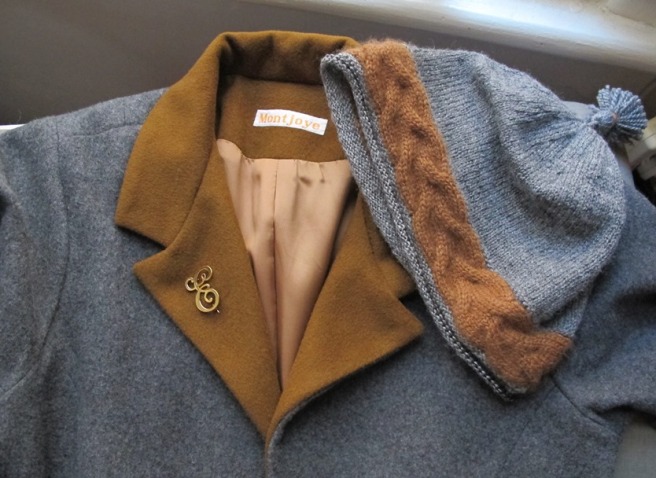
It was made to match a jacket I made a few years ago, which hasn’t been worn a lot, partly because I didn’t have a hat that went with it. The colours are not absolutely identical but they are pretty close. The differences are even less noticeable with the separation delivered by normal wearing.

IMG_1546-1

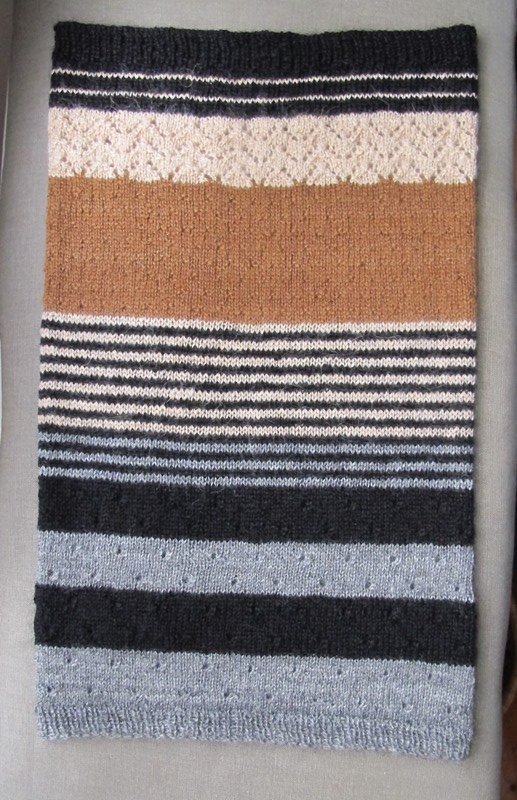
The pattern is based on “After the Frost Beret” by Melanie Berg. I’m extra pleased with myself because this little project required techniques that I haven’t used much. Cabling, Kitchener stitch grafting and an awful lot of picking up.  I had to mess with the stitch counts and needle sizes etc due to using three(well, four) different handspun yarns and I have a larger than standard head for a woman.

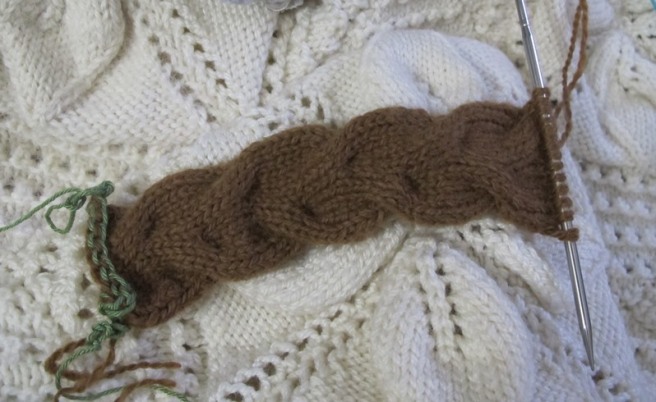
You start by knitting the plait like cable band. I think this is the first iteration which turned out to be too dense. I used two strands together of the nearly lace weight caramel coloured alpaca. I went up to 4mm needles and knitted an extra pattern repeat.

IMG_1310-1

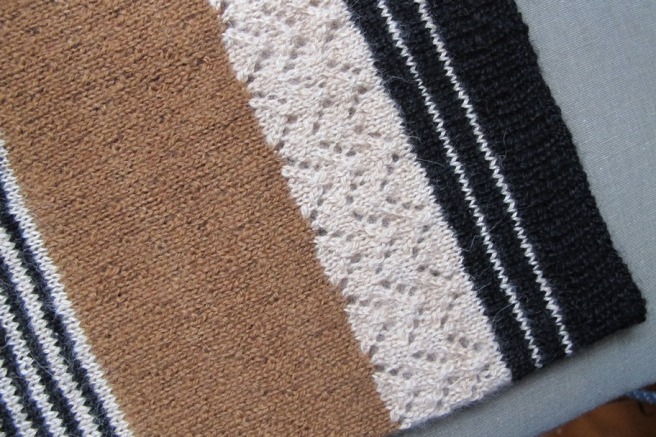
Then this band is grafted to make a circle and you have to pick up lots of stitches to knit the brim, then again for the crown.

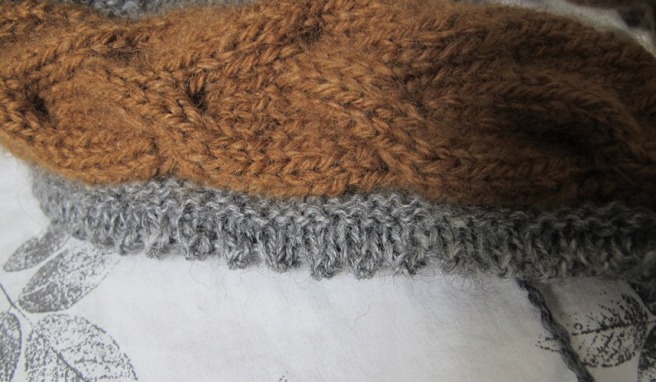
I made my first picot edge!  But couldn’t tolerate the ridge caused by the cast off. So I pulled it back and replaced it with a simple stocking stitch roll edge. The little black border is really because I ran out of the grey alpaca and using the caramel looked messy. I don’t mind it now I’ve seen it for a while.

IMG_1425-1

The crown ended up too tall, despite my theoretical calculations and decreasing twice as fast after I realised this was going to be the case. I could have pulled it back and reknitted… but just folding the excess to one side and adding a tassel is quite appealing I think.

20190831_170421-1

20190831_170547-1


Alpaca Goodness part III and done

The end product of my big winter project has reached it’s people. I’m extremely pleased with myself for managing to produce such an item from fleece through learning both fibre preparation and wheel spinning, then knitting it up. It’s a cowl, a neck warmer. A scarf that won’t fall off.

I’ve used the imaginatively named pattern “3-colour cashmere cowl” by Joji Locatelli. I found this pattern a few years ago and loved the variety of design elements and colour balance. This one is of course in 4 natural colours of fine alpaca and the depth of some elements have been tweaked a bit. One day I’ll make one for myself.

IMG_1217-1

A couple of detail shots:

IMG_1224-1IMG_1223-1

Modelling it to demonstrate a few wearing options. Wear it either way up

20190810_133429-120190810_133309-1

Or pull one end up over your head and it works as a hood too

20190810_133155-1

Handspun Jumper Part the Fourth

IMG_1339-1

Only a little progress update for want of anything else to post. Normally by this stage I’d have another skein or three to show you. I decided though to utilise the large bobbins of the new wheel. That is 150g of single. 3 times what would fit on a Traddie bobbin.

Now to go make a start on combing and spinning another 150g to ply with this.

Drawstring Backpack

I needed a present for my niece. I’d been trying to think of something I could make and personalise with her name that would be appropriate and doable. My clever Mama suggested a book bag. So I had a look around and found versions of this. A little change to a standard drawstring bag that turns it into a minimalist backpack.

This is the back view. I embroidered her name on the front, but you don’t get to see that. I neglected to get good photos of the top section, but it’s just a double drawstring. I added pull tabs for easier opening and to strengthen the seam area. I rather like it and might make one or several for myself. Not in pink though.

IMG_0821-1

The self satin strip pink fabric is quite close woven. Stronger than it’s thinness suggests. It was bought in Switzerland back in ’04. The other fabrics are cotton drill from my “cabbage” stash for added durability and colour interest. The strings are twist cords made from coordinating colours of crochet cotton. I thought I’d made lots but it turned out to be barely enough. Oh and I french seamed it. No raw edges or even overlocking.

New Wheel, First Spin

I have a new spinning wheel! Well, new to me. She is a pre loved Majacraft Suzie Pro.

IMG_1036-1

I feel lucky. This was the most likely wheel for my wants that I found at the Bendigo Sheep and Wool show. The next day, a friend pointed me to a second hand one that had just listed for about half the new price. Snap it up I did.

Here she is next to the borrowed Ashford Traditional (Traddie) that I have been using to learn on.

IMG_1168-1

Reasons I wanted the Suzie:
-Double treadle. Important for improved ergonomics. Allows a more square on posture and balances the exertion much better. Extended time spent in unbalanced exercise causes problems
-Wide spaced pedals. Not that wide but wider than most other double treadle wheels. I am much more comfortable with this spread than with the pedals side by side which is the more common arrangement. There was a german wheel with pedal separation, but had the wheel position perpendicular, which would likely clash with my skirt wearing habits
-Space saving. This is true of most upright double treadle wheels. In some ways I preferred the Majacraft Rose for her more old fashioned look, but she was a bit more expensive, a bit wider, and wasn’t the one that turned up second hand. Suzie is less than half the width of the Traddie. Makes it so much easier to move around the workshop end of my living room.

Reasons I’m sad to give up the Traddie:
-More proper wood content. She is all wood except the metal and string bits. Proper wood, not composite rubbish. Suzie’s bobbins are plastic, grr.
-Old fashioned styling. Yeh, that’s me. Suzie looks are pretty sleek and badass though.
-Familiarity. Well. I’ve only used one wheel until now. This I will get over. It helps that Suzie works very similarly despite looking rather different. Single drive, same kind of tension. She has the added bonus of 5 spinning ratios though (changes the relationship between how fast the wheel goes and treadling speed)
-achieving a stable position is so much easier. The Traddie is built as a tripod, so you can put her anywhere and she won’t rock. Not so with Suzie, she needs a flatter floor….. and the floor in my rather old house isn’t really flat. I’ve added more non slip rubber pads underneath and that has helped.

So I had to have a go at spinning with my new toy. Spin she does.

IMG_1106-1

A finished skein and the braided tops it was spun from. This is from “Strength Honour Wares” bought at the Bendigo show. They also sell through Etsy I’ve discovered. This was labelled only as “Australian Wool, Smoky Grey”. I’ve spun 70g of the 100g bought, which should be enough for the project in mind- I wanted to match the grey of a coat of mine as close as possible and this was the best option I found at the show.

IMG_1132-1

I didn’t want to spin the chocolate alpaca first go as I want to try to match the yarn to what I have done already. This was on the project list and could be whatever it ended up being. I’ve used the middle ratio and it’s come out with more twist than I was managing with the Traddie. Having just looked it up, the Traddie ratio is close to the second largest setting on the Suzie. So it turns out I was indeed spinning on a faster ratio, I rather thought so, though how my treadling speed relates between the two wheels is hard to judge.

Accident appealing enough to mimic

While waving dye about the last few days, i decided to dye a jumper red. A jumper that I liked the shape of, but had fallen out with it’s colours. I failed to get a proper before shot, so I submit one taken by a friend. She calls it the “Dutch Masters” look

IMG_20160721_193754-3

Oatmeal and salmon. Opshop sourced, darned and mended. I wanted it red. I’m in a red wearing mood. wearing red in winter makes me feel warmer. However, I was a bit concerned that trying for a flat red over a striped plus darned and mended jumper might not be that appealing. Besides, I’m currently very taken with the whole shibori thing. So I jumped in and bound it up with string after the garment had been washed and vinegar soaked. It turned out that the string I used had powers I had not anticipated. Powers lent to it by it’s previous sojourn in blue dye! When I untied it and found unexpected blue in parts of the garment, I was shocked and saddened, but only momentarily. I soon found that I actually really liked the effect. So much so that I took a blue fabric pen and worked to imitate the effect in as yet unaffected parts of the garment. Can you tell which sleeve is string dyed and which is imitated?

IMG_1009-1

String, dye exhausted and not. That blue string still holds possibilities.

IMG_1059-1

Whole finished jumper. I am really pleased with my last minute tie dyed stripes. They give character and soften the boxy, shoulder enhancing effect of the unstriped yoke area, changing the focus to the face and forearms. The red was achieved with Queen food dye. 50ml (a whole bottle) of pillar box red, 2ml of green and 20ml of yellow. I find that “pillar box red” alone gives a colour too candy pinkish for my liking.

IMG_1004-1

I love it anew. I’ve worn it the last two days. Might well be my newly favourite jumper.

IMG_1014-1

Stripey! Trying a new dye

After dyeing other peoples handspun yarn blue, I had a bit of prepared dye left. It’s a kind of dye I’d not used before and I found unusual, though it did work well. The brand is “Earth Palette”. For their wool dye, you mix up 100g powder with 600ml hot water. It turns out more care is needed in that step than I used because there were some unmixed lumps at the bottom of the pot, that didn’t want to redissolve. You get a thickish liquid, which is not supposed to be further diluted but allowed to cool, then added to either dry or barely damp wool by pouring or dipping  and squeezing etc. Then you wrap and leave it for 24 hours!! Oo that waiting part was frustrating!

While being frustrated that I couldn’t rinse the yarn yet, I cut a skivvy top from the last of some off white double jersey. There wasn’t a lot of dye left, so I pleated and tied the pieces for a shibori effect.

IMG_0905-1

I dipped each side of the dry bundles into the dye. There was barely enough. I resorted to a bit of dilution to get the collar done, which worked and says dilution is at least some kind of feasible. There certainly wasn’t enough to soak the fabric. Never mind, I got some good bold stripes this way.

Here are the bundles before untying the strings, and partially untied. A friend said the right hand picture looked like blue cabbage to her. I was amused. Both pics are underwater. I wasn’t doing well at slowing down to take pictures, partly because I was working in gloves while the dye was being handled.

Very little colour was released on rinsing.

After the pieces were dry, I felt they were too stark. Too pale where they were not blue. So I grunged them up with food colour. This also helped to deepen the blue and dull the green content.

Sewn up, I couldn’t get it over my head! Turns out I’d stupidly cut the neck band/collar lengthways instead of widthways. So I spent some tedious time unpicking it. Because I had no more dyed fabric, I cut it in three, and re-seamed so that the stretch ran the right way. It puts two extra seams into the neck, which is sad, but salvages the project, of which I am glad.

And all done. I might well buy this dye again later for more experiments.

IMG_1049-1