Indigo Tiers

When prepping materials to dye in our indigo adventures three years ago now, I pleated up some fine, crisp linen(?)* with the intent of making a tiered ruffled skirt. I was working at speed to get everything ready in time and didn’t think hard enough about how much fabric I needed. This turned out to be only enough for a bit more than the lowest ruffle.

*Possibly not flax? Definitely cellulose fibre. My best guess is a cotton ramie blend. It was bought very cheaply in folded bales from a closed shop clearance sale.
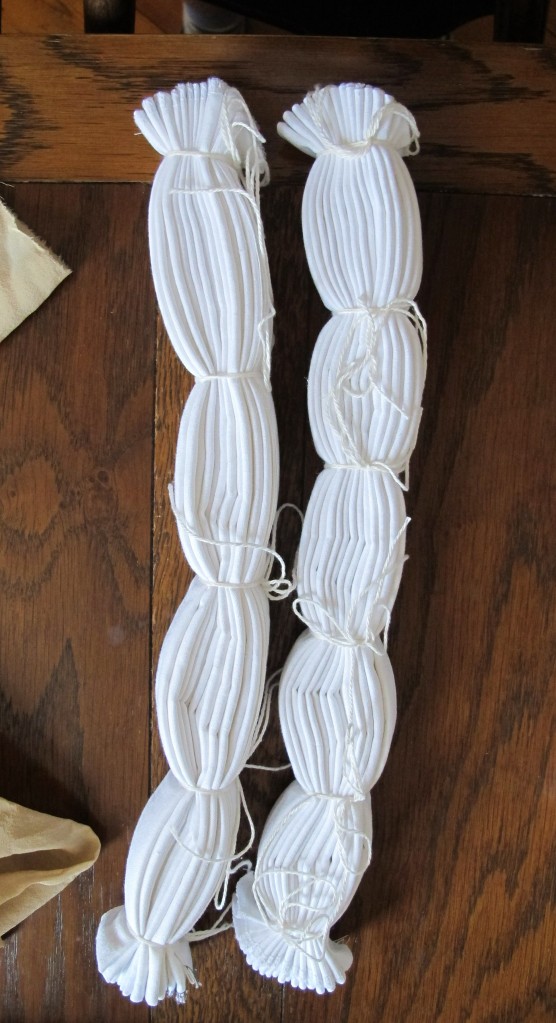
Happily, I also pleated up another piece of the same fabric but slightly differently and with no specific plans attached. This is the piece with the copper coloured clips below
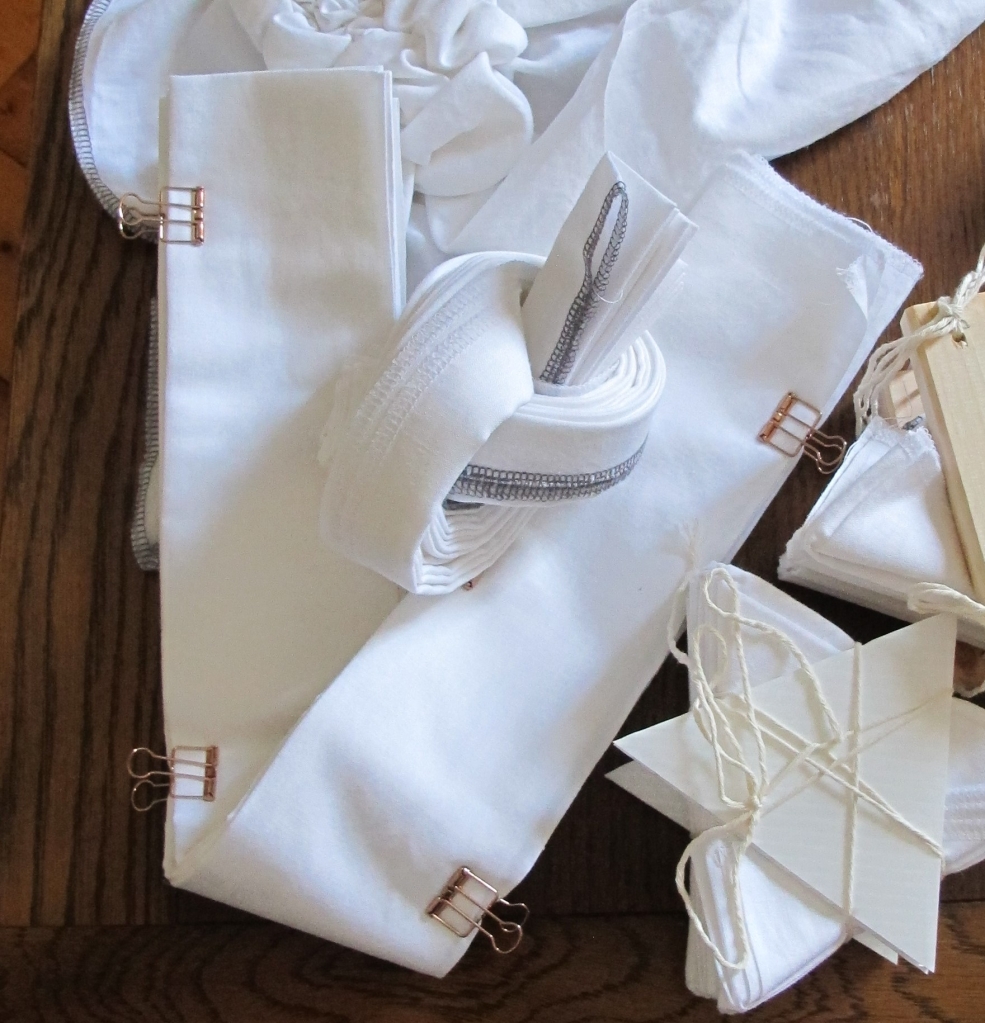
by chance, I have a picture of these three pieces next to each other straight out of the dye vat
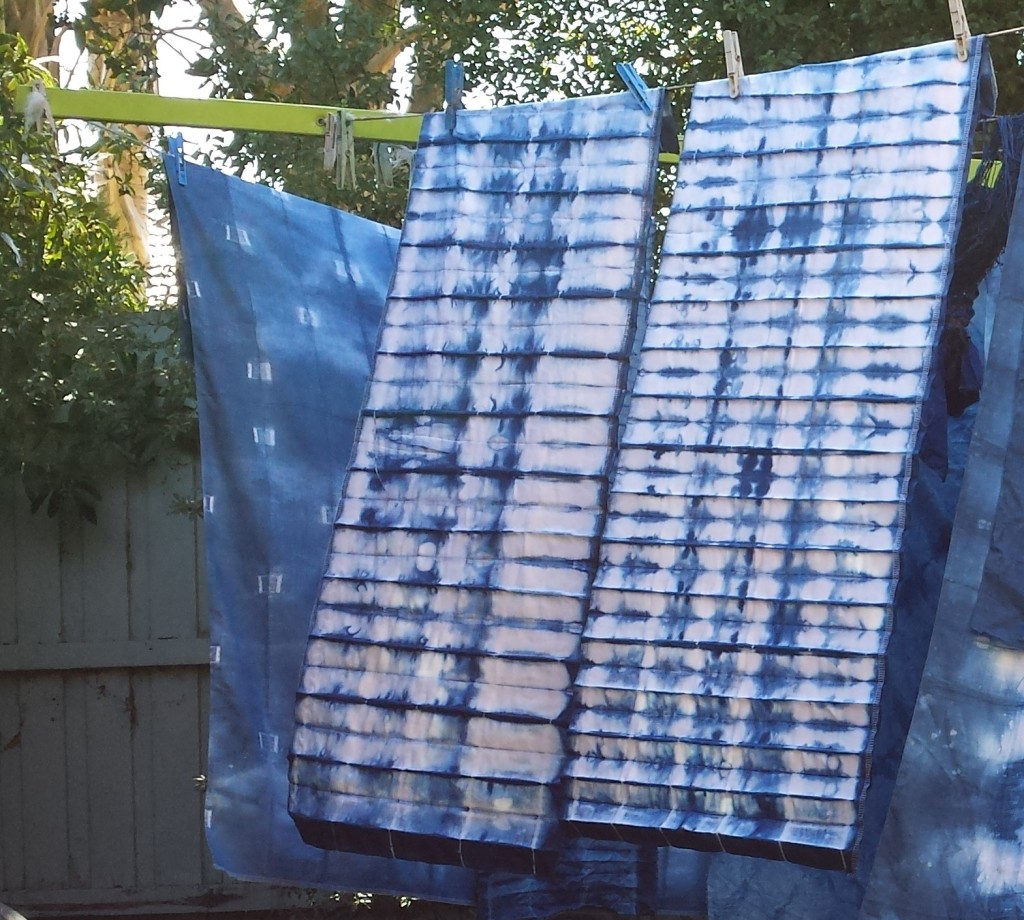
Argh. These images are bigger than I would choose to use. I’ve moved to a different computer and don’t currently have a copy of my usual photo editing program. Maybe I have to bite the bullet and shell out for it.

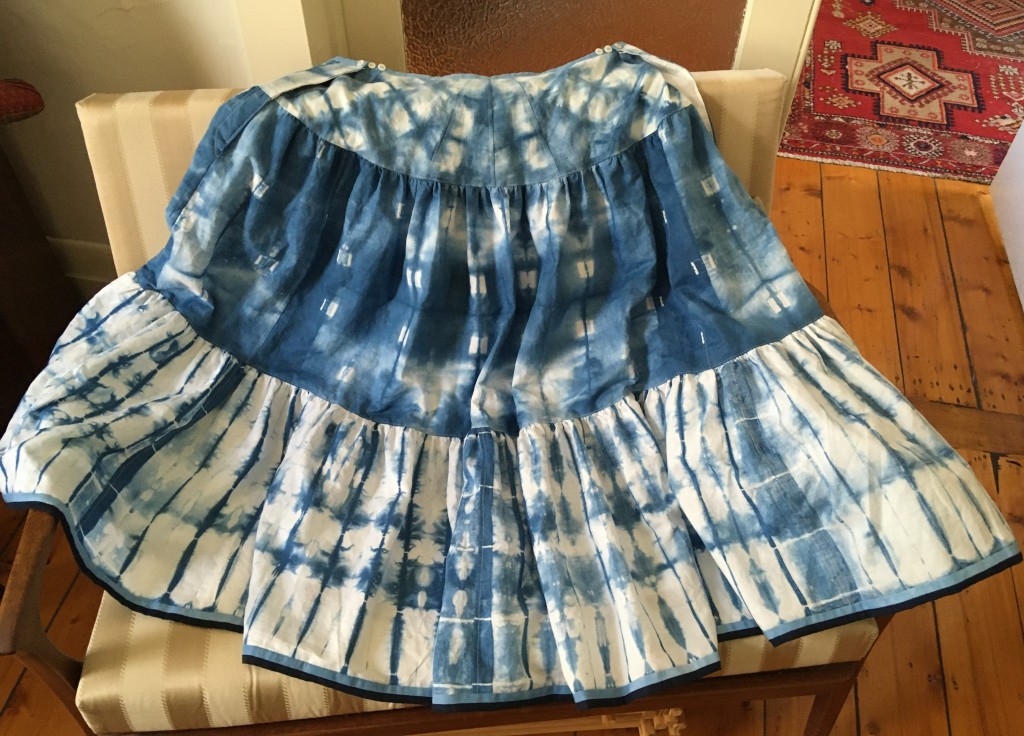
Anyway, All these pieces started the same size and were folded in three before pleating. So they all broke down most neatly to three 38cm wide strips. I used the darkest three for the middle tier and ended up needing 5 of the remaining six for the bottom tier. I still needed a top section to get the overall length I wanted. I originally meant to make another rectangular cut gathered arrangement for the top part, but flat to the body is more flattering even though it will mostly be covered in wear. So I fiddled appropriate shaped curved pieces out of the bits leftover from the indigo rays frock which is also and usefully, a slightly heavier fabric. This is just pinned, prior to final adjustments. Silly me fitted it over another skirt though so it ended up needing more overlap than intended.
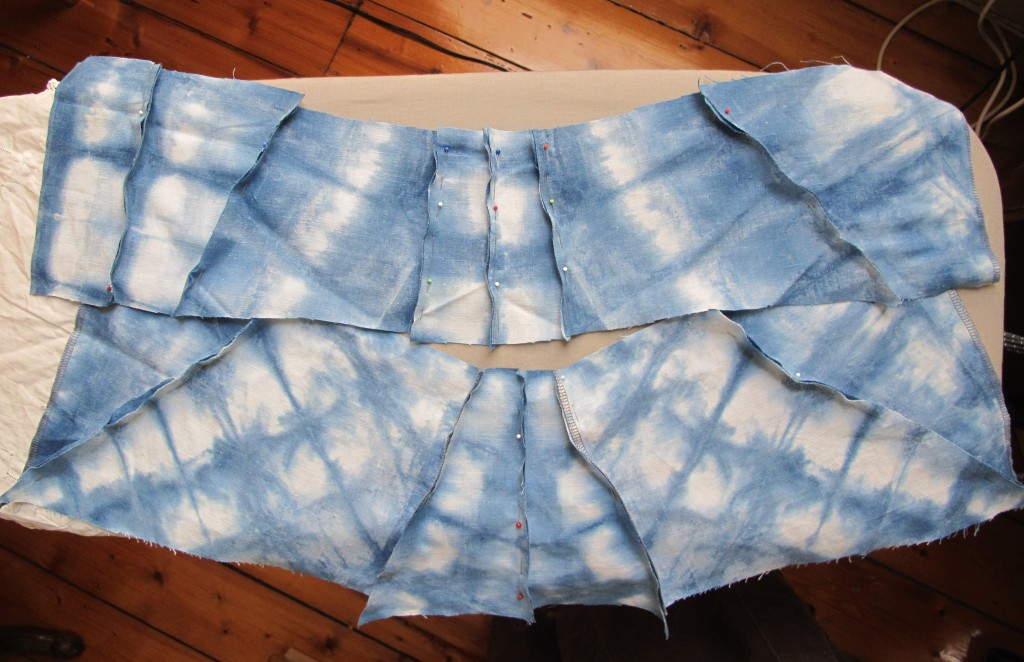
The fastening is similar to the overlap method used in this colourful remodel but buttoned instead of the ties used there. A friend suggested the buttons and I think I like them. They are more comfortable than the ties I think, but require sewing on many buttons to provide the same breadth of adjustment. Optimistically I have placed buttons for my current size and a couple of smaller options. Fingers crossed I don’t need to add more.
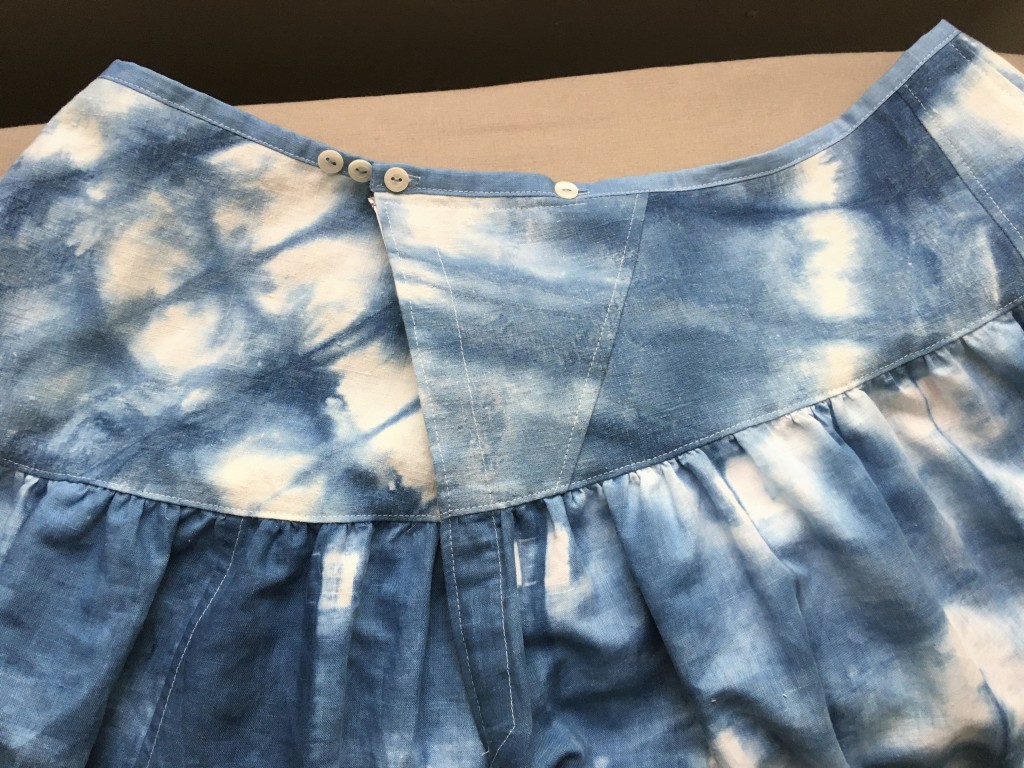
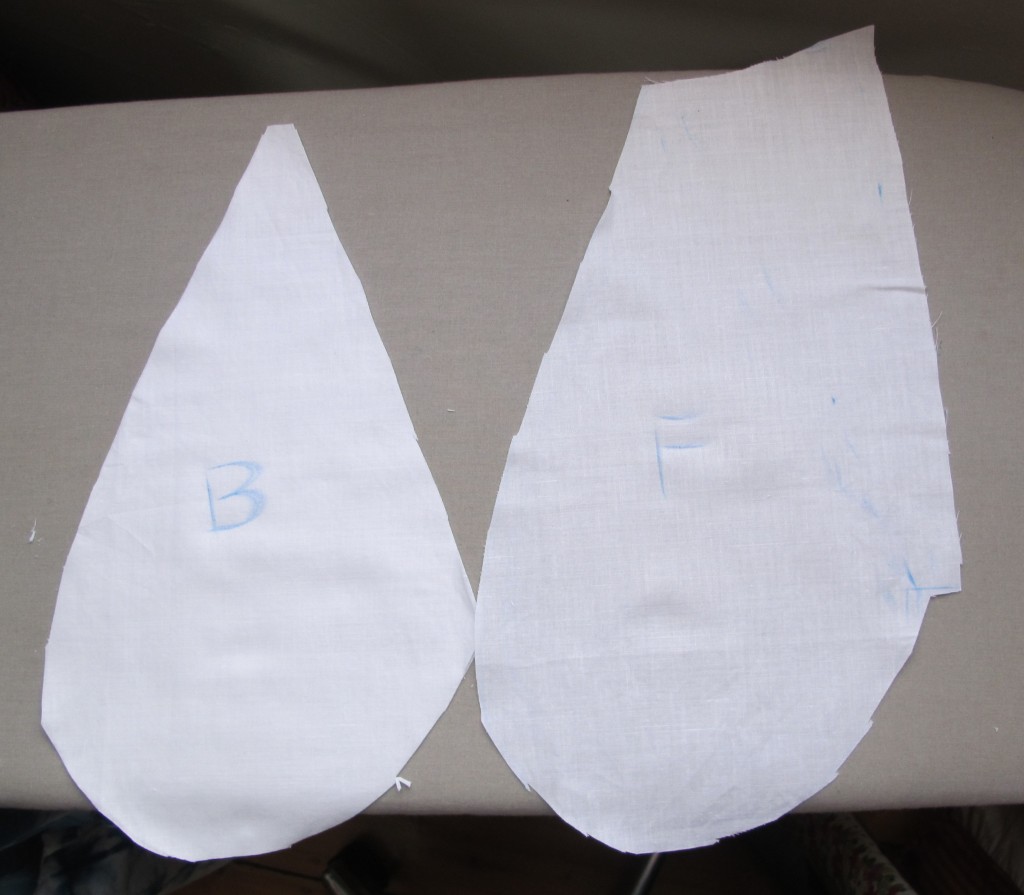
I couldn’t face braining the pockets until I’d finished everything else. So they are not sewn in as elegantly as if I’d planned them from the beginning. I’m happy that they work though, and I ought to be able to make nicer versions if I make another skirt of this kind. Here are the shapes. The front and back need to be different because of the overlap.
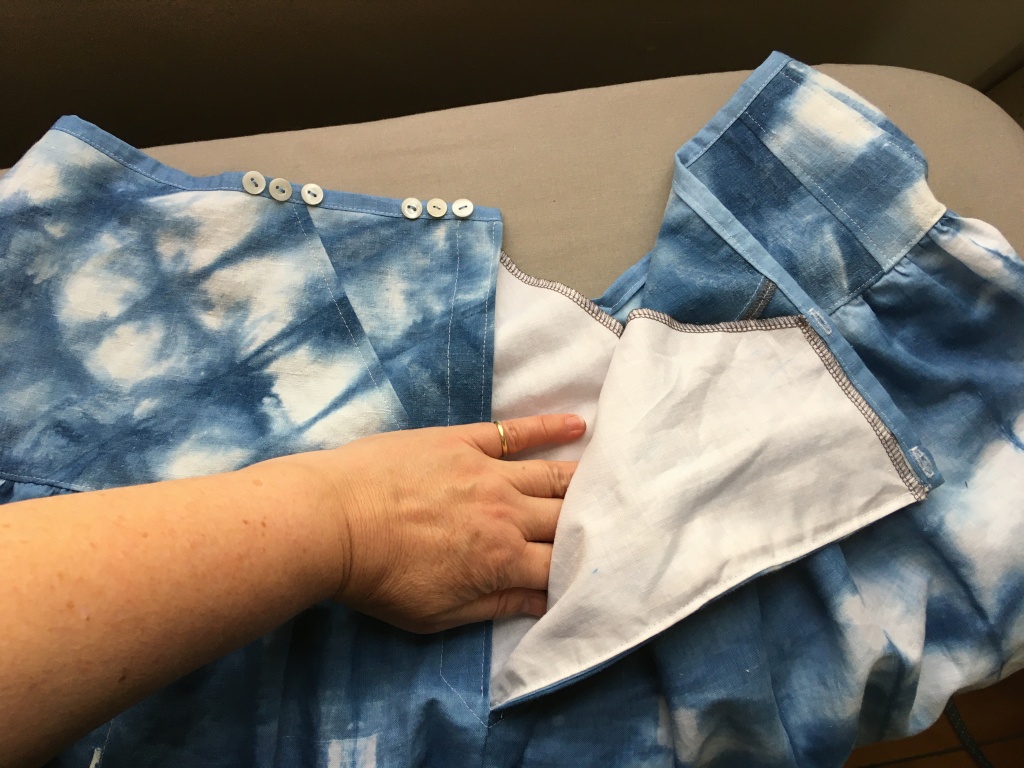
and after insertion: the two sides are sewn together below the opening shown. The front section is sewn in under the waistband to support the pocket and contents, so the pocket bag can’t be fully closed or one can’t get in and out of the skirt!
Here is the full thing, front and back
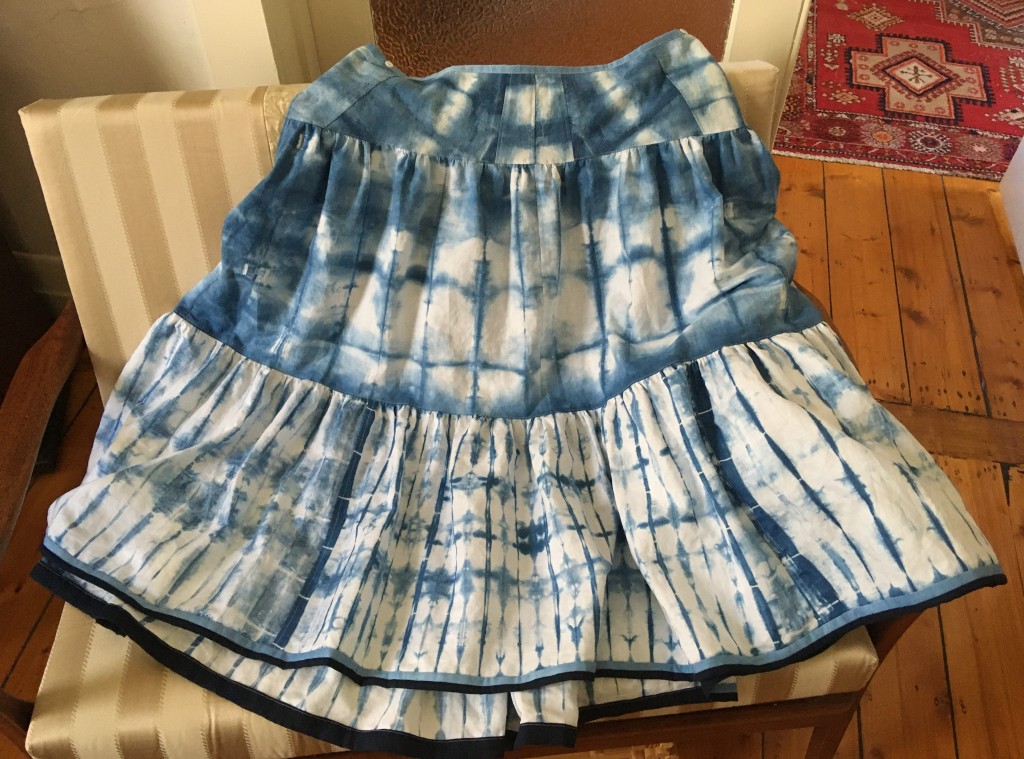
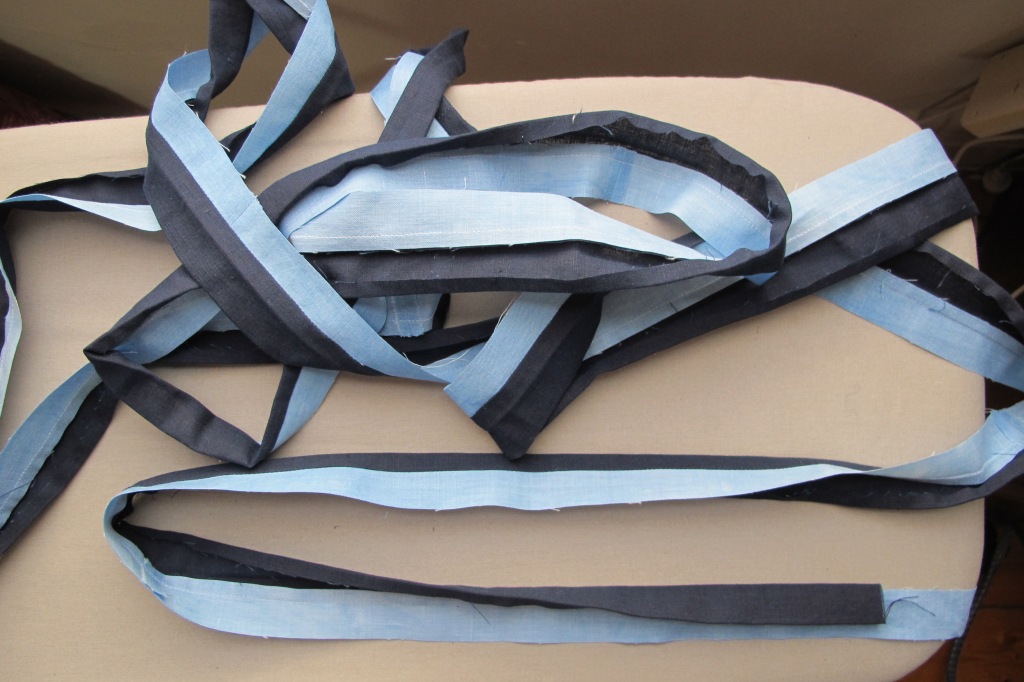
I’m delighted with the hem. I didn’t want to sacrifice any length, so I needed to bind it. Neither the pale blue or dark navy cloth sparked joy on their own for this purpose, but both together felt like a sweet solution, a subtly fussy detail. It took quite a few hours to achieve though. I used patchwork style rotary cutting for accuracy of the strips and fully assembled the border, sewn and pressed before attaching it to the skirt. Worth the effort I think.
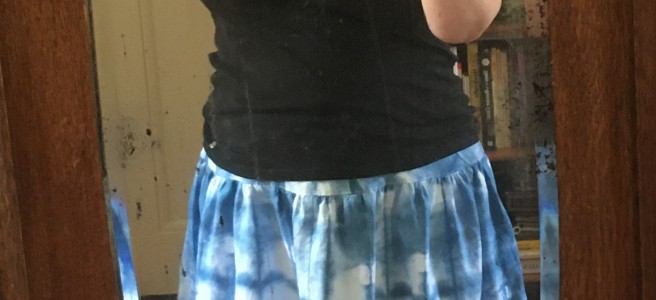
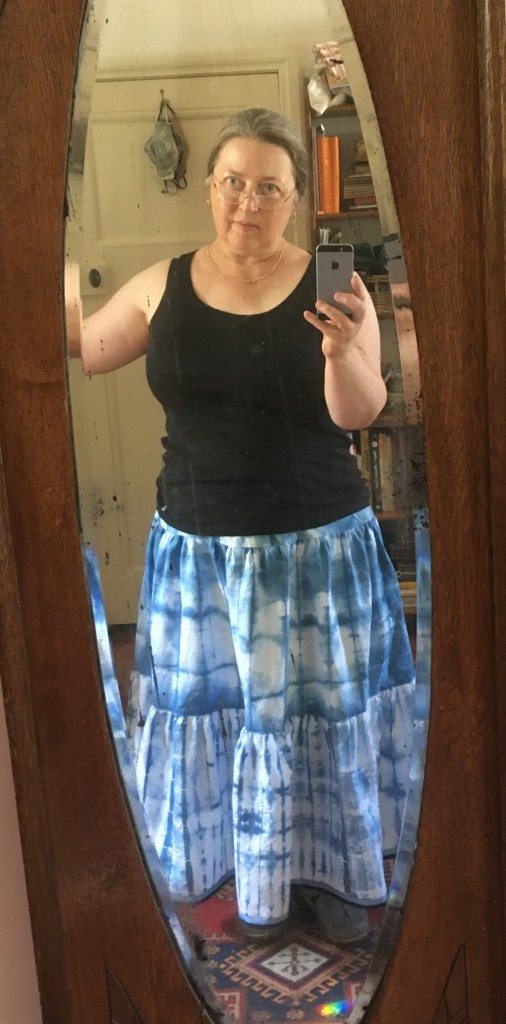
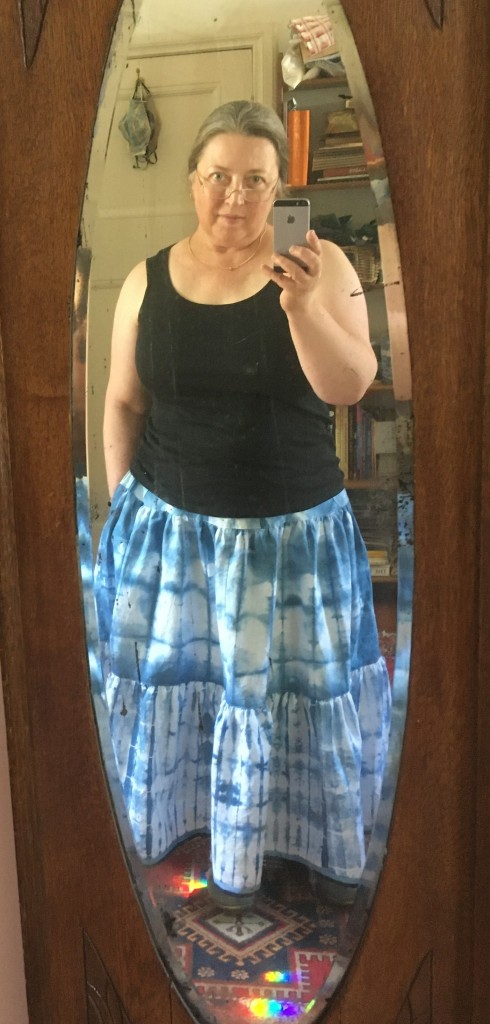
A couple of shots of it on me, one demonstrating the pockets of course. My mirror is the wrong shape for taking pictures of full skirts, but full swishy skirts make me happy. I was worried this one might feel too silly, but happily I like it.
One for me

Last year, as the culmination of my Alpaca goodness project I knitted a version of Joji Locatelli’s “3-colour cashmere cowl”, written up here. That was a gift for friends and I wanted one of my very own. I’ve loved the look of this pattern for ages.

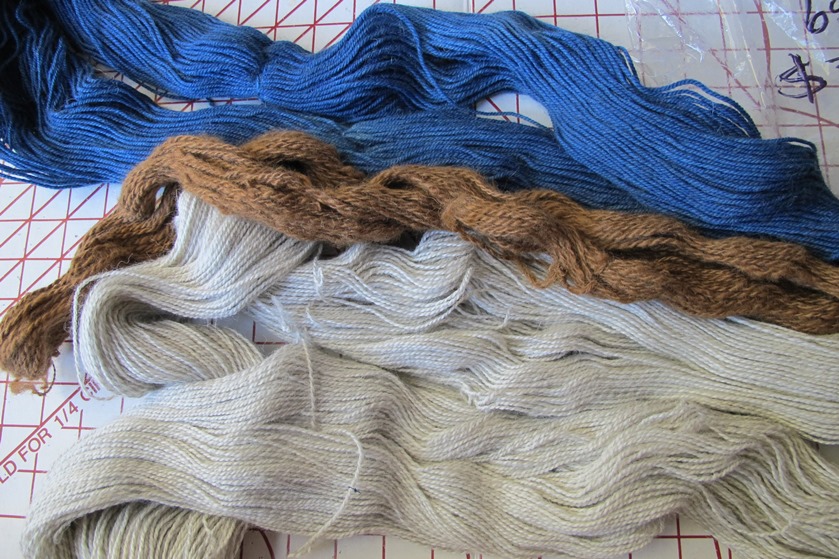
I’d been fancying these colours together:

IMG_5092-1

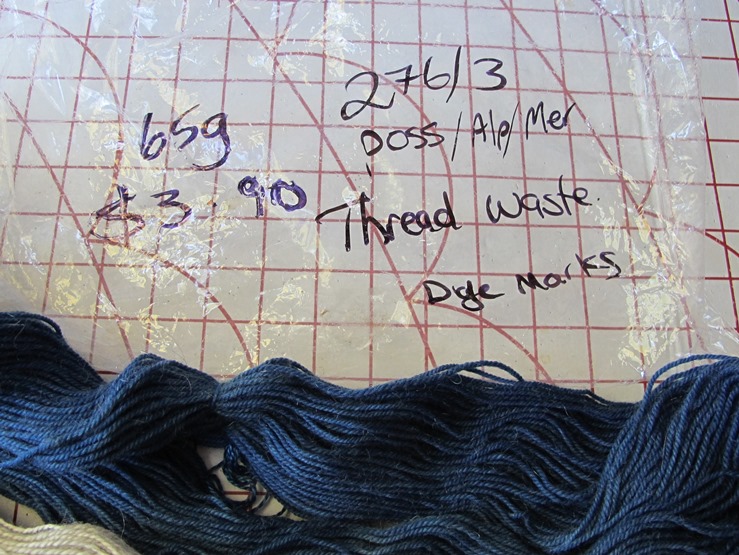
The off white is 50:50 extra fine merino and baby alpaca. I can’t remember the seller but it was bought at a fibre muster in I think Gerringong a few years ago. The blue is this yarn bought as an absolute bargain from Skeinz factory outlet in Napier NZ, which i had to figure out how to wind into a workable form and then dyed with indigo.

IMG_5087-1

The caramel is left over from the Alpaca goodness project, though the small hank pictured turned out to be too thick to work with the other two but I gleaned little bits of other leftovers from mostly the same creature. I think I ended up with five different little sections of yarn spliced together to make up barely enough of the caramel element, and then had a win with the last one running out just after the end of a round and the end of a pattern repeat! Yarn chicken win!

IMG_5365

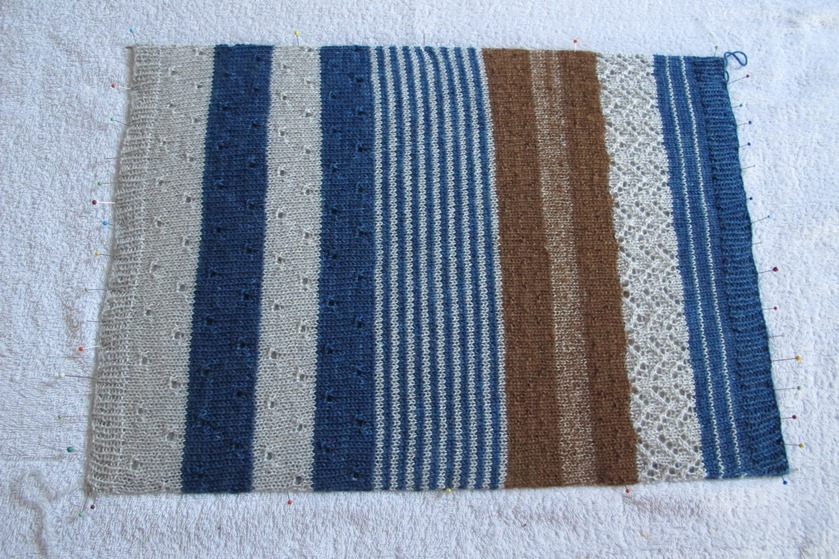
Here is the finished cowl straight off the needles

IMG_5427-1

and then blocked

IMG_5464-1

and here are a couple of pics of it on. Soft and warm and interesting.

IMG_0098-1

IMG_0101-1

Last of the First – well almost

This little T top used up the last piece from my first indigo dyeing session. Oh! no it doesn’t, oops. There is another small piece I haven’t cut into yet. That actual last one is in my “probably for patchwork” pile. Well, this uses the last of the ramie voile pieces anyway, augmented by a couple of strips left over from the little kimono jacket I made earlier, and which I don’t seem to have written up here?

Just a little project. One of five with fabric prepped and fairly firm intentions. One more turned into a garment and not just bits of fabric cluttering up the place.

Front

IMG_3796-1

and back, which I now see isn’t hanging evenly.

IMG_3797-1

a detail shot. The darker strips increase interest, make up the desired length and increase the decency factor.

IMG_3802-1

and on. Not shapely but it will be very cool to wear. Yet again I’ve finished a garment when the weather is not appropriate for wearing it.

IMG_3806-1

All of the above

IMG_3412-1

Shirt? Dress? Coat? All of the above

This started with an experiment in diagonally folded shibori. The upper piece in the picture below.

img_9246-1.jpg

I don’t recommend it. Diagonal means bias and that as you probably know, is stretchy. Getting this into neat parallel folds was NOT EASY. However, I bloody mindedly pursuaded it. I cut a large square from wide linen, heavy end of shirt weight and lovely quality. If I remember correctly, I folded the corners to the middle, then pleated it up on the bias and pegged it to hold, aiming for minimal resist. Grr. Big struggle to get it neat. There was a narrow strip left which I simply concertina pleated on the weft grain. That is where the finer stripes came from.

The bias experiment did make an interesting piece of fabric though. It was dyed all pegged up and then re dipped after the first lot had oxidised. Hence blue on blue rather than blue on white.

IMG_9339-2

The dyeing happened back in about Feb 19. A few months ago I was frustrated with sewing fine silk and decided it was time for some nice friendly linen. I got this out and pressed it. Then got sick and hung it in the corridor. It made it to the cutting table a few weeks ago and then languished again. I changed my mind several times as to what I would cut from it. I was going to make a dress, but didn’t want anything too similar to the other things I’ve made from indigo shibori. I didn’t want a plain shirt. I ended up with a skirted shirt, a shirt dress, a lightweight coat.

I’m pretty impressed that I managed to get this out of a total of, I think, about 1.1×1.4m of fabric, plus a little plain dyed lesser quality linen for facings. Golly, can that be right? The back and sleeves did need to be pieced, but some good came of that. The bodice back became more interesting and gave me seams for shaping.

IMG_3415-1

The sleeve piecing gave me an easy option for the vents- just leave part of the vertical piecing seam unsewn, press open and hem/fell.

IMG_3407-1

There was rather too much inside out, upside down-ness during construction. Some got fixed, some didn’t.

Of course I put pockets on it. I forgot to put the label on the yoke facing as usual, so it went on one pocket instead. I was lazy. I haven’t given it a final press before taking these pictures, it’s only had construction pressing. I quite like the relaxed look of slightly rumpled linen.

IMG_3403-1

Here it is on. Back and front

IMG_3433-1

IMG_3427-1

I really like it. It has 18thC frock coat overtones. Vaguely piratical. I’m thinking this shape would be nice in some lightweight coating I have in stash. I’ve been nice to future me and taken a pattern of the bodice adjustments before assembly. Pretty happy now that I did that.


Indigo Vines Dress

Quite some years ago I saw a child’s dress in Glasgow’s Kelvingrove museum. Custom batik decoration, indigo dyed, and with an intriguing but simple cut. An Arts and Crafts movement piece.  I was very taken with it and it stuck in my head.

IMG_0169

Then about 14 months ago I prepared a length of silk with custom stitched resist pattern, intending to make a dress inspired by this. See Indigo stitch resist experiment.

A month ago I realised I had a delightful excuse for a new semi formal day dress in the form of Christmas lunch. So I decided to make this up. I laid the fabric out and was about to cut but felt fuzzy headed and left it until a little later. This turned out to be a very good thing because during the pause I remembered that I wanted to embroider the leaves, which had not worked as well as the stem of the design, and that is much easier to do with the fabric uncut.

IMG_3058-1

I worked the embroidery over the next week or so. The neckline and one sleeve edge is done in stem stitch with one thread of Madeira stranded silk. The other sleeve and the front hem are done more simply with just a running stitch. The fascinating background fractalish pattern is I think because I washed but didn’t fully scour the fabric before dyeing.

IMG_3226-1

That done, I finally did the very minimal cutting out and assembly.  There is a little machining for the main seams but I did most of the stitching by hand. Partly in keeping with the rather labour intensive custom decoration but also to make the non pattern stitching less visible and let the silk sit well.

Here is the finished thing. By no means a close copy but very much inspired by. Amongst other things, mine is less full (limited by fabric width) and has added pockets. Sleeve edge to sleeve edge is selvage to selvage.

IMG_3242-1

A detail shot of the finished neckline:

IMG_3228-1

and on:

IMG_3265-1

I’m pretty pleased with this I think. It’s loose and very comfy. A great dinner dress. A bit matronly perhaps? I was going to add ties to pull it in but it really didn’t want them, unlike my first go at a dress with this cut.  I think that might have something to do with the level of the waist cut. I must do a proper comparison of the two. I’m feeling I might make another of the same cut with a fuller skirt and with the front waistline cut angled downwards to allow for the bust lift.

Yes, I’m dressing like a Victorian child again. I noticed some time ago that clothes popular with middle aged women have a certain intersection with designs used for children. There are good practical reasons for this but it does amuse me.

Indigo Cardigan

IMG_9369-1

Indigo dyeing on the weekend went really well. We successfully resurrected a 7mth old dyebath and dyed a great many things blue. I’m sure I’ll share more of them with you later, but I’ll start with the results on the grey cardigan from my last post.

This cardigan, folded and pegged


After a spell in the dyebath, turned out like this:


The positioning of the paler sections isn’t maximum flattering but the overall thing is really appealing. I’m very pleased.

A close up of the fastenings. The loops are made of leftover yarn from the indigo shawl. The buttons are from an old waistcoat that belonged to my Nana.

IMG_9355-1

I’m delighted with it. Very comfy, good sleeve length. In a perfect world I’d have cut the centre front points a little lower and taken in the side seams at bust level a little more. I still love it. It’s a tidy, fairly elegant example of resist dyeing and pretty much what I was hoping for.