Painted mats

Medieval painted cloths are turning up in my feed quite a bit at the moment. I wanted a little door mat or two for reenactment camping. These are not truly medieval but will serve the purpose and painting them up was a lot more fun than the weeding that I spent the rest of yesterday doing.

Started with a couple of $1 opshop sourced placemats.

IMG_9073-1

Then marked up a grid to paint into pretend medieval tiles. I used a ruler for that part and then drew up the rest by eye.  The paint is cheap acrylic art paint with Jo Sonya textile medium mixed in. My first try at this paint combination.

This is the first one I did. Is ok. I learned how hard it is to paint on such a rough surface. I also decided that I wasn’t happy with the black.

IMG_9076-1

Here is number two. I like this a lot better. I’d like it better still if I hadn’t used the yellow ochre. I am pleased with the terracotta colour I managed to mix up (equal parts red + yellow ochre, plus a tiny bit of black from the paint water). My silly free hand birds amuse me. Cave paintings? I tried to put a tail on one but that looked a bit too demonic so I left that off the others.

IMG_9070-1

Serendipity cushion

I just spent a week with hard flat wooden seats as the only sitting options. Oh my sore tailbones. A cushion would have made my week more comfy.

In the clean up after this event, I nearly threw out the few handfuls of cotton flock left over from a futon remodel. No! this could be cushion stuffing! Then I remembered a scrap of lovely wool embroidered upholstery cloth I’ve had in stash for many years. That had resisted all attempts at inclusion in other projects. It wanted to be it’s own thing. So I assembled the cotton into the shape of this cloth and made it into a baby futon with a bit of old sheet that was lying about.

.

.

By itself, this cotton made a sad, flat, baggy cushion. I wondered if I had much in the way of feathers left from previous custom cushion insert games. I did! It was the short end of a feather pillow, already roughly closed and…. the right shape! So that went in too, making the cushion slightly overstuffed.

I made a bunch of tassels from left over tapestry wool in stash, picking up the colours of the embroidery

.

The backing is heavy cotton offcuts from a butterfly my grandmother worked many years ago. It’s a good match for the weave and weight of the ground of the embroidered cloth. My stash doesn’t run much to heavy cloth, so piecing the bits of this was worth it.

IMG_5292

Cushion! The multiple tassels per corner were inspired by the extreme tassellation of some 16thC bags.

.

It’s only little, and quite narrow, but it’s enough to give my poor tailbones a softer experience and can be used even on little stools. Fits nicely on my “Waldo” stool (one of a series of these made by a good friend).

.

Serious Warm Finito

Faithful readers might remember this garment from last year. Serious Warm, Serious Remodel. After the hacking up, dyeing, recutting and machining, this lived in a cupboard until a few weeks ago.

Since then, I’ve removed all the overlock stitching and hand finished all the seams. This now joins my small collection of living history clothing with insides that I’m not ashamed of. Having it done after literally hanging about for 8 months feels good.

From this, though with the sleeves attached.

IMG_1108

To this.

IMG_4703

The thread is fairly fine two ply wool from the London handweavers shop. I bought it in the hope of tablet weaving with it. It’s nowhere near strong enough for tablet weaving warp, but it’s working just fine for this handsewing and at least some of the Greenland garments were finished like this with 2ply wool. It would probably be more accurate and less work to fold both allowances to one side of the seam (except the shoulder) but this fabric is so thick, that would end up very lumpy.

It was a minor miracle I got all the seams and hems done with only this little bit of thread left! Sew faster so you can finish before the thread runs out!

.

I used a different fine wool to stab stitch the edges of the sleeves, but you can barely see that anyway. Can you tell the thread is bright acid green? A more obvious type of stab stitching is more accurate for the Greenland frocks, but this is a familiar technique for me and negates the business of having to use different thread to the rest of the finishing.

IMG_4957

Here she is all done. I will try to remember to take pictures of a full outfit when the weather is conducive. It’s way too warm at the moment.

.

Gathered inset chemise

To my non reenactment readers I apologise. This post is long as it is and I realise has a bunch of assumed knowledge that I haven’t explained.
__________________________________________________________________________________________

I’ve seen several extant “late period” chemises with the hip fullness enhanced by gathered insets rather than the more usual triangular gores at the sides. Here is one from 1660, the picture is from Janet Arnold 4.  I really like them and would love to make one (or more). (I’ve now added a couple more gathered inset extant garments at the bottom of this post).

.

However I’m currently making and wearing early 14thC garb. Then a friend shared photos of a fine linen alb from Switzerland dating to ~1310.

22050123_800398055765_3358846686553267422_n

Woo hoo! I thought. I’m going to use these two garments to inspire a chemise. I need another for a long event anyway and one in very fine fabric might make the too tight sleeves of my new blue gown a bit more buttonable. The picture above looked to me as if the gathered inset was set directly below an underarm gusset. I now think that is not quite the case. The extant alb has a bit more drapiness above the gathers than my version.

IMG_3924

I’ve used a very fine ramie voile which I bought cheaply. So I can make several of these if I like and not break the bank, which buying fine linen voile would, if one could even find it (the alb may well be in a particularly fine strain of linen which is now extinct). I cut out the garment, and then almost immediately wished I’d done it differently. I did the gathered side pieces cut together with the garment body. I now think they should, and would better be done as separate sections, sewn to the garment body. I did manage to hide the side seams pretty well in the actual gathers. The fabric is very wide, so I was able to cut the sleeves with the body piece also. the only separate pieces were the underarm gussets and the neck facing.

IMG_3861

I constructed each of the side gathers differently. Both are cartridge pleated. The first one doesn’t have a turn down at the top of the gathered section, and is bound by the bottom tip of the underarm gusset. This came out a bit uneven, but is nice and flat. Right side, then reverse view below.

IMG_3898 .

The second side came out much neater, but has more of a lump from the bulk of the pleats. I’ve turned down the top of the gathered section before running the stitches for the cartridge pleating. Then I’ve used a small piece of straight grain double fold facing (left over from the neck facing) to stabilise the gusset section the gathers are sewn to.

. IMG_3911

The hem is a deep (7cm) double fold. Which is a good thing to do in very fine fabric. Gives it weight so it behaves better.

.

However although the alb has a deep hem, looking again that seems to have basically a double fold hem with only a small turn under at the top.

22089255_800398015845_2896447492289793572_n

Here is the whole thing on. I will wear it with the blue gown in a couple of weeks and see if the gathered sections annoy me or not.

.

And a silly action shot, just for fun. New garments often inspire me to dance.

.

Adding in a couple of other extant side gathered garments:

The tunic found at Guddal. I think this might be 12thC? Probably a short man’s garment.

pleated and split gore, Guddal tunic (kjortel)Universitetsmuseet i Bergen 030984

A beautiful garment from “somewhere in the middle east”. Foolish me didn’t capture the information. I will see if I can track it down.  Make that 14thC Persian. I don’t understand how this would have been worn though.

1424506_10203015066337801_1119428498833148027_n

Repeating the prettier gathered section so it will be picked up when shared on other sites.

.

Serious Warm, Serious Remodel

Wanting to capture this project on the blog, I’m converting a bunch of small FB posts to one simplified blog entry.

.

I love the garment on the right*, pictured above. In the cold evenings at a recent event, I decided that a version of it in seriously warm cloth would have enhanced my life. The garment on the left is seriously warm cloth (heavy wool coating with a strong nap) but I hated it. It was ill conceived and I didn’t wear it. So I chopped up the garment on the left  into rough pattern pieces and split it into two halves, meaning to dyeing each pile a different colour.  Two colours because:
1. The gear I have won’t allow me to dye the whole thing in one go, and if I don’t, the two halves won’t match.
2. Particoloured is a perfectly authentic option
3. If I can’t have stripes or some other interesting cloth, bright particolour is about as fun as it gets.

If the whole transformation were not to work, at least the huge pale coat will still be out of the wardrobe. If it does work, I’ll have the toasty warm particoloured gown that I want without having to buy the fabric.

IMG_1018

I really love dyeing stuff. It’s so transformative. The seriously warm fabric took up dye really easily too, so even though I did two dye baths for each half, I still got it all done in a little over 3 hours. The simple red and green I started with came out too bright and candy like. So I softened them with additions of yellow and black.

The first try was using 2 bottles red, 1.5 bottles green, both Queen brand food dye (all I had). I wasn’t surprised that these came out too stark for what I wanted.

IMG_1056

To soften these I added half a bottle of yellow and a small slosh of black to the red. The last of my McCormick blue and two sloshes of black to the green. Much better.

IMG_1084

I’m fairly pleased with these colours. The green is less even than the red, due to rapid uptake of the red parts of the black dye. My choice of colours was influenced by what I thought I could achieve with these dyes in large volumes, plus what I want to wear and what might be plausibly medieval.

Then I had to cut out the proper pattern pieces. Sadly I didn’t manage to be as clever as I would have liked. Cutting a particoloured garment from fabric with a very definite right side has pitfalls. I anticipated some correctly, so the fronts and backs make a proper set. However, I switcheroonied the side panels front to back and the sleeves left to right. Wrong side out was completely unacceptable. Random colour placement was not welcome either.

I managed to fix my idiocy by swapping the back and front pieces. This was made possible because I had enough offcuts to recut new upper back pieces to give the needed width and higher neckline. Just a few extra seams needed.

IMG_1108

Here is the new gown all assembled. Not finished. Lots of hand sewing still needed. Ideally, I’ll get rid of the overlocking and whip all the seams down. Eventually. I dared not forgo overlocking against all the handling needed for the dyeing. I thought I’d be able to lose it in the cutting out, but fitting the pieces into available fabric was tighter than I’d thought it would be.

Bit of a transformation eh? Once I decided it had to go, that pale coat was just raw material. I have a silly fancy that the finished shape of the serious warm is rather Dr Seuss.

.

and here it is on so you can see the fit. My take on these gowns is that they need to fit well in the upper body and arms to capture both the proper look and maximum elegance. Not full 14thC presentation, the stretch skivvy is fully anachronistic.

.


*an early 14th C overgown based on several from the Taymouth Hours.

taymouth8

Ho Hum

Yet another chemise. Now I can do Festival in 14thC with a clean chemise each day.

It doesn’t look like much hanging. White on white.

.

It’s linen. Of course. Or at least what we believe to be linen (some of the Job warehouse haul). Sewn mostly by machine in cotton thread. All seams are neatly flat felled, even if only by machine. My uber authenticity friends will think ill of me for that. I’d claim to not have enough arm to do it by hand. Actually I suppose I could, over quite a long period.  It seems I’d rather spend that capacity on my patchwork.  Some medievalist I am eh?

.

Neckline is faced with straight grain double fold tape of the same fabric. Handsewn down, though I had a brain spasm and went with a less than wonderful stitch choice. I realised partway, but chose at that point to just continue.

.

The wrists and hem are done by hand in a prettier stitch, which the camera really didn’t want to focus on.

IMG_0207

Here she is having a rest on the little sofa :-). Nope I’m not pressing it.

.

Belt for a Foundling

Back in April last year, I agreed to contribute to a mad plan by donating an item for a quest that would also be a gift for a friend. It needed to be an item that might be useful to a gentleman living in Calais in 1376. I have made a bunch of tablet woven belts for myself and others which people have been kind enough to admire. I decided to make another for this project. Construction started in October, and the belt finally made it to the intended recipient in January. Now it doesn’t need to be a secret any longer I can write it up publicly.

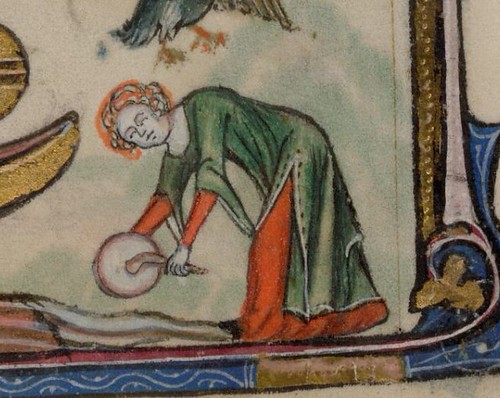
I went back to look at weave types though. My previous belts had mostly been random chevron patterns under the mounts. Defensible, but I felt like doing something different. I had always liked this extant band, and it is listed as mid 14thC and 8.5mm wide.

IMG_0011
Museum of London “Textiles and Clothing” Fig 100B.

Then I found this image in a collection of extant medieval girdle images on , sigh, pinterest. The weave is rather similar.au.pinterest.com

This is the blog post it came from. The image itself seems to come from a Sotheby’s auction catalogue. A translated description in the post is:

“With a length of 128 cm and a width of 1,5 cm the original tablet woven band has been typical for a belt of 1340 to 1350. It is decorated with 51 metal mounts. Through the quality of the mounts it is supposed that the belt has been produced in France.”

Fibre:
The MoL band is silk. I’m thinking the Sotheby’s one is too (I don’t read German at all well but a few textile terms are familiar and the blogger has done her reproduction in silk). I did not have appropriate silk on hand. I had however recently found a worsted wool that weaves well (“Cool wool” from Dairing). Wool girdles are perfectly authentic though lower status I’m told. When doing my test weave with this wool, the weft behaved badly, twisting up on itself and forming tiny picots on the edge. So in this belt I used a cotton weft for ease of weaving.

Colour:
Both extant bands are done in a single colour, but the SCA has sumptuary traditions for plain belts in any single primary colour. I would have been happy to make a plain red one, but I did not want it to be confused for a squires belt. So I used a red border and an off-white centre. These were the two colours I had of this wool.

.

However, after weaving it, I concluded that though I really liked the result, looked at with a medieval eye, it did not look rich enough. So I overdyed the whole thing with yellow. Though annoyingly, that meant that the weft then didn’t match the centre section of the weave. I will point out that the gentleman in question is known to wear very bright colours for the fun of it.

IMG_8822

Weave:
I’ve used 18 four holed tablets all threaded alternately S and Z. The edge three tablets on each side were turned 1/4 turn forwards each weft pass. The centre tablets were turned two 1/4 turns forward, then two 1/4 turns backward. I think the result looks pretty good except the border weave is a bit loose. That could be perhaps from the weft being a little heavy? or possibly that the double turn of the centre tablet takes up more length?  The resulting band was 16mm wide to match the buckle I wanted to use.

IMG_8749

The MoL weave description is very similar except they split the centre pack into two section of alternating tablets, one half turned twice forward and the other twice back, then reversed. I couldn’t see why that was necessary, though I might later experiment and see what difference that makes.

The blog reproduction linked above uses six hole tablets and two wefts, which I don’t fully understand and anyway, I only have four hole tablets and wasn’t up for making 6hole.

Then I attached the buckle (copy of an extant one from Gaukler) and end and blinged it up with mounts. More mounts would have been a better match for extant examples, but this was as many as I could get at the time to work on such a narrow band. Riveted mounts seem to be more authentic, but again, working with what I had. Oh, the buckle is brass and the mounts are gold plated pewter.

IMG_9337

Here it is as it would be worn, though only on my dress dummy.

.

and a pretty coiled shot for good measure.

.

Save