Pre-dirtied Cardigan

Some time ago I wanted a light weight wool cardigan. I made a lovely one and carelessly left it behind on an aeroplane. I made another, which I love but it’s “too good” to wear around the house. I made a pretty red one which I haven’t written up yet, but I’d also like to keep nice for at least a while. So I have made yet another deliberately for wearing while doing rather than with particular sartorial aims. I decided to make one dyed similarly to this skivvi .

Take an inexpensive length of soft teal wool knit fabric. Cut a baggy cardigan based on a tshirt pattern. Sew it up enough to put all the pieces together but without hems or other finishing. Torture it with pony beads and elastic bands.

Soak it for a short while in warm vinegared water. Using food dye set up in hot water so the dye takes fast, dye one side red and the other yellow/green. Fail to take pictures of this stage. Decide this result is nice but not yet interesting enough. Bundle the whole thing up kind of roughly pleated so only bits are exposed and dye that whole bundle black. Start taking the elastic bands off and finally remember to take a picture.

Finish taking the elastics off and impatiently wait for it to dry.

Decide there isn’t enough black and add extra donuts with a fabric ink felt tip. Sew the hems and the front bands. Find some leftover handspun that will make nice button loops.

Find some nice buttons, make the loops with the handspun plaited up. Sew all those on.

Here she is in all her messy glory

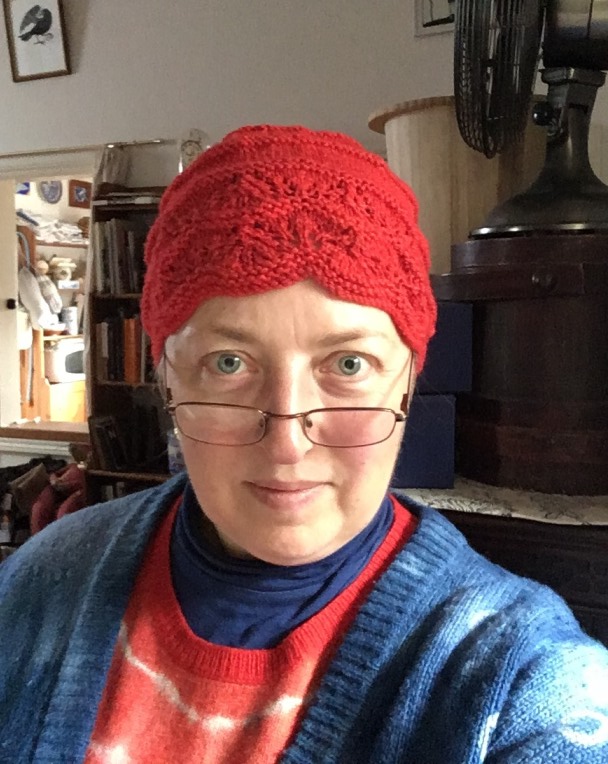
On me. I am pleased with it and I think this one I really will be willing to wear around the house while working on stuff, even somewhat mucky stuff. By happy accident it goes really well with this skirt.

From the back. Seeing as I was drawing things on it, there was no reason not to have a trefoil

Not the original plan but I like it

Take about three metres of black and white wool jersey. Use it to exhaust some dye that you don’t quite understand the behaviour of yet. End up with a messy streaky ombre which was very much not the aim. Get grumpy with it and throw it in the naughty corner for a year or so.

A year or so later, realise that you can cut two skivvis, one from each end. The darker blueish grey end makes quite a nice darkly grungy shirt without further effort.

The paler end just looked dirty until I had some fun with food colours. There are days I would enjoy some mad colour to wear. I amused myself by making sure the red and green are the right way around for port and starboard, or they in wearing.

Extendo Remodel Success

About two years ago I knitted a capelet. “Laced with Leaves” by Liz Langford Knits.

Really pretty but it so didn’t fit me like the image on the pattern. That looked like it came down to waist level but on me it very much did not. I am probably rather larger than the dummy in the pattern pic.

I only wore it twice and found it annoying. Very warm shoulders, cold everything else. I dubbed it the ‘Stupid Shoulder Frill” and started thinking about how I could make it more wearable, which basically meant longer. I even thought of just pulling it back and reusing the yarn. I decided to start by pulling back just the bottom border, but when I tried, the halo fluff got all jammed up and it wouldn’t frog. Instead I ran one of my tiny circular needles around at a nice identifiable row, then pulled the next row out half a stitch at a time to get the edge section off.

I had some of the original yarn left, with which I knitted another round of the leaf pattern with needles a size up from the pattern. That didn’t make it long enough, so I overdyed some merino yarn that was near the right colours but not quite.

Merino before
Merino overdyed with added possum/merino yarn

The resulting colours melded much better with the original variegated yarn. I also added in some hand dyed possum/merino yarn leftover from https://montjoyeblog.wordpress.com/2018/07/25/colour-coordination-win/ . Bonus, that hat should now look fine worn with this garment, whatever you want to call it.

With this I added a scalloped border and an extra band at the neck of the turquoise possum yarn to help tie in the stronger colours. Overall it is now about double the original length.

pinned out and in the sun to dry

I liked the extra weight of the beads in the edge of my last shawl, so I beaded this one too. Oh so many beads.

I am so much happier with it now. I suppose though it will go into the cupboard until I have somewhere to wear it. Ruddy virus.

This post was written with much frustration as I tried to figure out the new WordPress editor.

Lacy red hat from white fleece

As part of my slow mission to learn by experience the properties of different kinds of fleece, I bought ~75g of Polwarth fleece blended with silk 70:30 as tops from Wool Chambers at last year’s Bendigo show. I got around to spinning it up a couple of months ago.

IMG_4899-1

I was aiming for 4ply, which I think I managed straight off the wheel.

IMG_4929

Then when washed it did what I’m told is the classic Polwarth Puff. I made that a bit worse than it might have been by the agitation required to dye it a slightly variegated red with food colour. So it ended up somewhere between 5 and 8ply!

IMG_4937

and wound into a cake

IMG_5458-1

It was originally going to be half a shawl, but it didn’t end up looking as well as I hoped with the other intended yarn. As it turns out, about 2/3rds of it has made a really lovely hat.

IMG_5512-1

The pattern is the “Strathcona Beanie” by Megan Goodacre, except I’ve altered it to a simple skull cap shape. My yarn was too boofy to work with the recommended needles but I also have a large head. Going up to 4mm needles gave a nice fabric and a larger gauge but in a happy accident, delivered a great fit with the gentlest of grips on the head but not remotely tight. This one is straight off the needles and completely unblocked. I don’t feel the need and I don’t want to mess with the fit.

IMG_0148-1

Lady Macbeth Gown

Gothic Pandemic Couture. Mwahaha.

There has never been a better time to work entirely from stash. Thankfully I have a lot of stash. I wanted a new winter dressing gown. After much thought, I finally came up with a design that met the evolving design criteria. All from stash, all natural fibre, warm colours, comfy, nice against the skin, especially at the neck, not too weighty. Then I realised my design had rather gothic overtones… which made me think of Lady Macbeth, who has a hand washing thing….That Was It. Had to be done.

I cut the gown from barely enough heavy Italian wool knit coating… need I say that I bought it cheaply? Yeh, nah. You know me a bit by now.  I had a piece of luxurious crimson silk rayon velvet to use for the collar, and I wanted to get that more of that red into the gown. I only had 1/4 bottle of red dye, so I dip dyed the cuffs and hem.


IMG_4304-1

It looks quite elegant in the finished garment but I could not help thinking “trailing in wells of blood” (which is a folk song quote really) but was what made me think of Lady Macbeth. “Out, damn’d spot! out, I say!…………..who would have thought the old man to
have had so much blood in him?” No murder done here except perhaps to the height of good taste.

IMG_4360-1

The gown is mostly unstructured, but I did tape the roll line (pictured), the shoulder seams and the back neck seam. There is a lot more handsewing than I initially planned. The knit fabric is bulky and doesn’t press well, so I coarsely hand felled all the shoulder and collar seams. I now wish I’d taped the edge of the collar as well, but too late for that now. The cuffs are hand hemmed but I machined the the bottom hem, I won’t be looking so closely at that and neither will anyone else.

IMG_4321-1

The collar turn backs are casually hand quilted so the velvet becomes one with the knit underlayer. Sort of works like pad stitching. There is no interfacing. I did though put a lot of effort into making sure that the roll worked properly. I must say, it feels glorious.

IMG_4376-1

There are of course pockets. Quite stealth though not a perfect pattern match. That, and the creative shaping are due to having no extra fabric. The label went here because previous attempts at putting them onto velvet caused much swearing.

IMG_4373-1

What to use for the belt? I had nothing but tiny scraps left of either fabric and no more dye. After a couple of other plans, I remembered I had previously dyed some grey wool yarn with the exact same dye for a project that didn’t proceed. Hurrah. Perfect.

IMG_4348-1

The belt loop is a detached buttonhole arrangement in stealthy grey tapestry wool.

IMG_4371-1

Here is the finished gown in a relaxed pose. So comfy.

IMG_4405-1

Here I’m trying to act all Lady Macbeth determined.

IMG_4386-1

and this was my best attempt at a handwashing shot with no one else present to take the picture.

IMG_4395-1

I don’t look forward to washing it and shan’t for a while. Every component is prewashed though, including the velvet and the seam tape. Part of the motivation for the dyeing was in case some of the velvet dye migrates to the wool in the wash.

Cashmere Eggs

A bunch of years ago, I brought home a pure cashmere cardigan in palest pink that I had found in a charity shop. I loved it. So, so soft, and it has pockets! It had drifted into too small territory so I stopped wearing it. I pulled it out in a recent wardrobe cull and found it was peppered with moth holes. No! The cupboard got a good clean and some moth papers. The cardigan got a wash and about half a day’s work.

IMG_2408

I darned 11 small holes or weak spots and patched two larger holes. I might not have bothered, but… pure cashmere! and…. pockets!

Aside from the moth holes, it was a bit yellowed in places. Too subtle to catch well in photos, but enough to make it dingy.

So I applied beads and elastic bands:

IMG_2420-1

and popped it in a yellow dye bath. Here are close ups of the most obvious mended section before and after dyeing. The mending was much more invisible before. The different materials took up the dye at different rates. Boo.

IMG_2423

IMG_2463

Still, the overall effect is nice I think. I’d so wear it if it was a bit larger. So I need to find it a home. Egg yolk yellow, decorated with fried egg donuts. Or possibly inverse cheezels.

IMG_2466-1

Accident appealing enough to mimic

While waving dye about the last few days, i decided to dye a jumper red. A jumper that I liked the shape of, but had fallen out with it’s colours. I failed to get a proper before shot, so I submit one taken by a friend. She calls it the “Dutch Masters” look

IMG_20160721_193754-3

Oatmeal and salmon. Opshop sourced, darned and mended. I wanted it red. I’m in a red wearing mood. wearing red in winter makes me feel warmer. However, I was a bit concerned that trying for a flat red over a striped plus darned and mended jumper might not be that appealing. Besides, I’m currently very taken with the whole shibori thing. So I jumped in and bound it up with string after the garment had been washed and vinegar soaked. It turned out that the string I used had powers I had not anticipated. Powers lent to it by it’s previous sojourn in blue dye! When I untied it and found unexpected blue in parts of the garment, I was shocked and saddened, but only momentarily. I soon found that I actually really liked the effect. So much so that I took a blue fabric pen and worked to imitate the effect in as yet unaffected parts of the garment. Can you tell which sleeve is string dyed and which is imitated?

IMG_1009-1

String, dye exhausted and not. That blue string still holds possibilities.

IMG_1059-1

Whole finished jumper. I am really pleased with my last minute tie dyed stripes. They give character and soften the boxy, shoulder enhancing effect of the unstriped yoke area, changing the focus to the face and forearms. The red was achieved with Queen food dye. 50ml (a whole bottle) of pillar box red, 2ml of green and 20ml of yellow. I find that “pillar box red” alone gives a colour too candy pinkish for my liking.

IMG_1004-1

I love it anew. I’ve worn it the last two days. Might well be my newly favourite jumper.

IMG_1014-1

Red Cashmere Remodel

I wanted a red jumper, but I didn’t want any more jumpers. So, take one chartreuse, 100% cashmere opshop sourced jumper that fits well but I’ve only worn once, and that a year or more ago.

IMG_0414-1

Dye it red with food colour. Ooo, I love the colour!

IMG_0449-1

Decide I’d really rather have it as a cardigan. So cut it open at centre front, make facings from bright orange merino knit offcuts and button loops from sexy shiny silk thread. The colour isn’t right in the picture with the buttons. It really is as red as the pic above.

IMG_0497-1IMG_0502-1

See, sexy shiny silk thread. I have a stash of this bought cheaply from a closing down sale. Well, cheaply per item. I spent a lot of money at that sale.

IMG_0518-1

Add a label, because you can

IMG_0484-1

and call it your new, ultra soft, rather stylish, red cardigan.

IMG_0506-1

The reddening

This adventure prompted by two thoughts:
1. That I wanted more warm red socks than I was in possession of.
2. That perhaps food dyed silk thread might be more colourfast than the commercial stuff I had?

I found two pairs of socks that I wasn’t wearing much and that would look well with a red overdye. They happen to be #5 and #15 of my knitting. The pink/yellow/green ones are comfy but I’d stopped wearing them because of the colours. The orange/grey ones were started while waiting for a hospital procedure and always reminded me of that experience, so I didn’t wear them either.

The socks reddened nicely. The silk thread surprised me by refusing to darken past a mid pink, which I shall try to think of as pale red, being as I am in an anti-pink phase.

IMG_0292-1

The silk thread, though paler than I wanted, does seem to be pretty colour fast. I’ve now done half the embroidery that it was intended for (more later) and am right now enjoying the old #5 socks in their new reddened form.

IMG_0315-1


Sock Pair #35

The latest pair of socks have gone to their person, so I can show you them here.

IMG_9123-1

They needed to be a fairly strong colour, and I didn’t have quite the right yarn. So, surprise, I overdyed three different sock yarns with food colour. Before and after pics below.


I rather like the subtle shading. They fit and seem to please my dear friend for whom they were made.  Knitted toe up as usual. I’ve used the k2tog bind off for the first time. It’s good. Easy and well stretchy.

IMG_9130-1