A project of many firsts and learnings.
Early last year, I realised that I had not yet tried spinning fleece that was dyed with colour changes across the sliver rather than parallel. In between lockdowns, in May I was able to get to a couple of fibre markets and bought 100g of lovely coloured merino fluff hand dyed by “Ripples on the Pond” in “Stormy Mountain” colourway. In August I started spinning it.
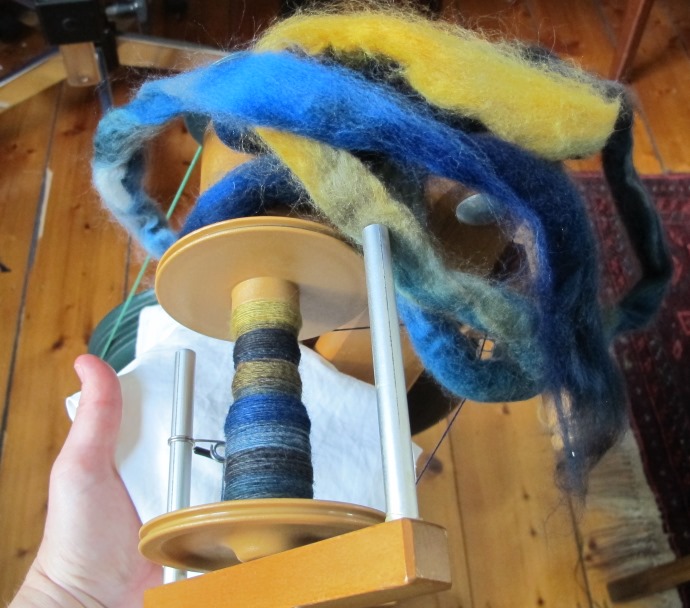
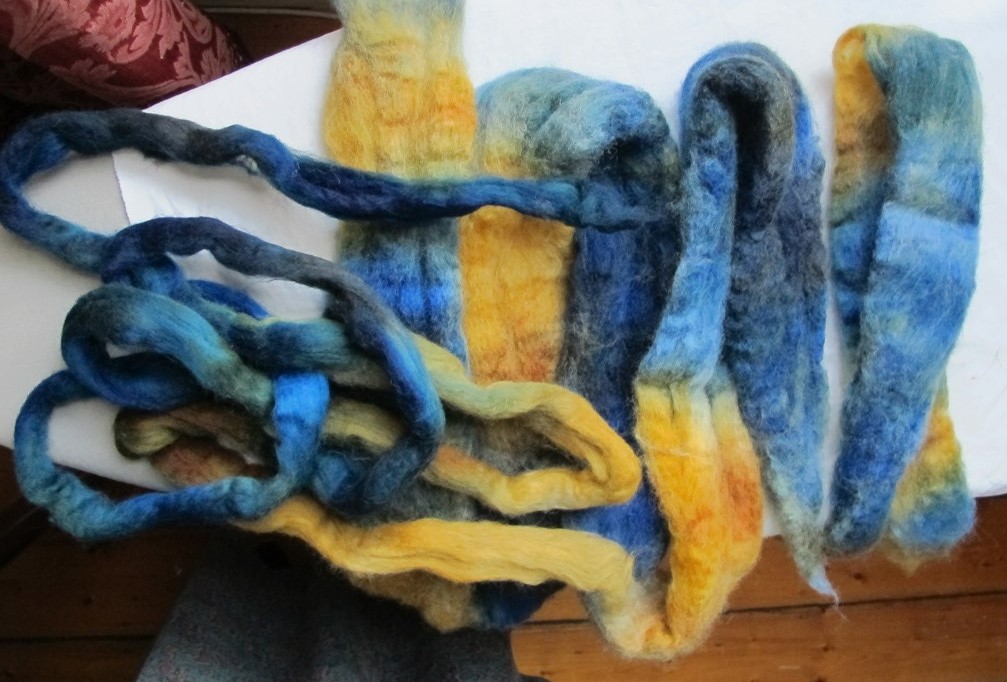
I enjoyed the extra interest from the different colours as they appeared so much that I thought 100g wasn’t nearly enough fun. So I decided to try dyeing some of the white wool I had on hand to match as well as I could manage, or at least coordinate. The target was enough yarn to make a cardigan. For this, I learned to dye in the microwave after ordering some Landscape brand dyes, and then some more colours when I realised I needed different blues. I used the only white merino I had first off, about 100g. Then moved on to the kilo of ABP corriedale/suri alpaca blend that I hadn’t yet touched. Dyeing in 100g lots. Below is the best match I managed. The narrow sliver is the original, the wider fluffier stuff is corrie/suri dyed by me.
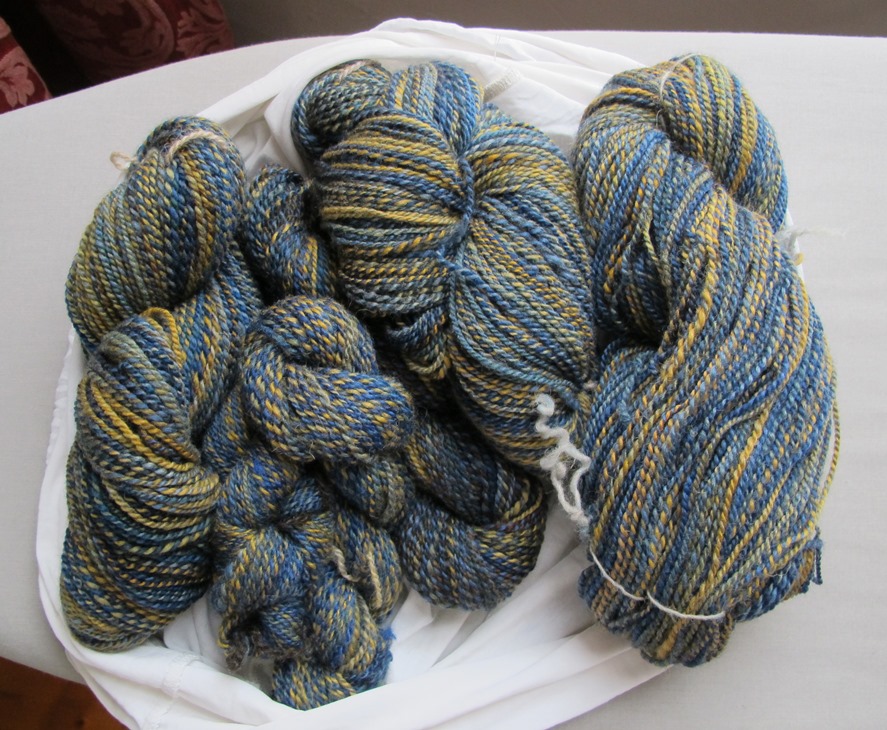
Some of the batches were paler by accident, some were darker by intention. Here is the majority of the spun yarn. Not all of it, I balled this lot up and started knitting before I dyed and spun the last of the wool needed.
Using two types of fibre was for two reasons. Firstly that I wanted to consume fluff I already had rather than buying more. The other thought was that the corrie/suri might be harder wearing so I would use it in the sections that tend to wear out or pill. For me that is where the inner upper arm rubs on the side of the bust and the tummy section where I lean on things; bench tops, tables etc. The merino is softer on the skin so I would put that at the neckline and the lower sleeves where skin contact is more likely. The multicoloured dyeing would hopefully mask the visible difference in the two types of fibre.
I knitted one pattern top down as far as the armholes and then found it really didn’t fit.
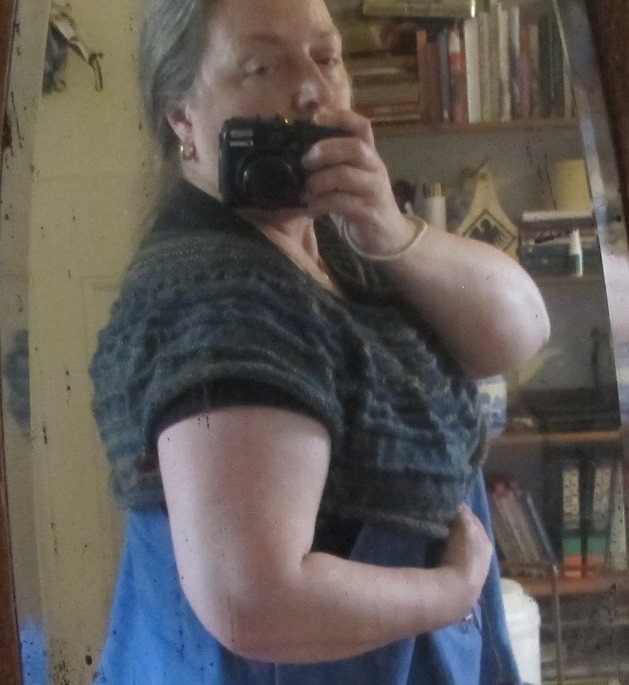
So I wailed a little, waited a few days and then pulled it back. The second pattern worked much better. Also top down but raglan:
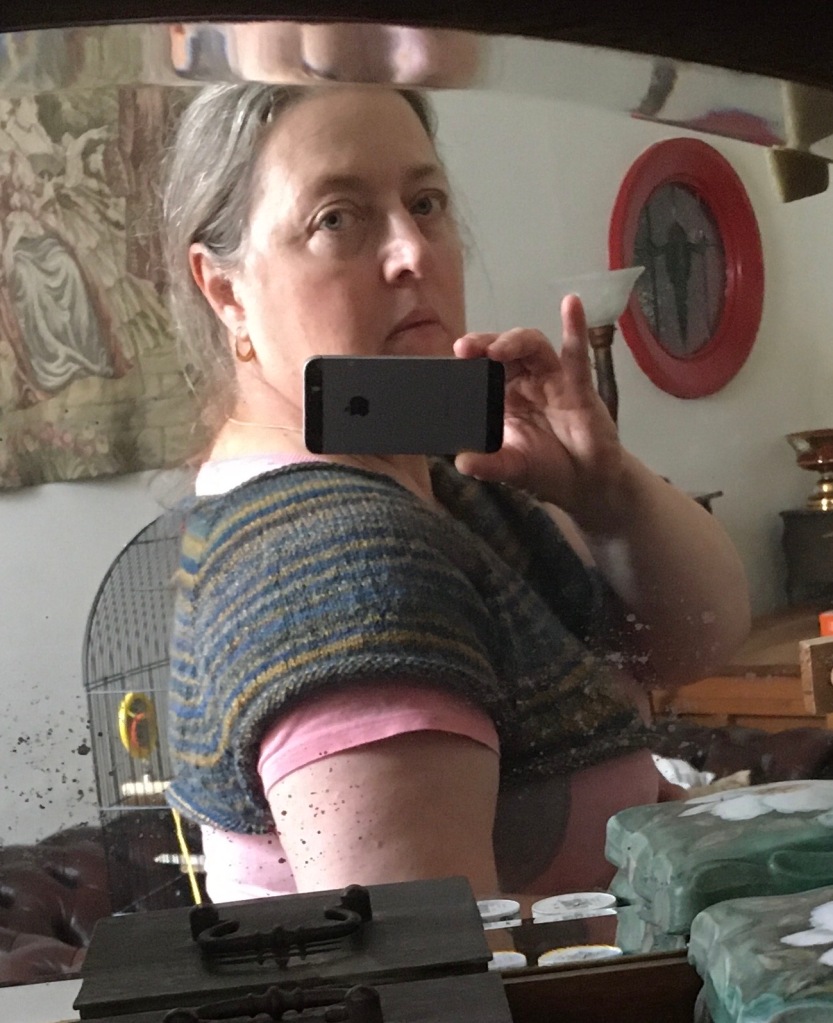
This pattern is “Albini” by Orlane Sucche. It is designed for 8ply yarn. My yarn is closer to 5ply so I did a bunch of calculations based on gauge. I’ve knitted a smaller size than my bust measurement but with a full bust adjustment that I made up. There is a line of increases forming a dart equivalent running from under the collar to the fullest point to give extra width then some short rows to give the needed extra length. It worked really well thankfully.
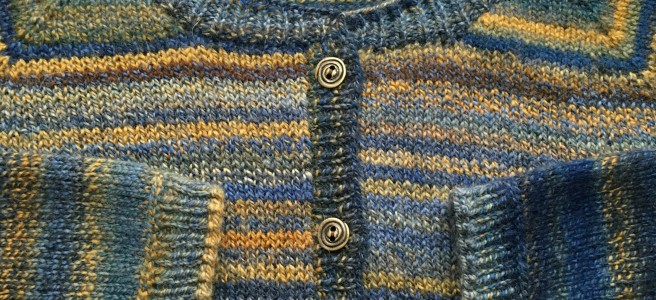
The colour placement is almost completely random. I did choose the lightest ball of corrie/suri for the upper body and I deliberately dyed the last 50g lot darker than the rest when it turned out I needed a bit more to finish off the body. At a couple of points I joined on from a specific end of the next ball to give a smoother colour transition. Other than that, the colours lie where they landed. I like the effect.
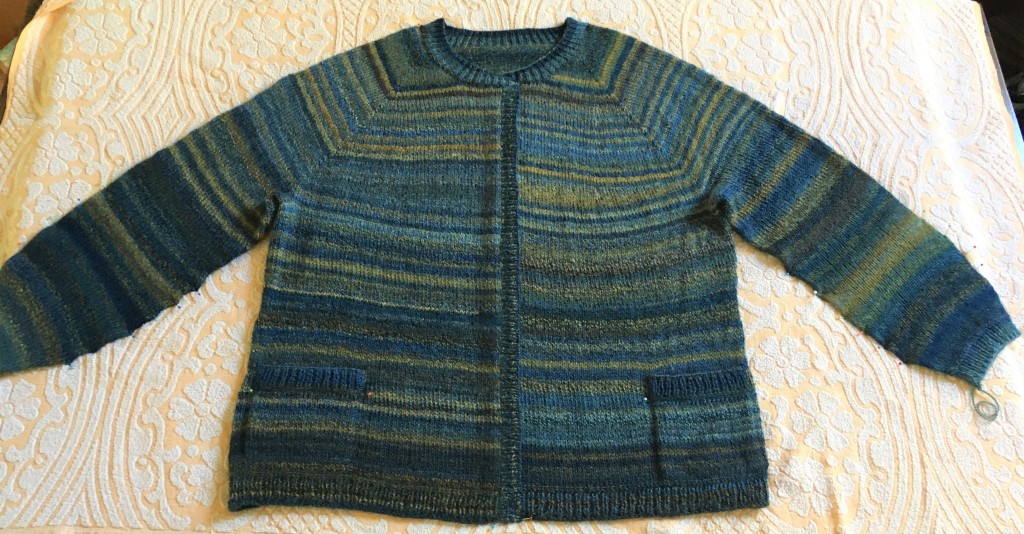
I won’t bore you with the rest of the progress shots, we will skip to the end. Here it is with the knitting finished but before sewing up the pockets, blocking and dealing with all the ends.

Laid out to for blocking after a nice warm bath. Mostly I’ve just patted it into shape. The only tension is on the forearms which were a bit tighter than I wanted despite being knitted wider than the pattern (one sleeve knitted twice) and a few edges like the neckline and pocket edges so they would sit right. I was amazed at the change in handle of the fabric after blocking even without tension. It is so much more fluid now. This fluidity is probably enhanced by the long staple suri.
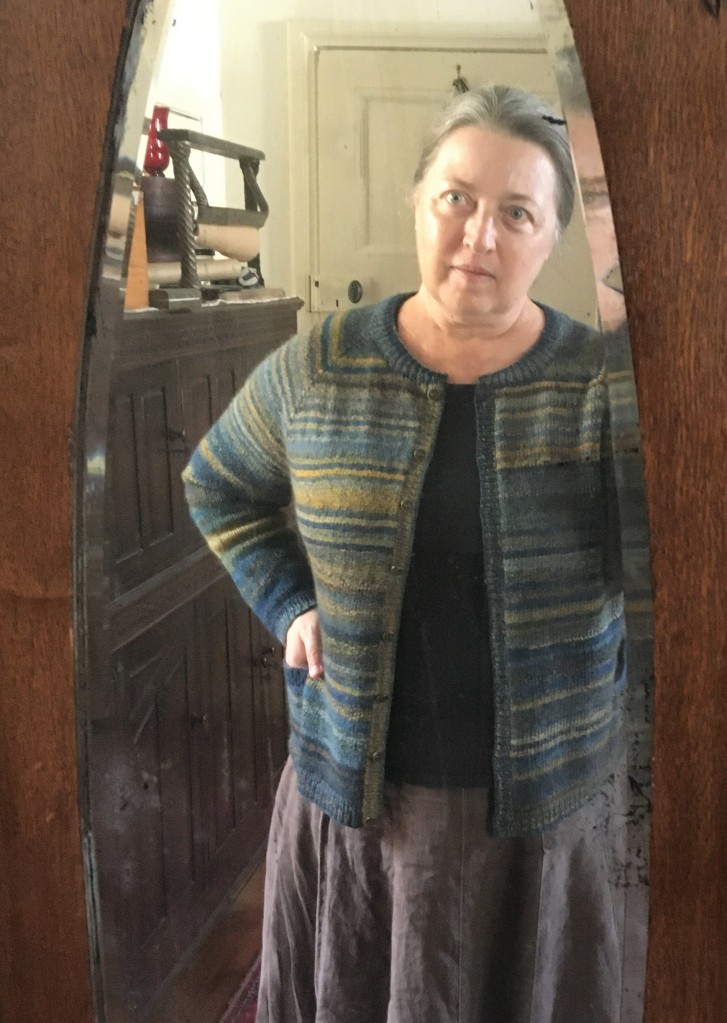
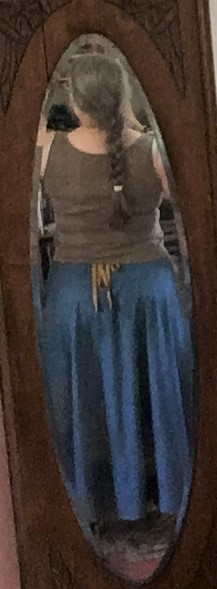
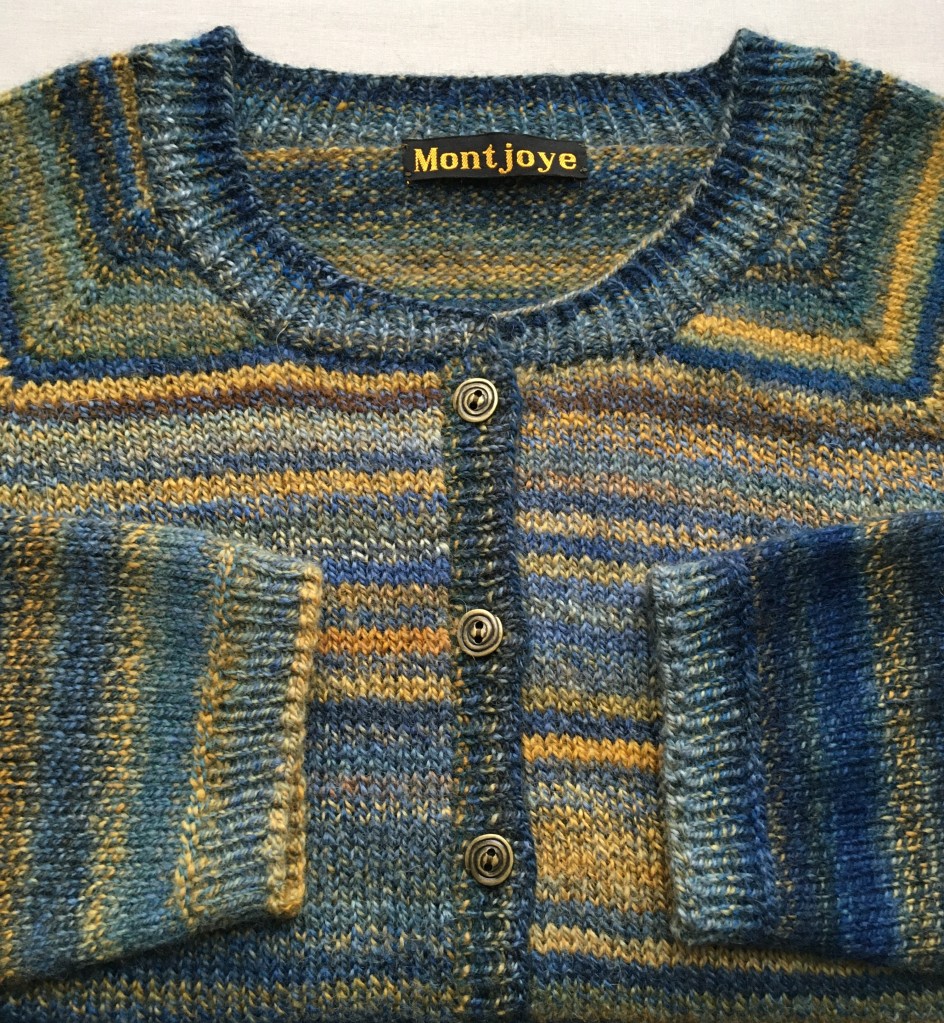
Here she is fully finished with label and all. There are a bunch of new knitting things for me in this too. First knitted pockets, first lateral braid stitch and a new kind of buttonhole.
A few friends said this reminded them of Van Gogh’s “Starry Night” painting. I was delighted to find spiral buttons in stash to further that association.
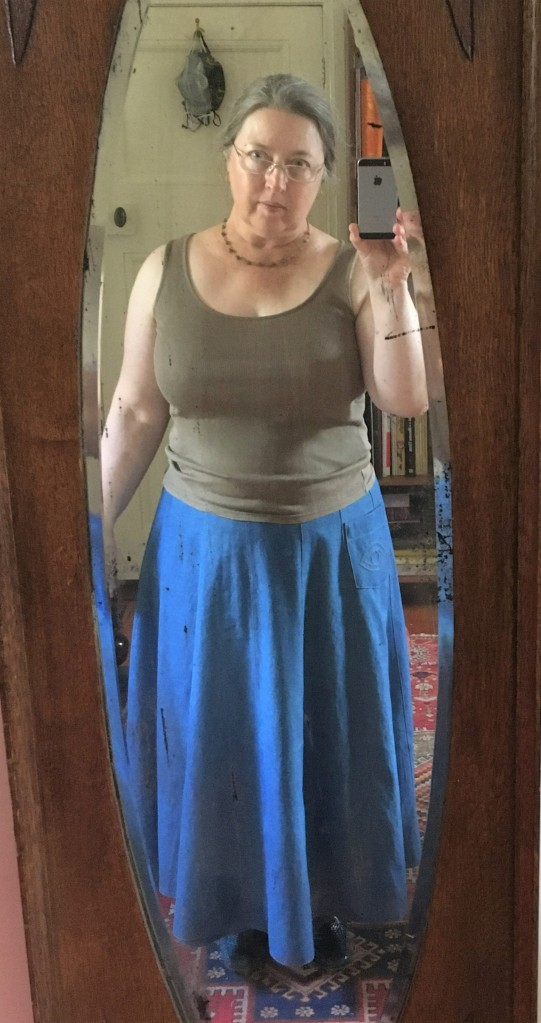
I am so very pleased with the fit. Look, even fully buttoned it fits without strain. That never happens with ready to wear garments on me.
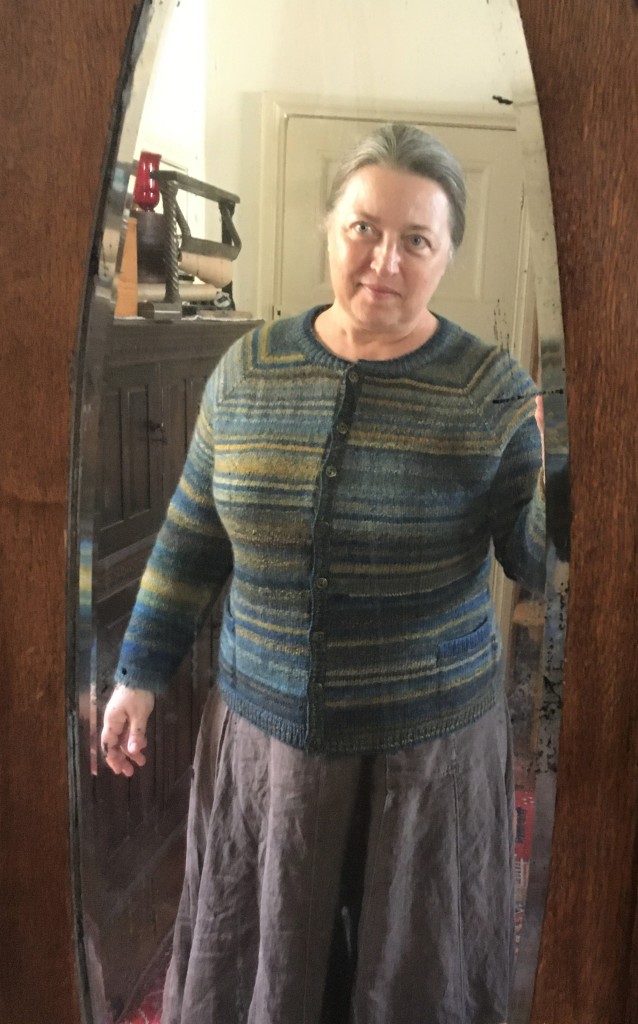
I’m much more likely to wear it open or with only a few buttons done up