I have a good friend for whom the quatrefoil is significant. This is a four petaled flower thing used in heraldry. Something over a year ago I got excited with the idea that I could make quatrefoils with shibori. Just do a standard square type fold and clamp it near one corner. But what to make and therefore what fabric to dye? Well, I have the coat pattern I made for her back in 2015 and she lives in Tasmania which is is on the cold side. So maybe a dressing gown? I’d had the thought for a while that such a thing might be nice done in cotton flannelette, which is also easily dyeable. Voila I had a plan. I managed to source some white flannelette, whew.
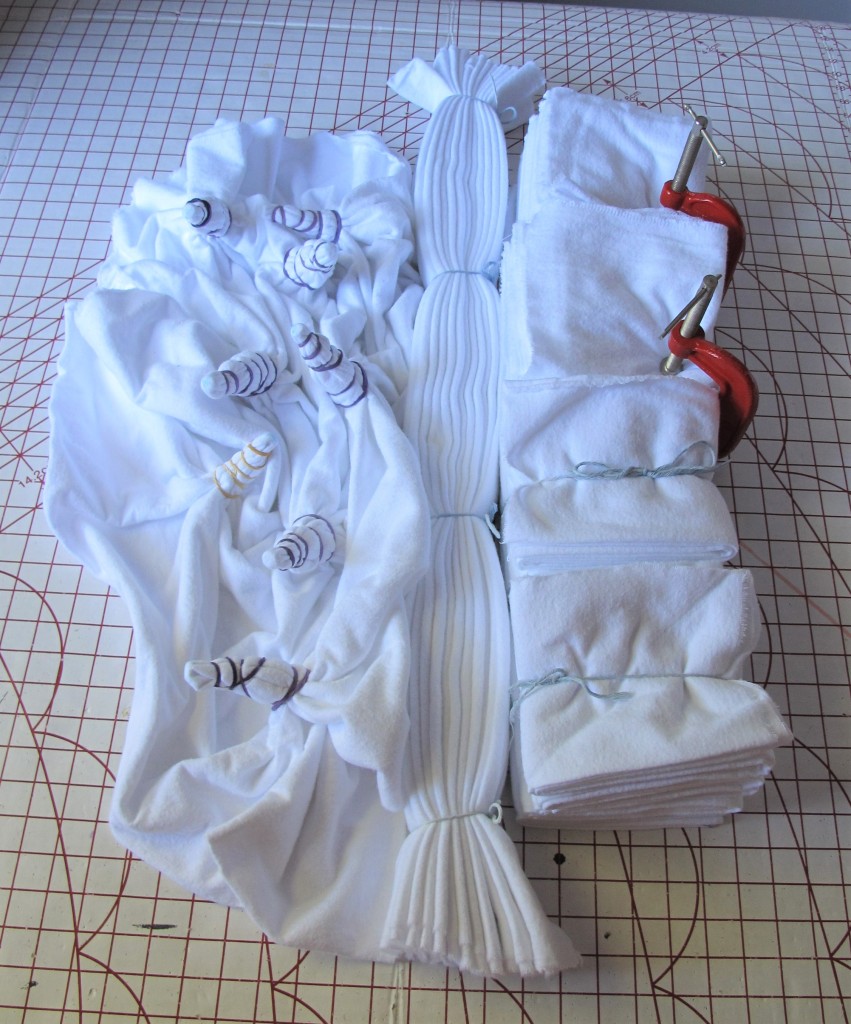
The small flaw in this plan was that flannelette is bulky, and I only had two appropriate clamps, so I could only do two quatrefoil panels, bother. Never mind, these became the gown fronts. I did another two with similar square folding but just tied which became the back panels. One was done pleated which i used for collar and facings. The last piece was done wrapped around long screws which gives a pretty effect that makes me think of dandelion clocks. This I used for sleeves and pockets.
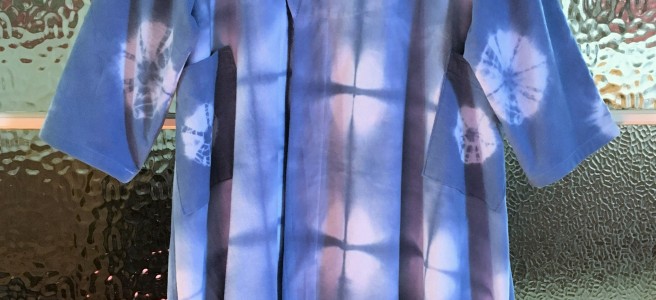
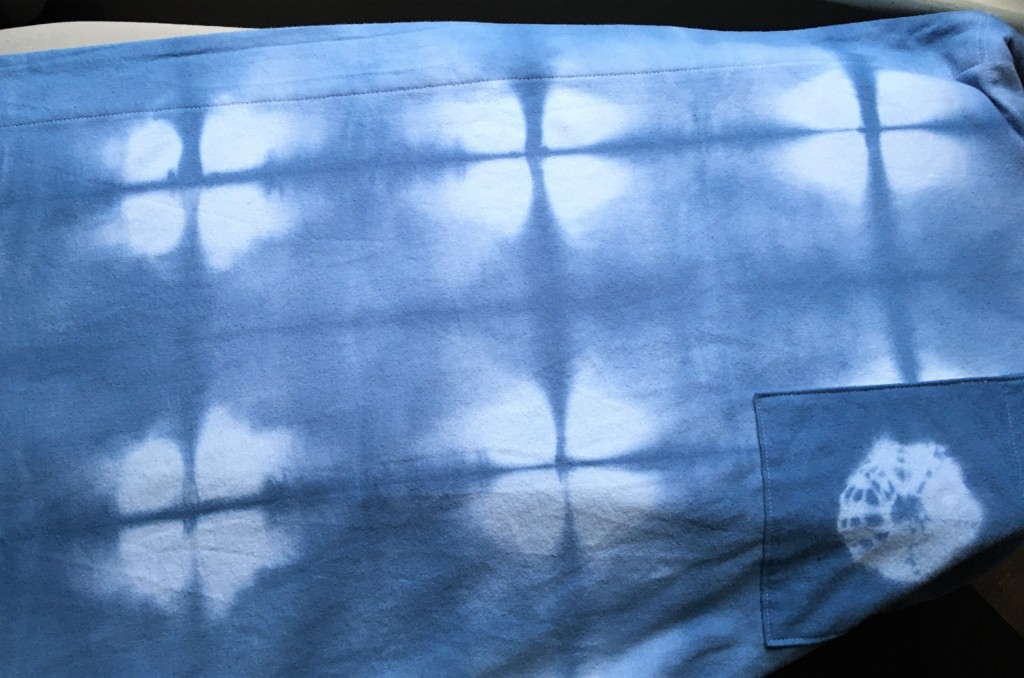
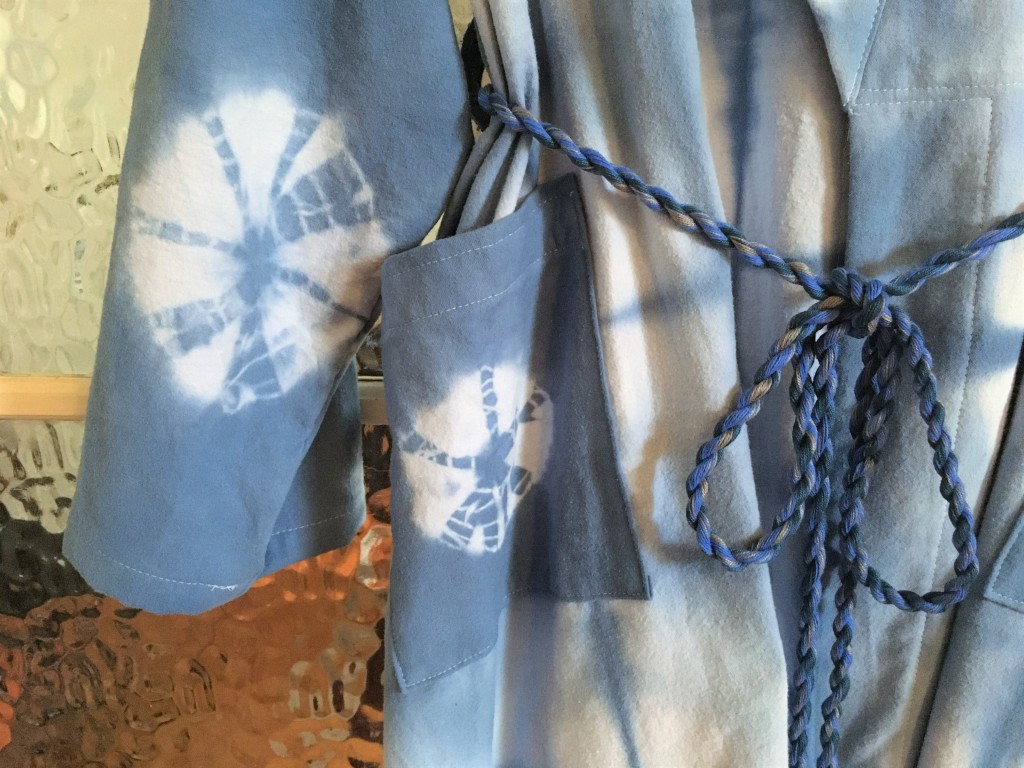
The best quatrefoil effects I managed, photobombed by a pocket:
A dandelion clock sleeve:
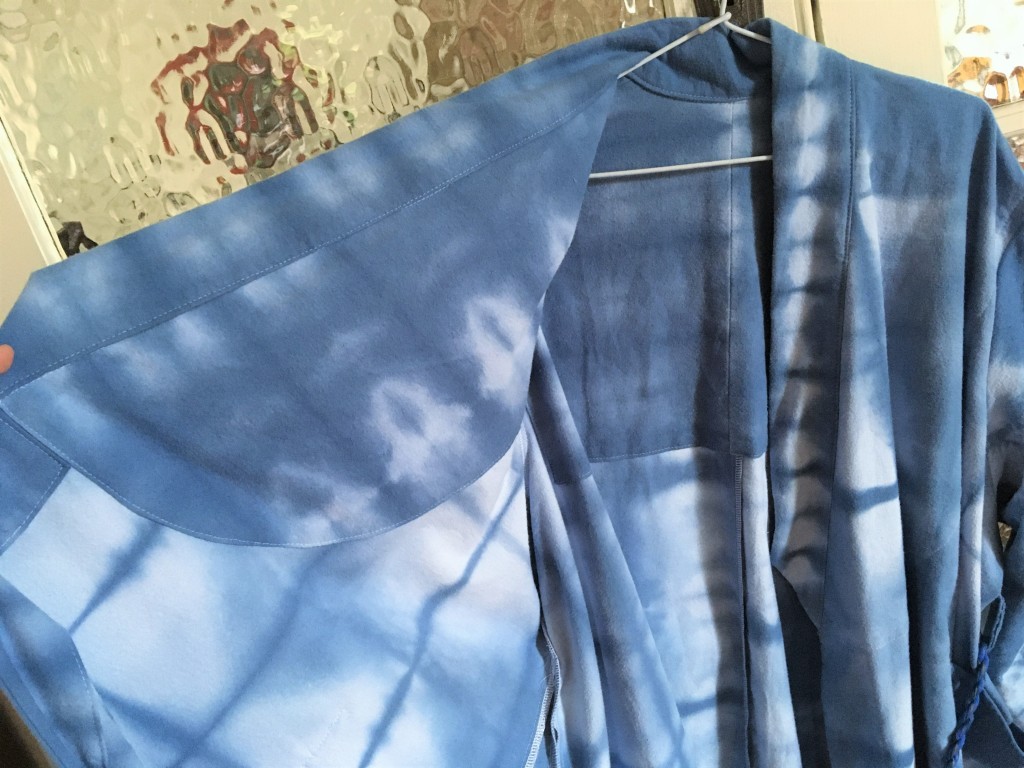
It has deep facings front and back to increase warmthPocket and belt shot. The belt is made of three colours to come the closest I could to the blue of the dye, if you squint and let the colours blend. I had enough fabric to make a self belt but given how flannelette sticks to itself, I thought that was a bad idea.
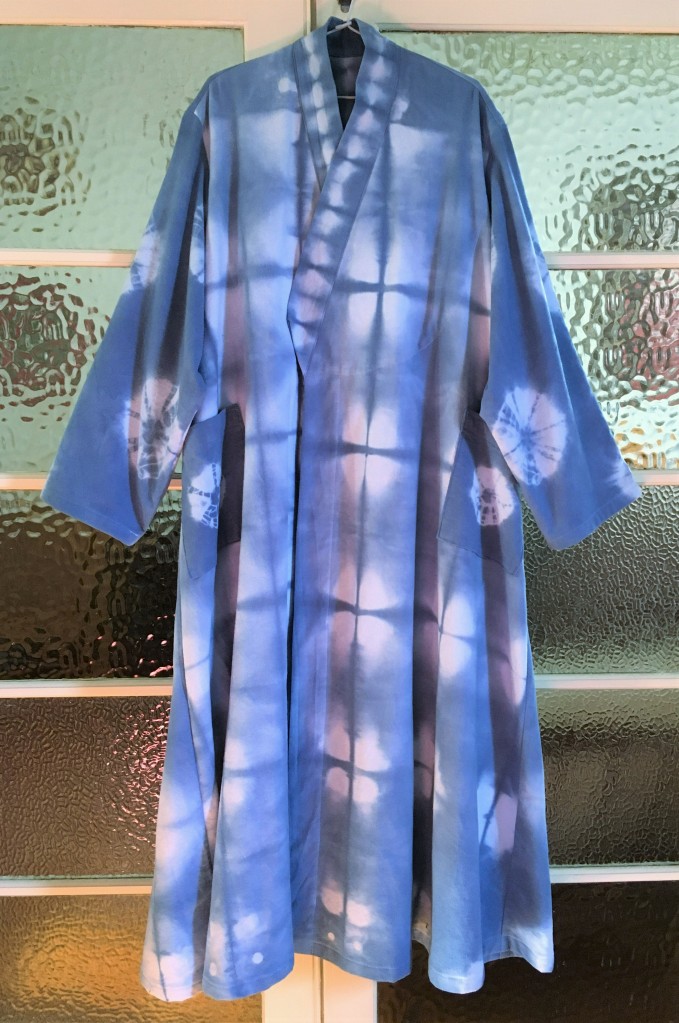
Here is the whole thing from the front. It’s a fusion garment. A-line body, western cut sleeves and armscye, kimonoesque collar for good chest coverage and I confess, ease of construction.
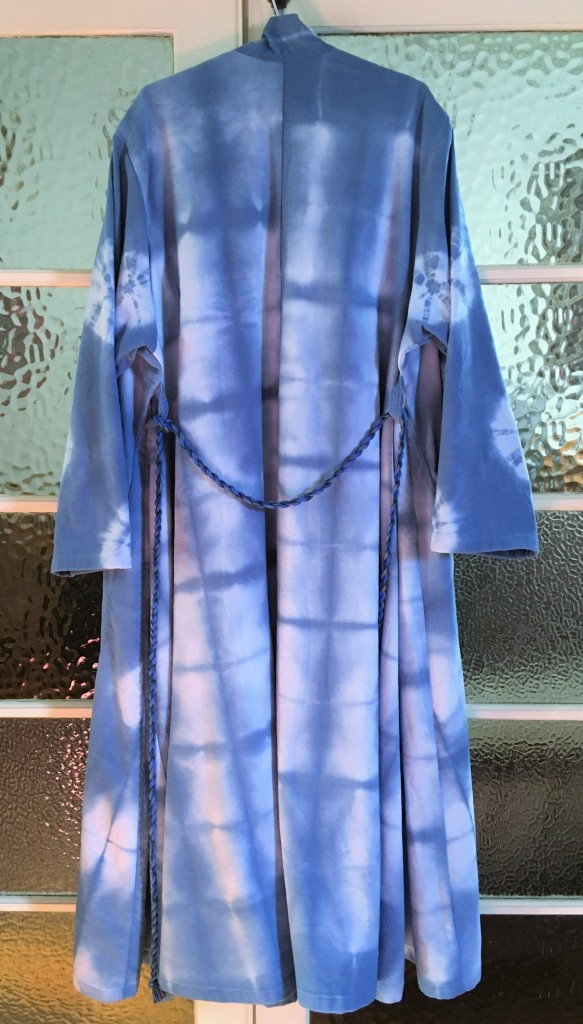
and from the back
I really like it. It is one of those gift makes that I would be very happy to keep! I didn’t though, I was good and posted it off to her as was intended.
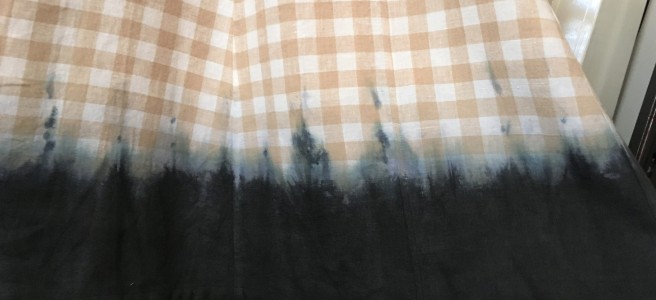
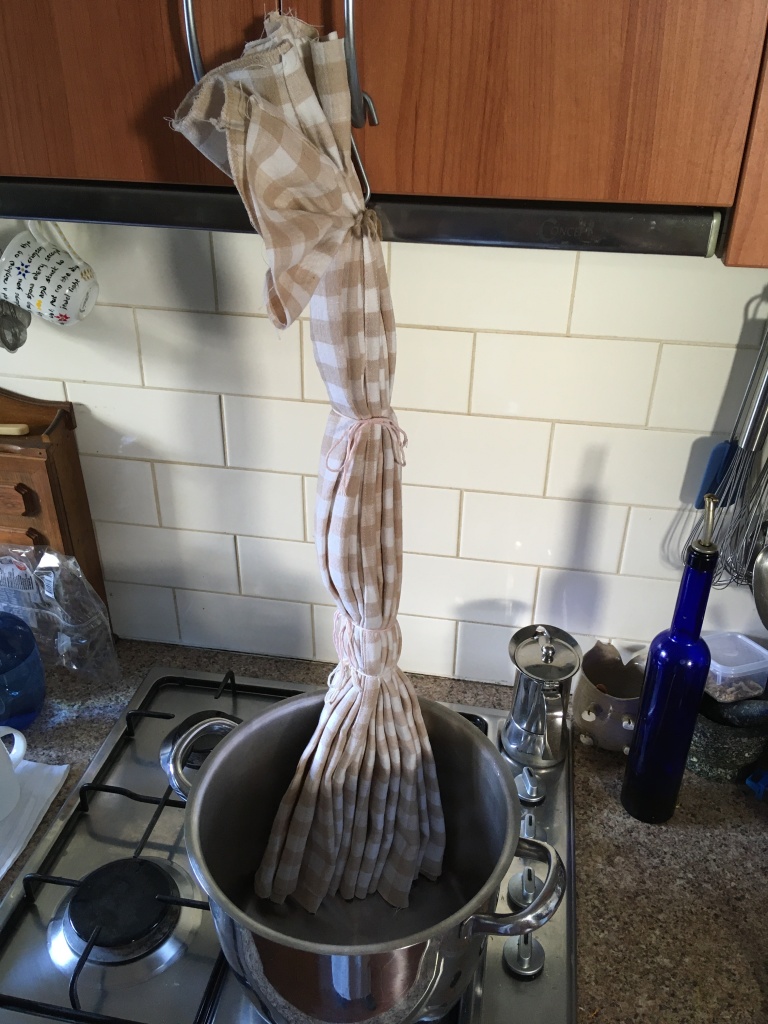
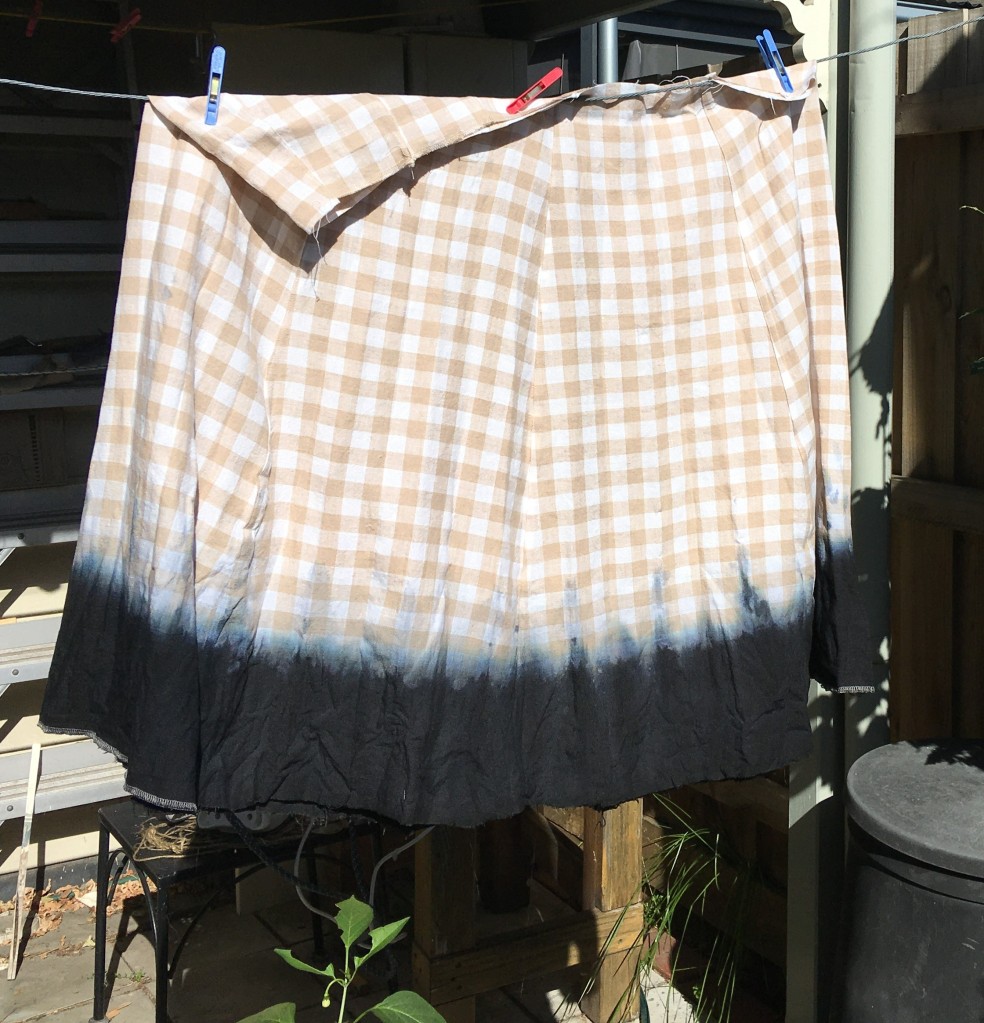
I’ve been thinking on this plan for months. Mid weight linen gingham, purchased maybe 5 years ago as a stash reject at a market. Cut a bodice, make an A-line skirt from the rest of the fabric. Pleat that up and hang it to control what fabric sits in the dye. Then sit it in a black dye bath.
This is a more controlled version of the dyed borders I did on the Lady Macbeth Gown. It came out neater than I expected. I thought there would be more of an ombre effect. The hem section has been rinsed, washed, rinsed etc then sun dried and ironed. It will probably shed more dye when I wash the whole dress. I didn’t want that to happen until the bodice was attached or it might look unnaturally clean. I am pleased with how black the blackest bits are. That may not be so after some more washing.
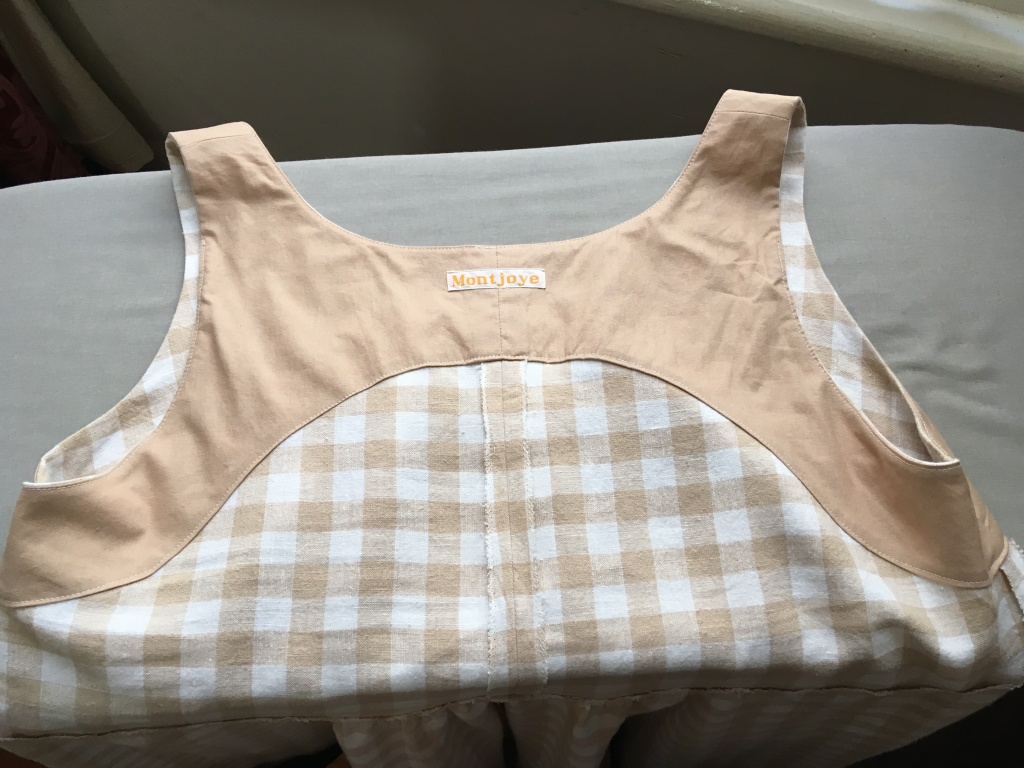
Then I built the bodice, which I remembered to cut it with a back seam so I could do the shoulder turn trick with the facing, which means the entire thing can be machine sewn.
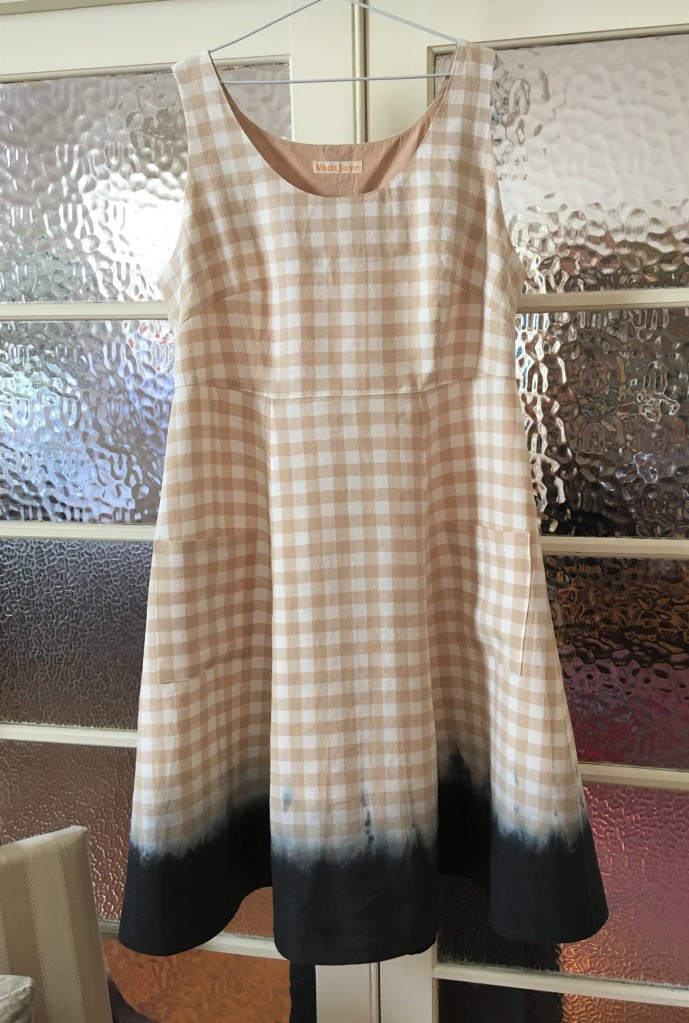
Then the hem was faced and the skirt attached. Done.
Or maybe it’s done? I like this on the hanger, though I wanted it longer and with a deeper more complex border. I don’t mind it on but I had somehow forgotten that I’m not fond of pale dresses. Sigh.
I’m really not sure about it. It might go another round with a dye pot. I might wear it for a bit first. Hmm. I’m pleased with the pleating and hook arrangement as a non-resist dye control method. Any attempt at a deeper treatment of this sort would either require a deeper pot or be messier due to tilt and crumple resulting from lowering the fabric further into the pot. That latter wouldn’t necessarily be a bad thing. Hmm, musings.
I’m having a minor freakout over an upcoming trip. So, sewing being self soothing for me, I’m building garments that have been in my mental queue. They might just turn into a new travel wardrobe.
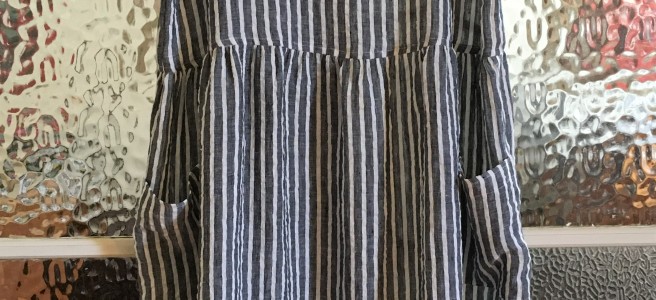
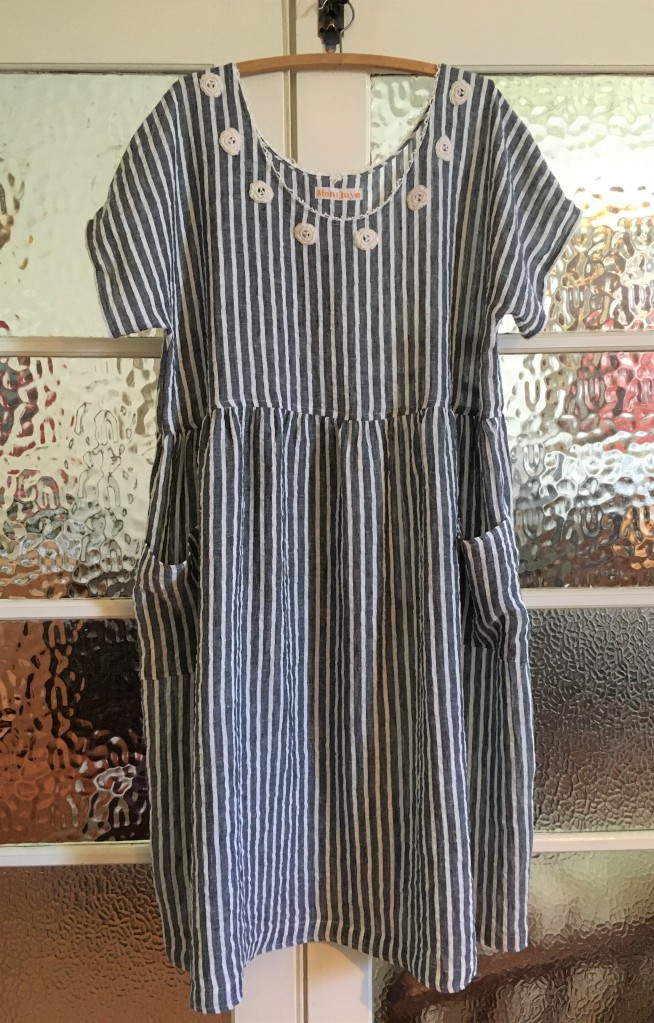
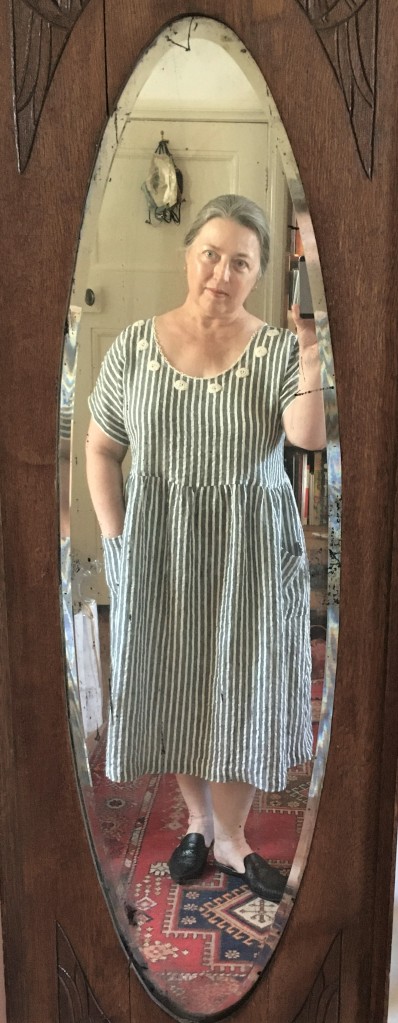
This one is floaty, runkley, stripey linen. I bought it a few years ago ridiculously cheaply. I kept thinking of making a buttoned overshirt type of thing, but the runkliness would get in the way of making neat buttonhole bands. It does though make a nice simple dress. T shaped bodice with an angle down from the shoulder. The skirt is just two drops of the fabric, seamed and gathered onto the bodice.
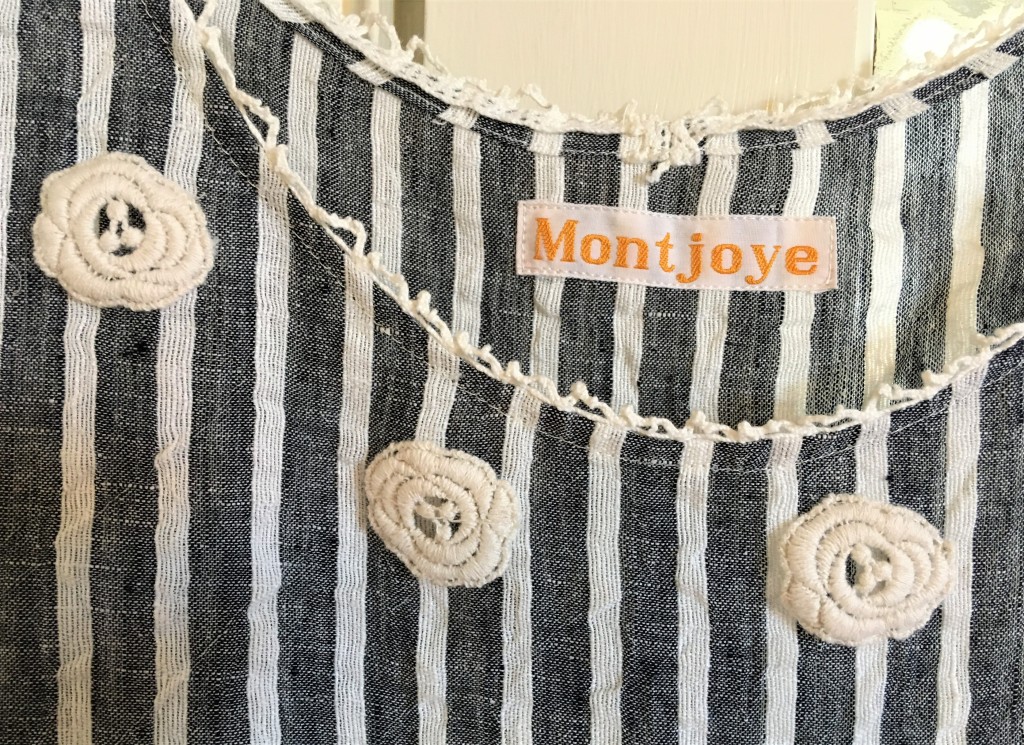
The neckline uses a treatment I rather like for floaty fabrics. Use a thin but strong cotton picot lace. Sew it on at the seamline. Press the fabric away from it then fold under and hem. The lace prevents the edge stretching and there is no bulky facing. I’ve also done this starting with an overlocked edge and just top stitching after the pressing. I like the folded finish better but different fabrics ask for different treatment. Yes the label is crooked. Or really, the dress is cut a bit crooked. I should have put the effort into pulling threads to find true weft grain. I can usually do it pretty well by eye, but not on this fabric!
The flower motifs were a Daiso find maybe 5 years ago? It did not escape my notice that they have trefoil centres.
Here it is on. So comfy and cool. Of course it has pocketses.
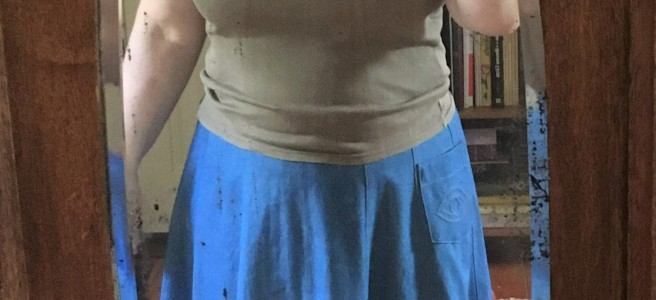
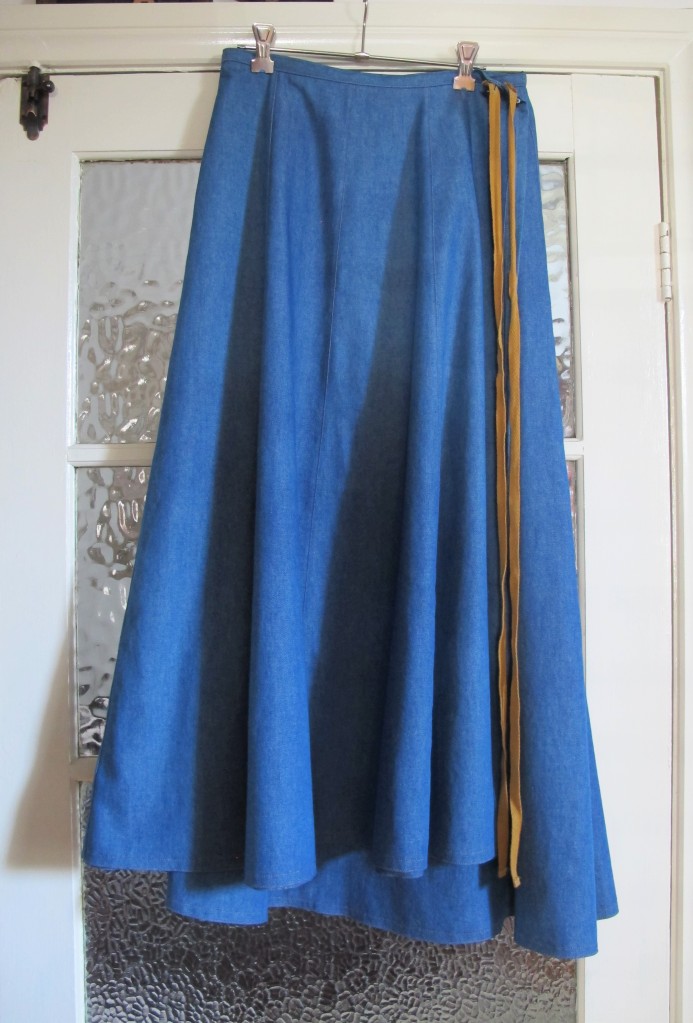
A plain title. A fairly plain skirt but a long wanted one. Ha, both long and wanted! A 16 gore wrap skirt in lightweight denim. I’ve made two of these before and love the style. One in three alternating colours of pinwale cord and one in chocolate brown cotton. I’ve been wanting a denim version for ages. Done. Ties stolen from the multicoloured big skirt, an extra advantage of detachable ties. That hemline looks more interesting on the hanger than in wearing. A substantial derriere needs extra length to get a level hem, ha!
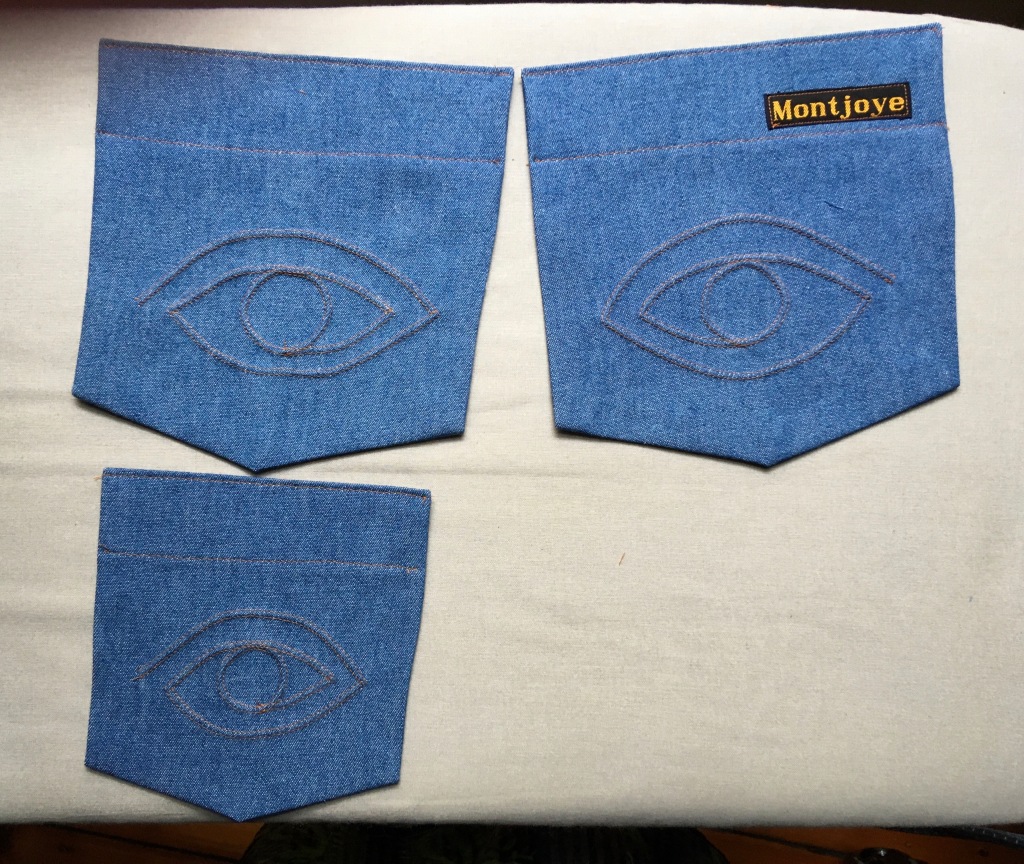
I managed one progress shot and one only. I have fun coming up with new stitching designs for jeans pockets. This isn’t trousers, let alone jeans but it is denim. Lens shapes are easy to sew, so I’ve been thinking of trying for an eye design. Last time I tried to draw one it wouldn’t work. This time I sat down and had a workable design in a couple of tries, hurrah.
Less happily, I had to place the back pockets higher than ideal for pocket function so they would not interfere too much with the hang of the skirt. Oh well. I shall have to make eye pockets for some other garment.
This is going to be a really short blog post. I’m feeling the garment will be well used and much worn though.
and a disappointing back view. Hard to get the photo alone and the pockets don’t show up at all. Oh well.
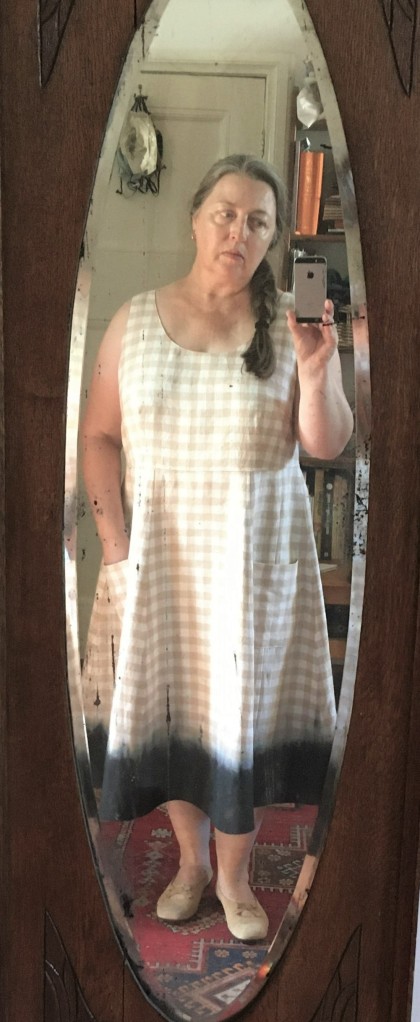
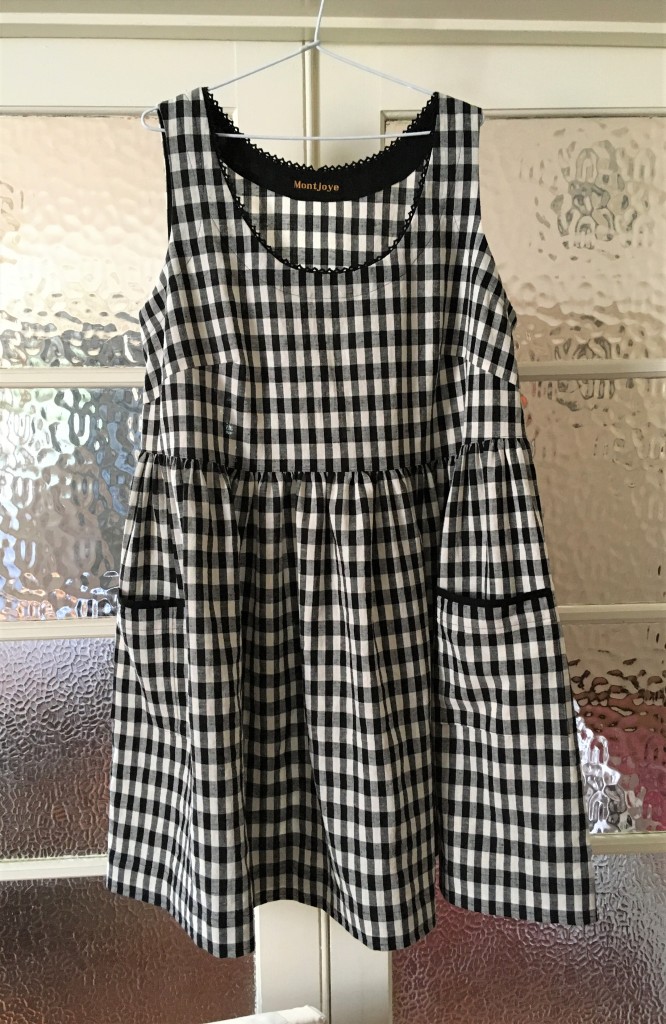
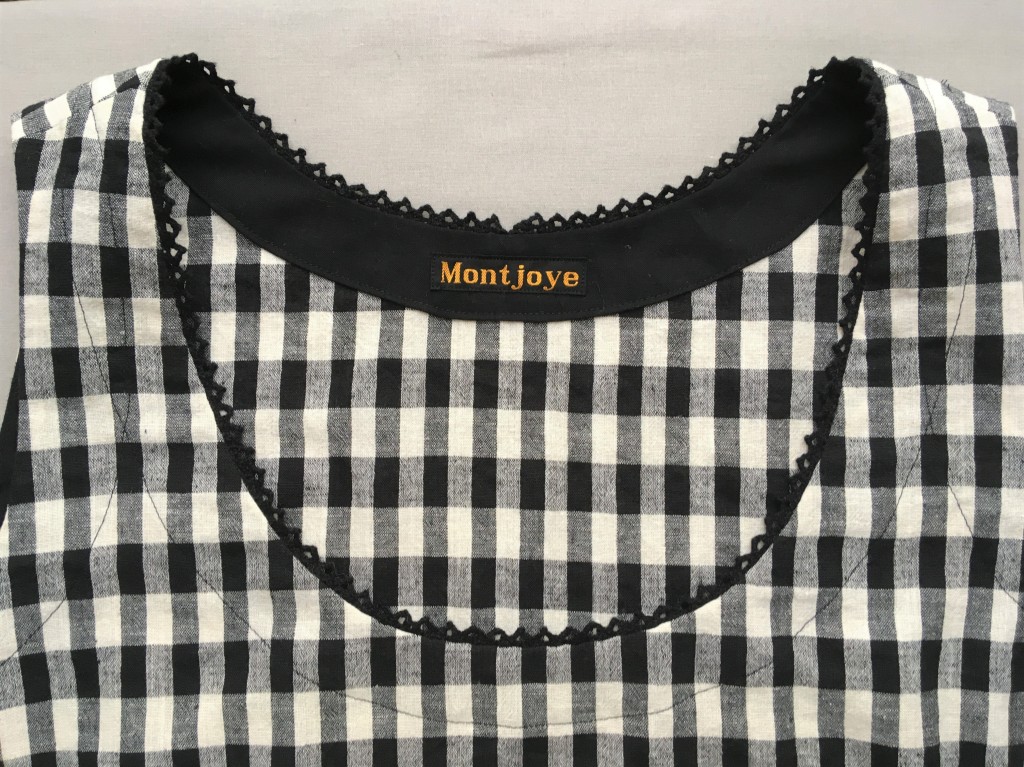
I’m not reading fashion media and I’ve not been out of the house much in a couple of years so I’ve not really much idea what is considered fashionable in clothing. The fabric shops however think that gingham is quite the thing. This lovely stuff is very nearly gingham so I thought I’d get it turned into a garment before the moment passes. It was sold to me as pure linen. I scoff. It might possibly be a blend but I believe it’s cotton. I really like it though. On washing, it went slightly wrinkly with a pleasing handspun type feel. I’ve been wanting a few more cool and comfy summer dresses so here is one.
I made it up in two days* and within 10days of receiving the fabric. The latter is most unusual. Mostly my garments are from well aged stash or recycled from other garments. I failed to take any progress shots so you just get a few details instead.
*would have been one but my recurrent overuse injury wouldn’t let me.
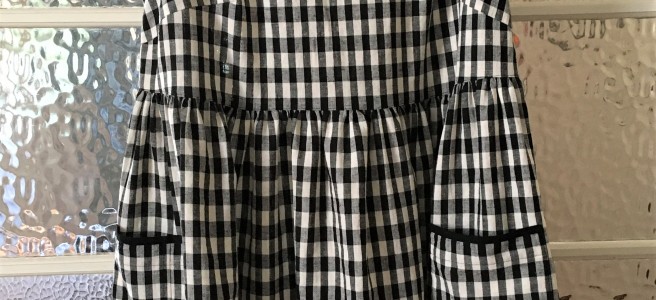
It has facings from plain black cotton (stash reject from a friend) and a little subtle black cotton lace trim at the neckline. I figured it would be cooler without a lining. I’ve been feeling the need to minimise femininity in my outfits lately but the lace trim just demanded to be there. It looks so right I’m pleased I included it.
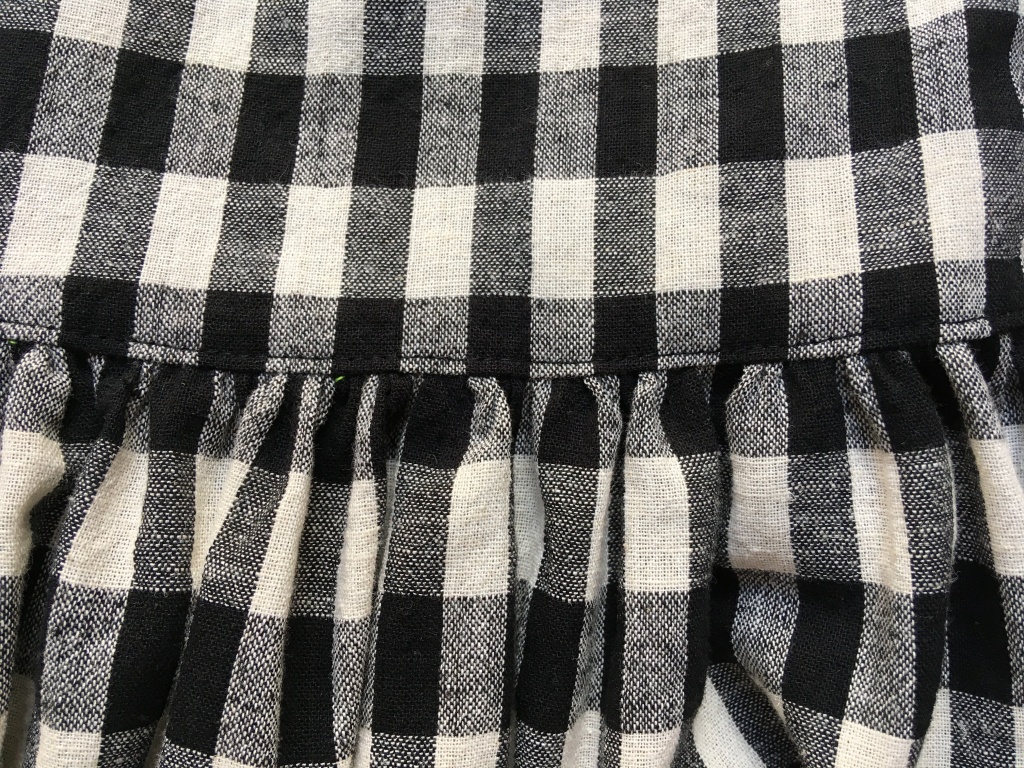
I carefully made sure that the waist seam had the black stripe on both sides. I figured it would look neat and possibly more slimming than otherwise.
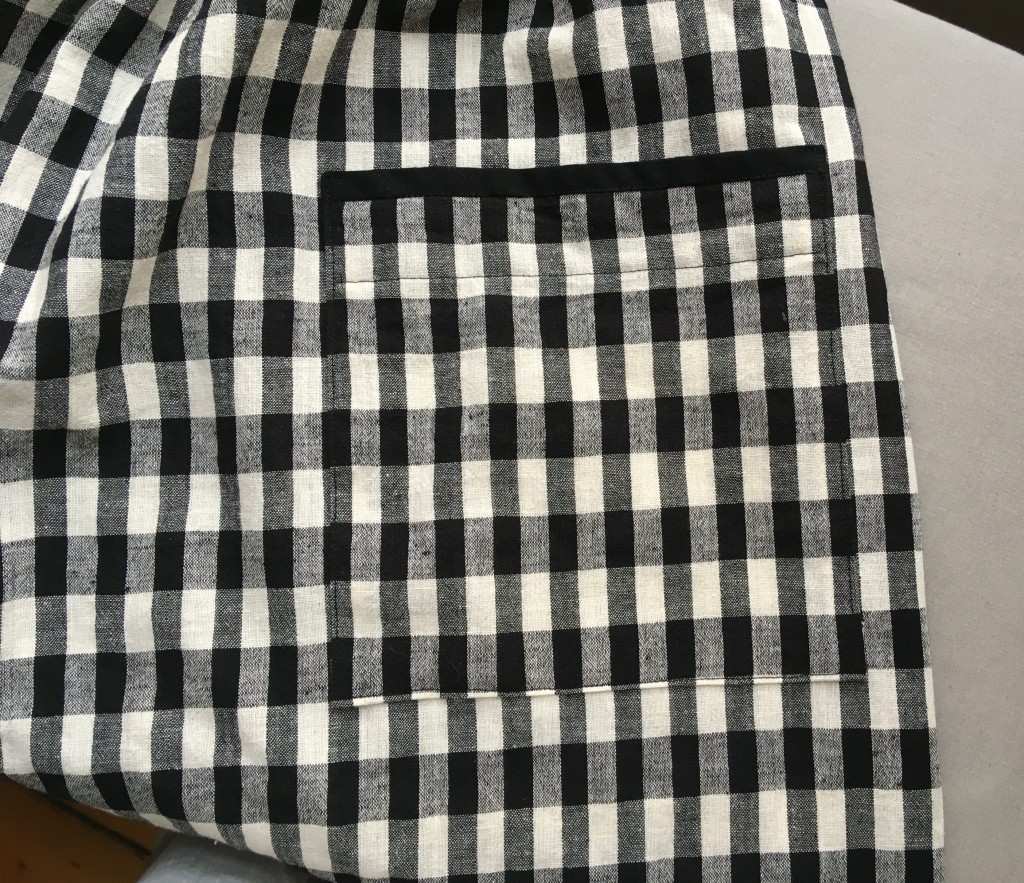
The pockets are stealth except for a little black band at the top for interest and to support the quite stretchy main fabric.
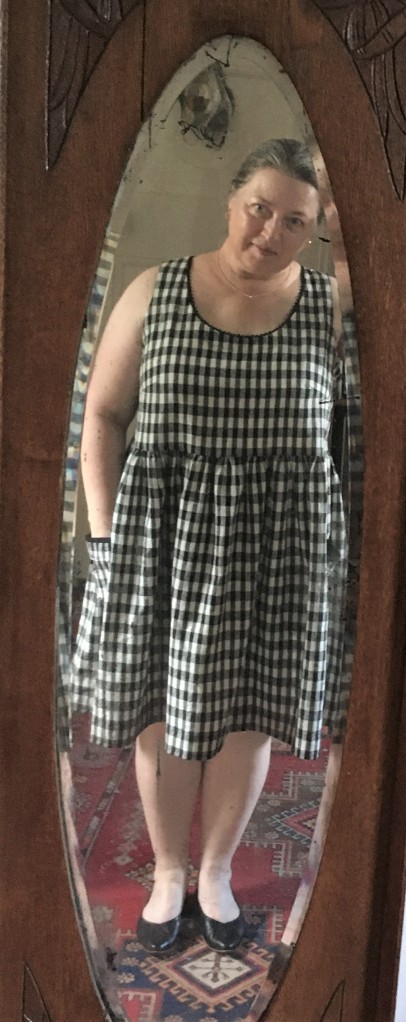
and a pic of it on. Simple, nice, neat, comfy. I think i will really enjoy this.
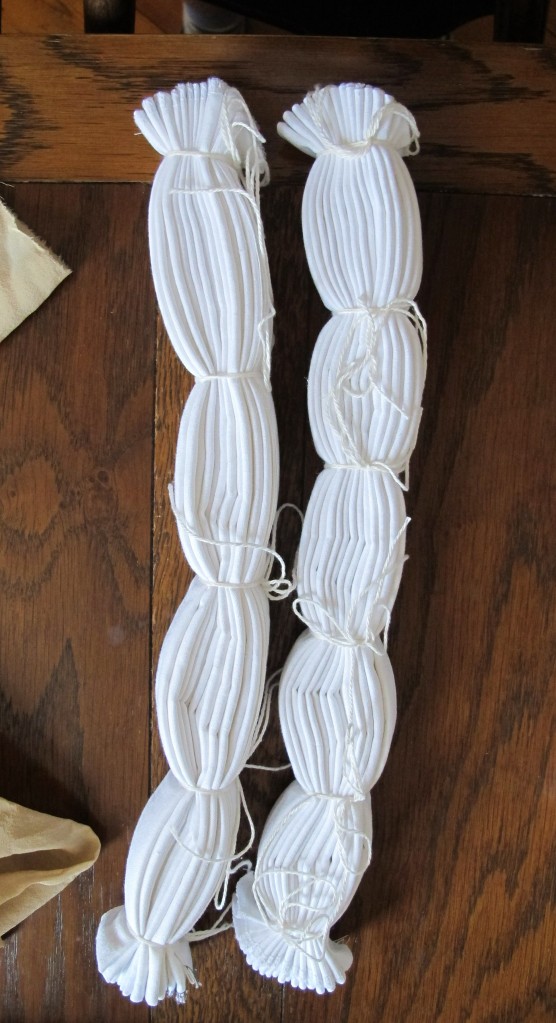
When prepping materials to dye in our indigo adventures three years ago now, I pleated up some fine, crisp linen(?)* with the intent of making a tiered ruffled skirt. I was working at speed to get everything ready in time and didn’t think hard enough about how much fabric I needed. This turned out to be only enough for a bit more than the lowest ruffle.
*Possibly not flax? Definitely cellulose fibre. My best guess is a cotton ramie blend. It was bought very cheaply in folded bales from a closed shop clearance sale.
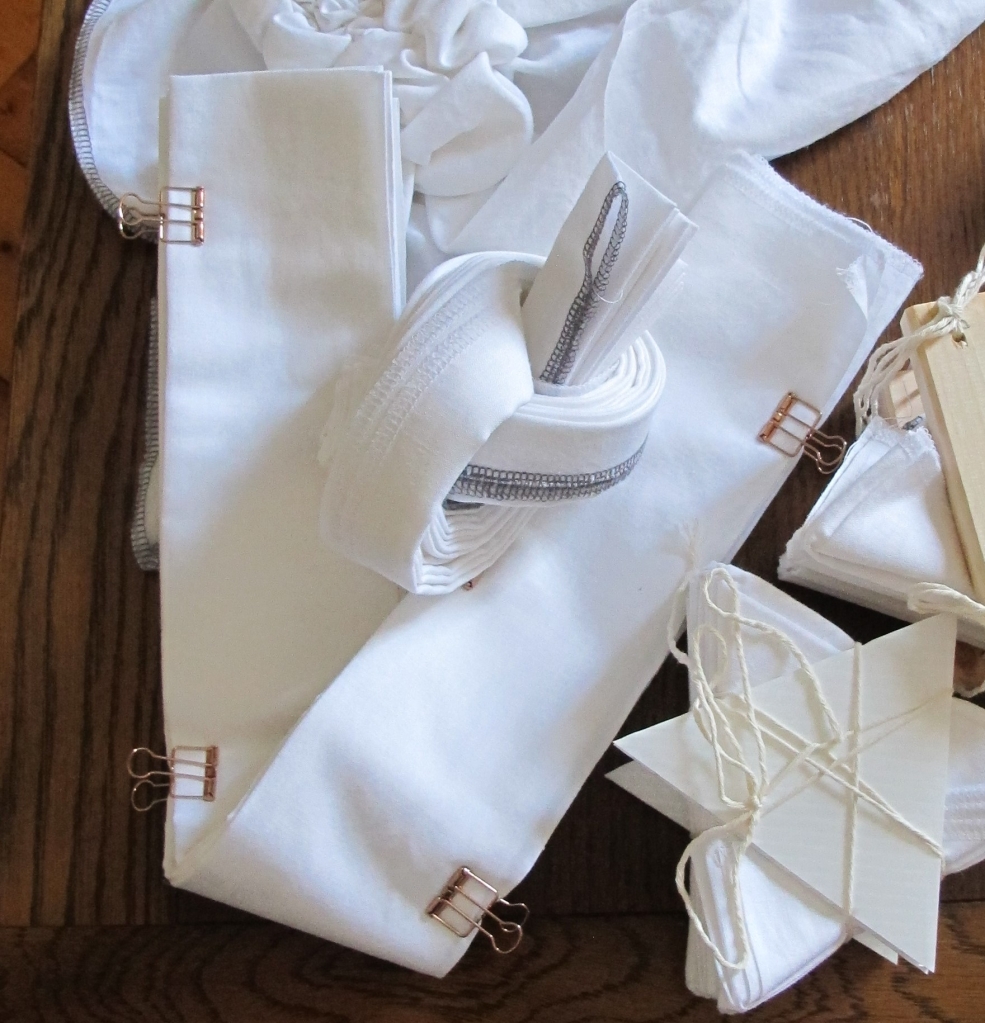
Happily, I also pleated up another piece of the same fabric but slightly differently and with no specific plans attached. This is the piece with the copper coloured clips below
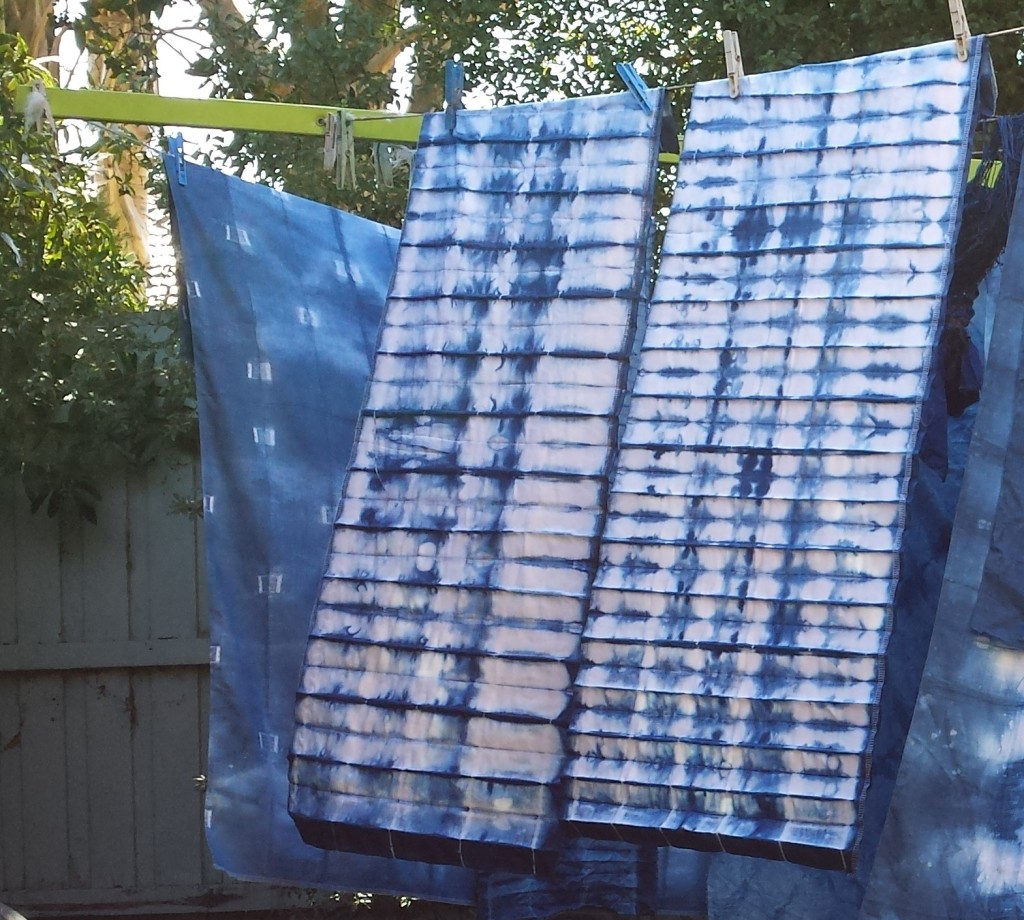
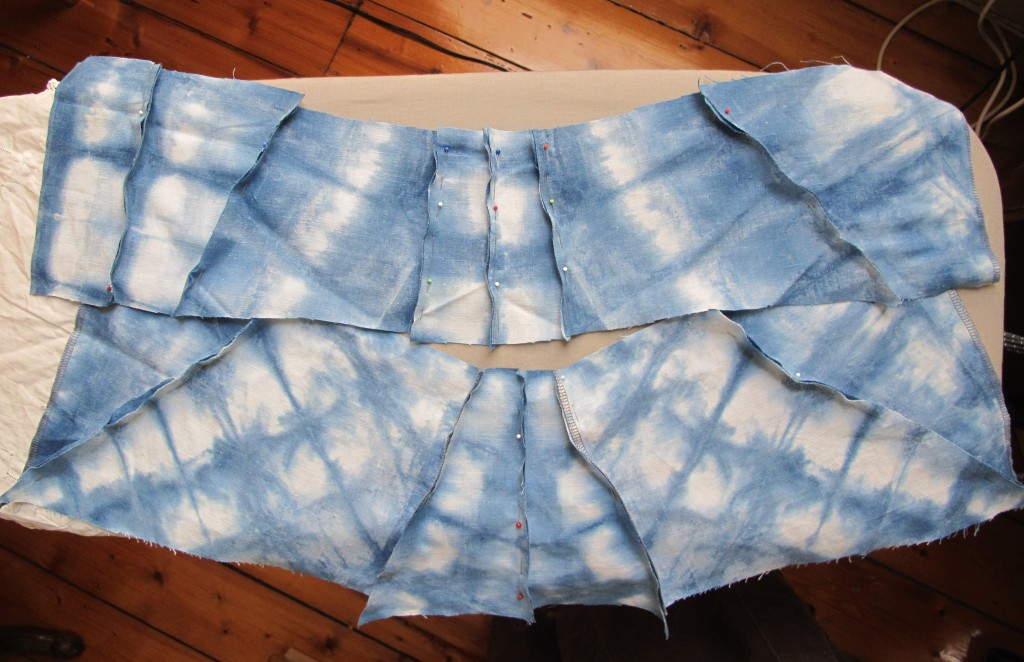
by chance, I have a picture of these three pieces next to each other straight out of the dye vat
Argh. These images are bigger than I would choose to use. I’ve moved to a different computer and don’t currently have a copy of my usual photo editing program. Maybe I have to bite the bullet and shell out for it.
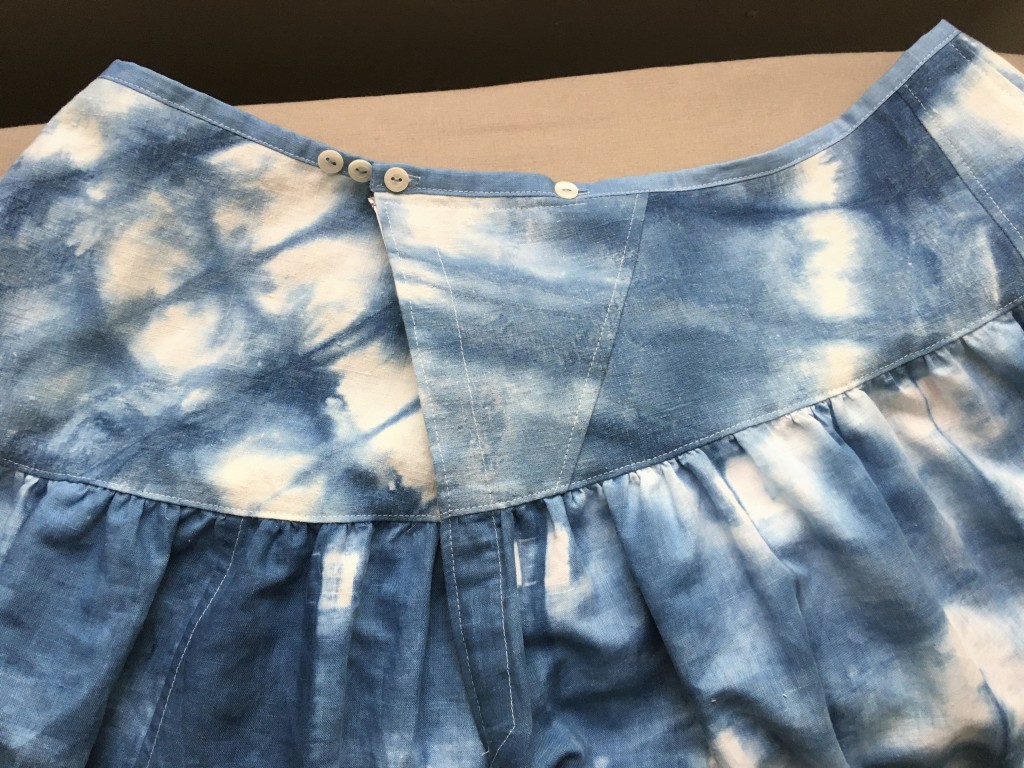
Anyway, All these pieces started the same size and were folded in three before pleating. So they all broke down most neatly to three 38cm wide strips. I used the darkest three for the middle tier and ended up needing 5 of the remaining six for the bottom tier. I still needed a top section to get the overall length I wanted. I originally meant to make another rectangular cut gathered arrangement for the top part, but flat to the body is more flattering even though it will mostly be covered in wear. So I fiddled appropriate shaped curved pieces out of the bits leftover from the indigo rays frock which is also and usefully, a slightly heavier fabric. This is just pinned, prior to final adjustments. Silly me fitted it over another skirt though so it ended up needing more overlap than intended.
The fastening is similar to the overlap method used in this colourful remodel but buttoned instead of the ties used there. A friend suggested the buttons and I think I like them. They are more comfortable than the ties I think, but require sewing on many buttons to provide the same breadth of adjustment. Optimistically I have placed buttons for my current size and a couple of smaller options. Fingers crossed I don’t need to add more.
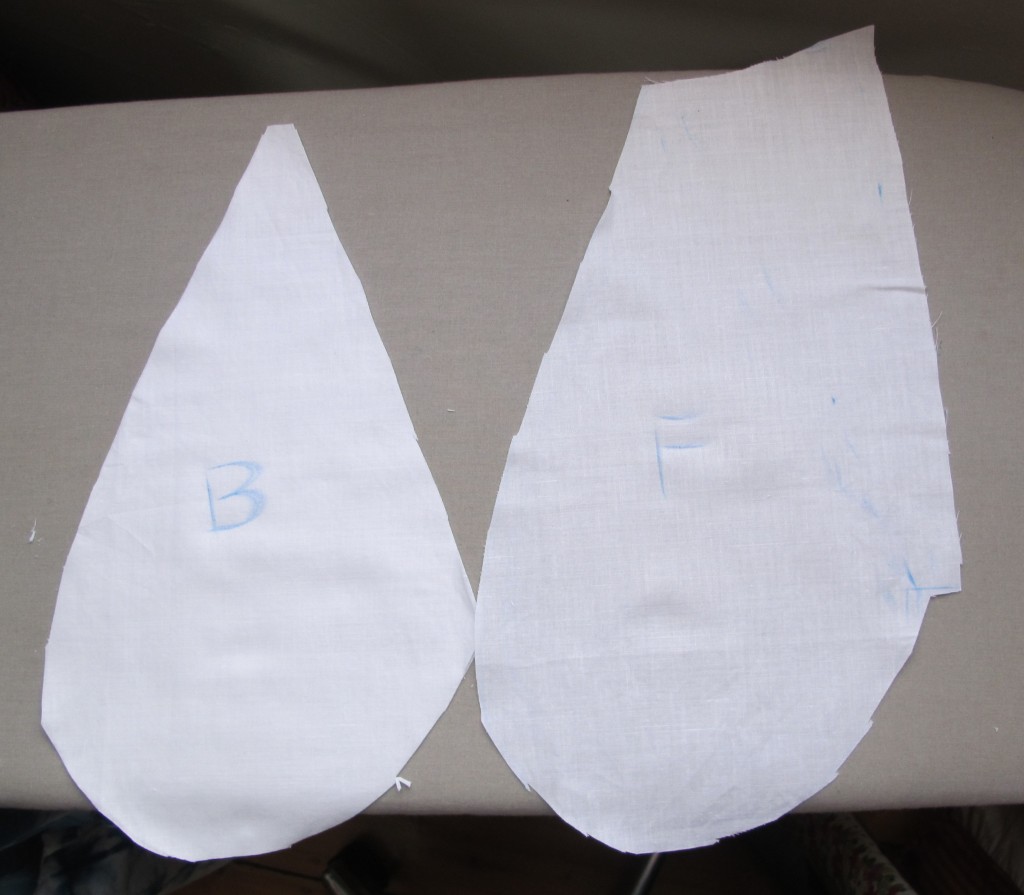
I couldn’t face braining the pockets until I’d finished everything else. So they are not sewn in as elegantly as if I’d planned them from the beginning. I’m happy that they work though, and I ought to be able to make nicer versions if I make another skirt of this kind. Here are the shapes. The front and back need to be different because of the overlap.
and after insertion: the two sides are sewn together below the opening shown. The front section is sewn in under the waistband to support the pocket and contents, so the pocket bag can’t be fully closed or one can’t get in and out of the skirt!
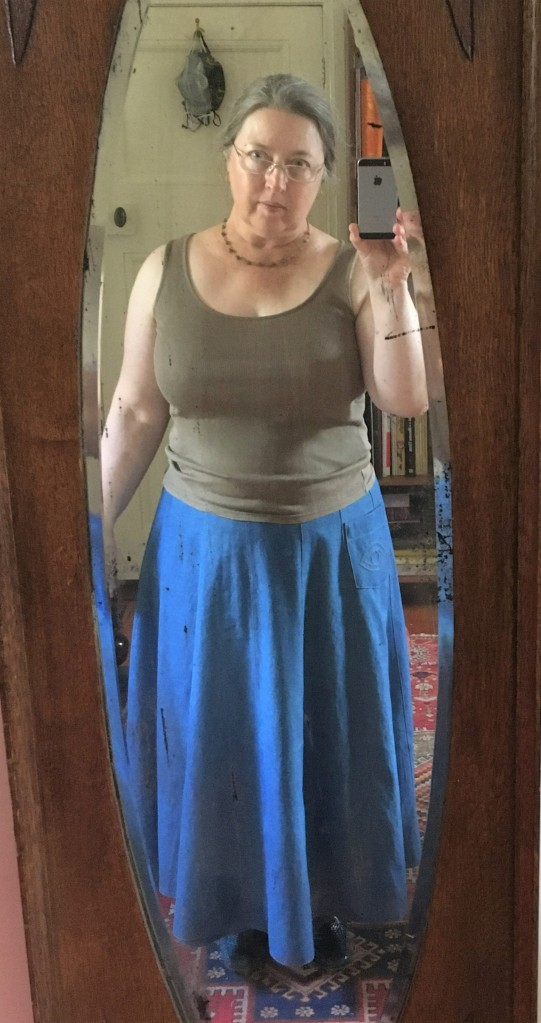
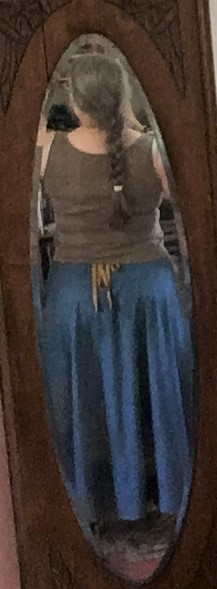
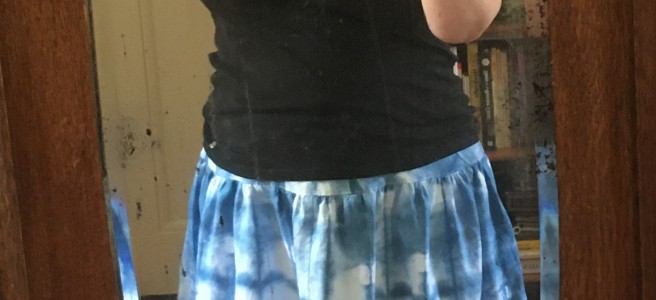
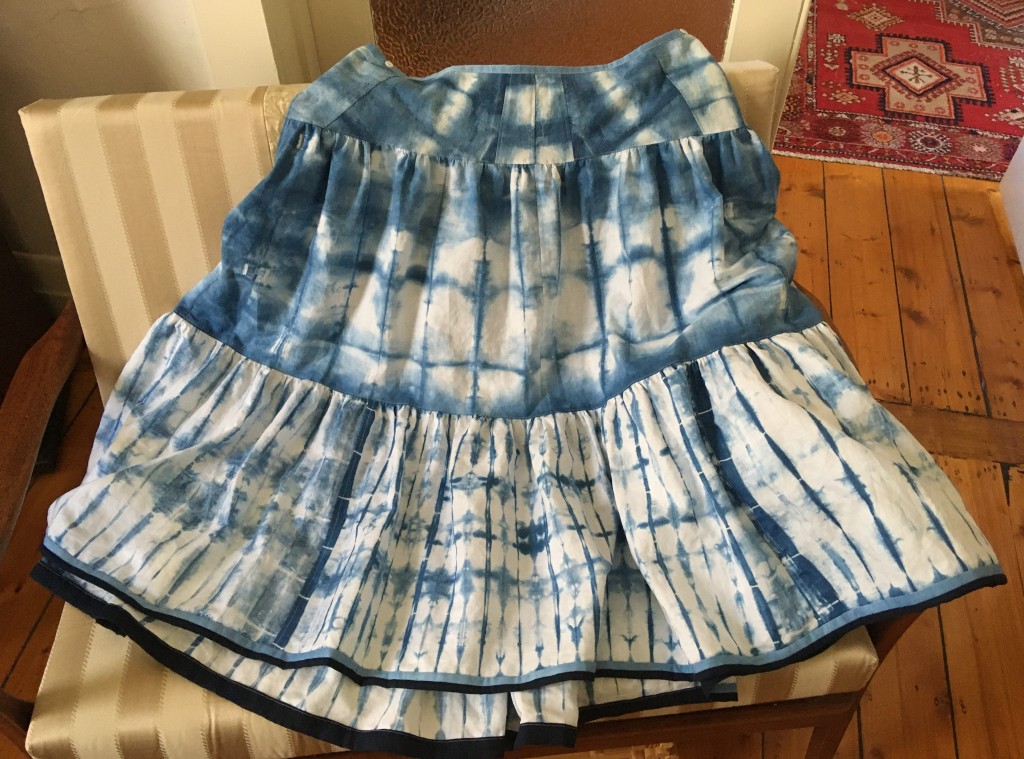
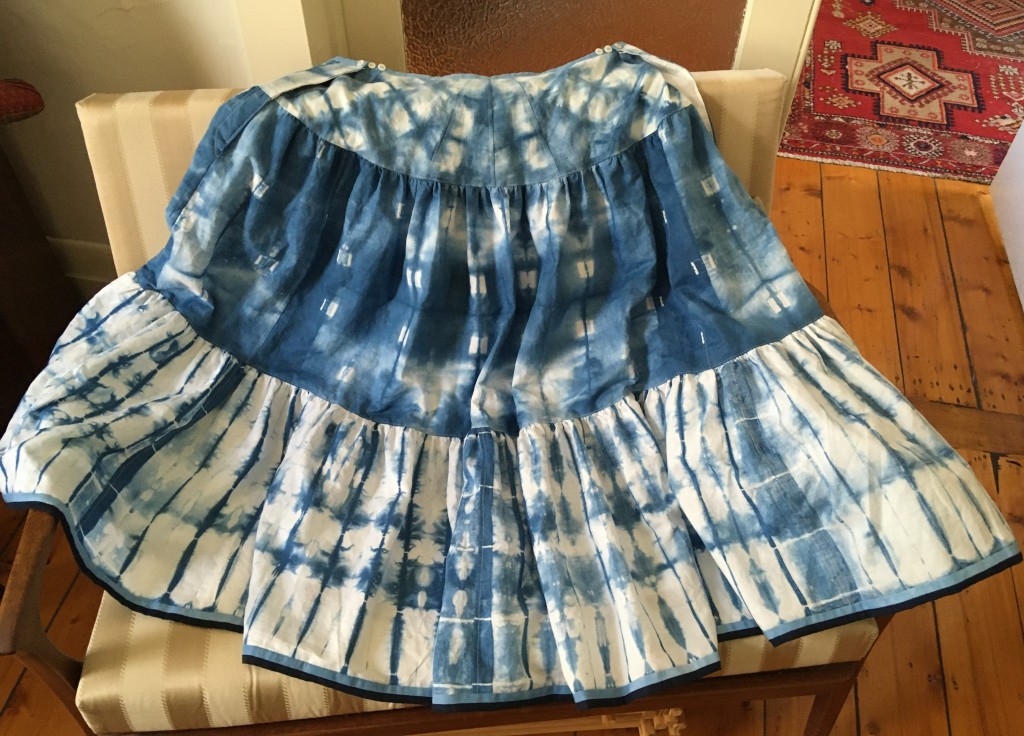
Here is the full thing, front and back
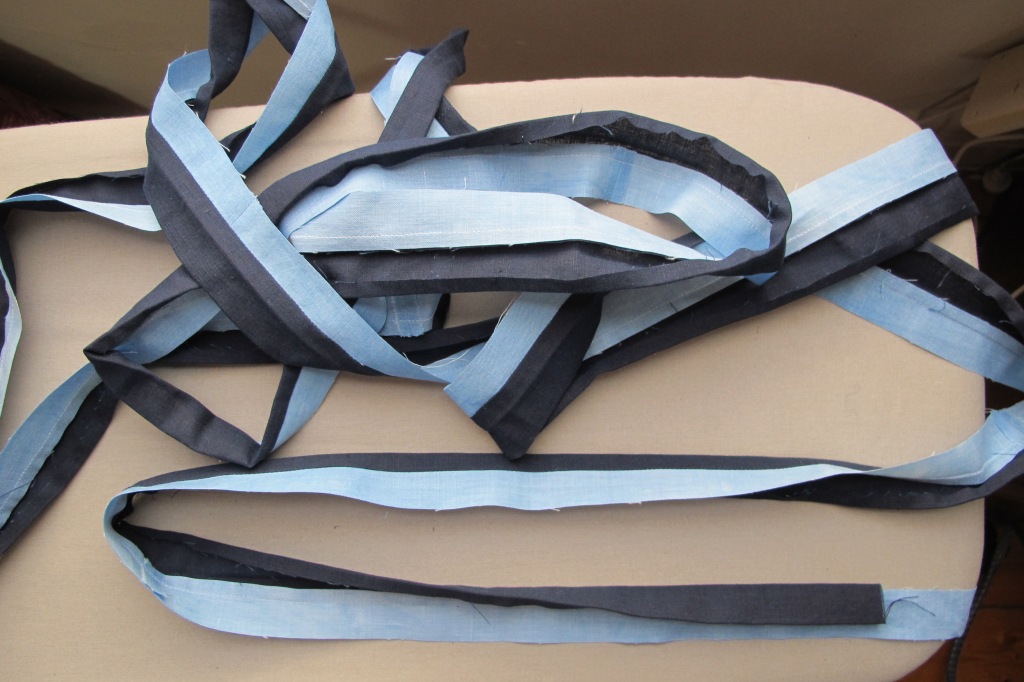
I’m delighted with the hem. I didn’t want to sacrifice any length, so I needed to bind it. Neither the pale blue or dark navy cloth sparked joy on their own for this purpose, but both together felt like a sweet solution, a subtly fussy detail. It took quite a few hours to achieve though. I used patchwork style rotary cutting for accuracy of the strips and fully assembled the border, sewn and pressed before attaching it to the skirt. Worth the effort I think.
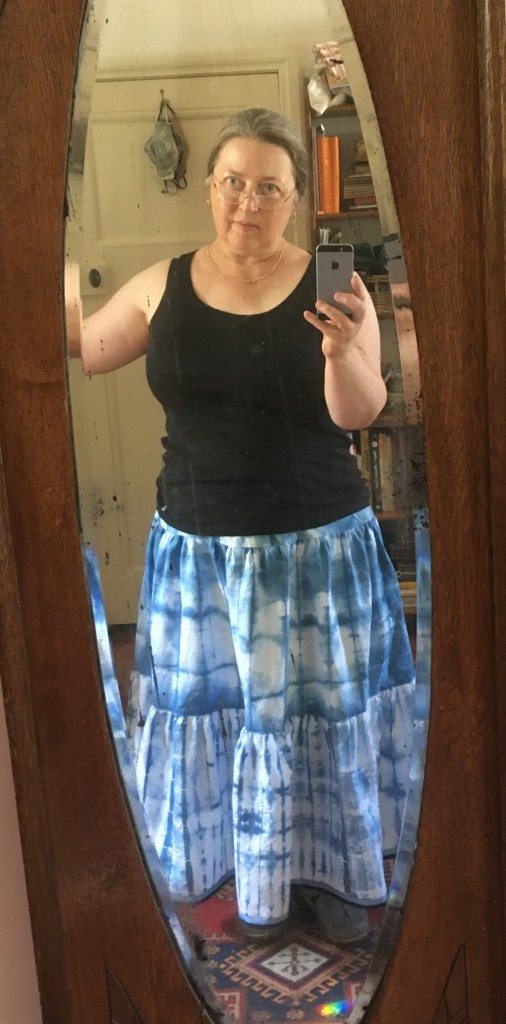
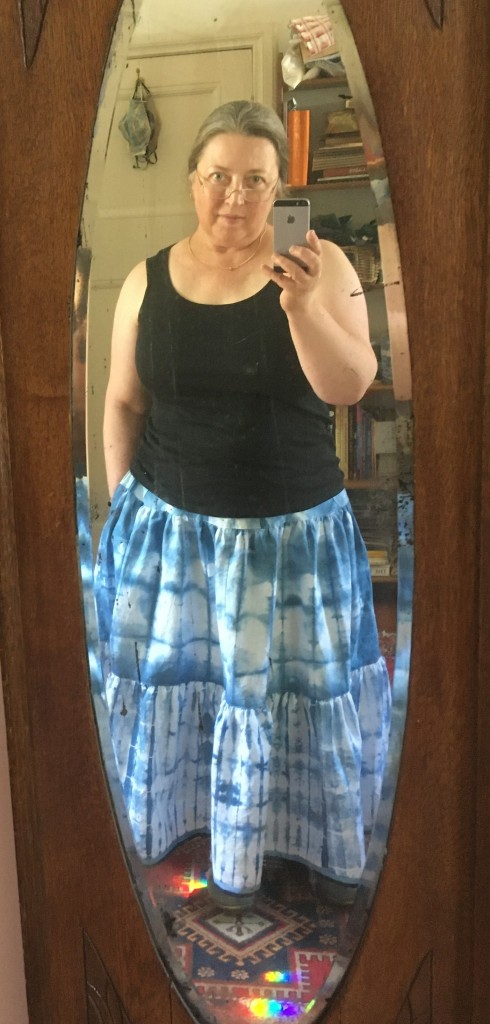
A couple of shots of it on me, one demonstrating the pockets of course. My mirror is the wrong shape for taking pictures of full skirts, but full swishy skirts make me happy. I was worried this one might feel too silly, but happily I like it.
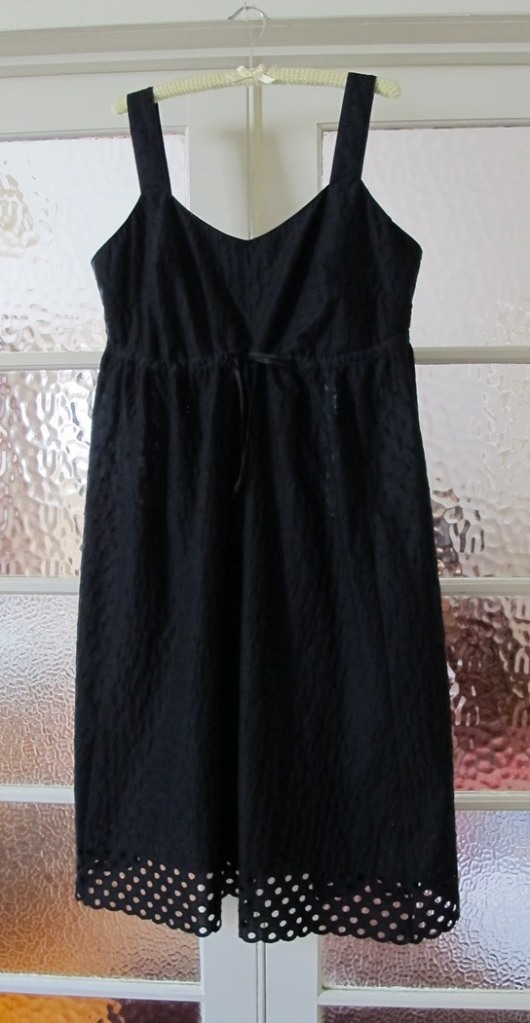
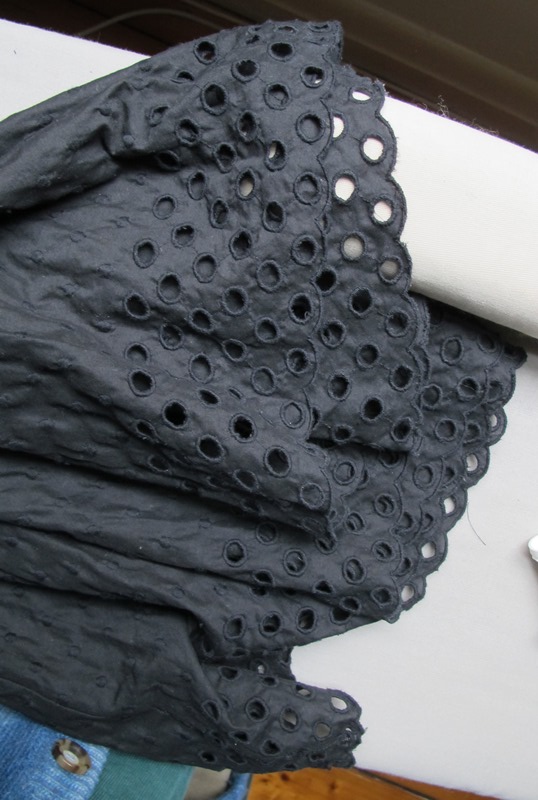
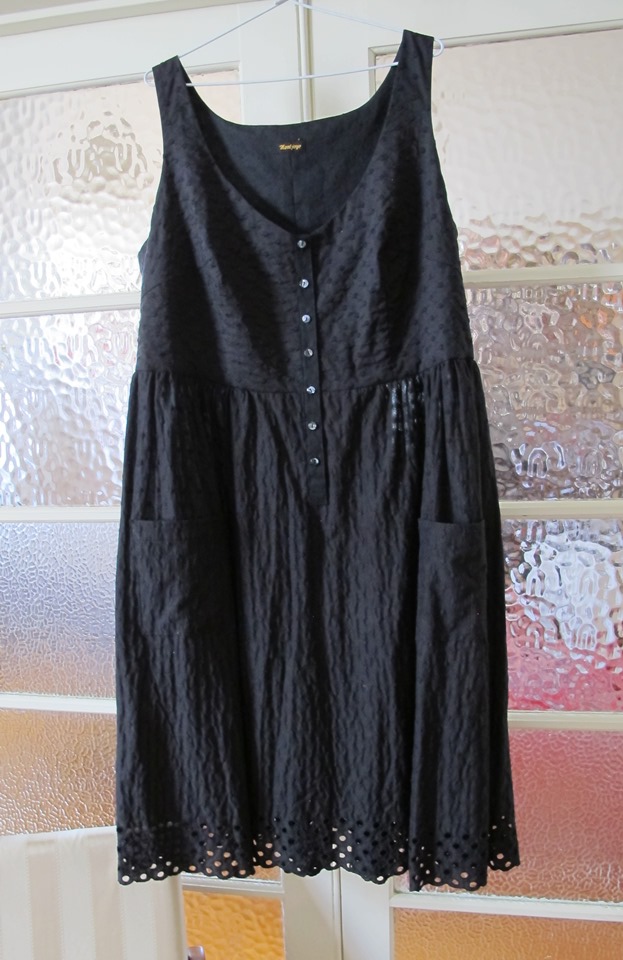
Back in late 2016, just after I started this blog, I made a dress out of a lovely piece of black on black dotty all cotton broderie anglaise. I don’t seem to have written it up here sadly, but there is a pic below. Sort of a petticoat dress. About “5 minutes” later the bodice didn’t fit. Yes I’m exaggerating the short time frame but I can’t even remember whether I even got a wearing out of this first incarnation.
The fabric was way too nice not to remake it, and I found that I had enough leftover cloth saved that I could cut a whole new bodice and pockets as well.
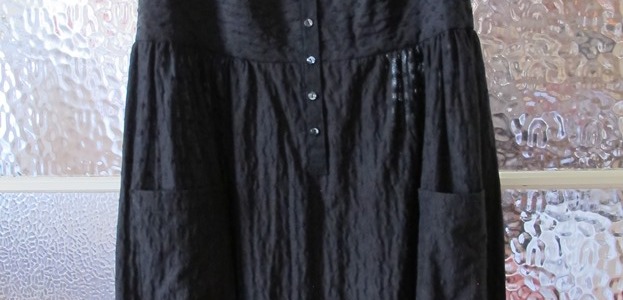
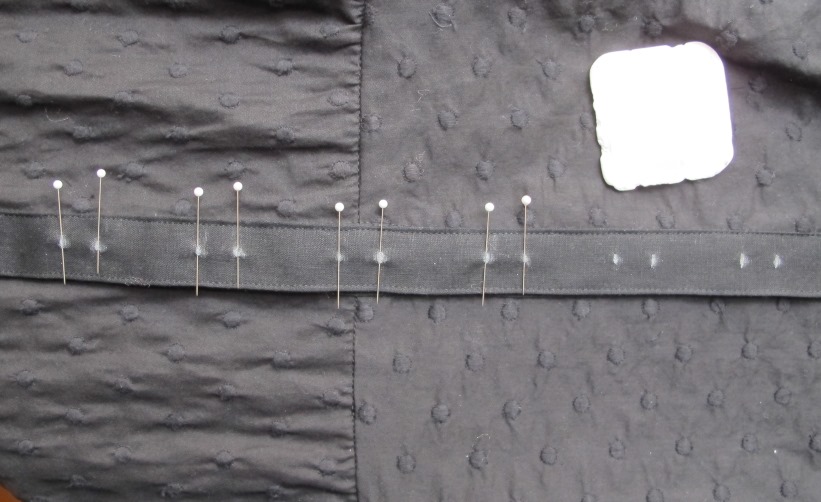
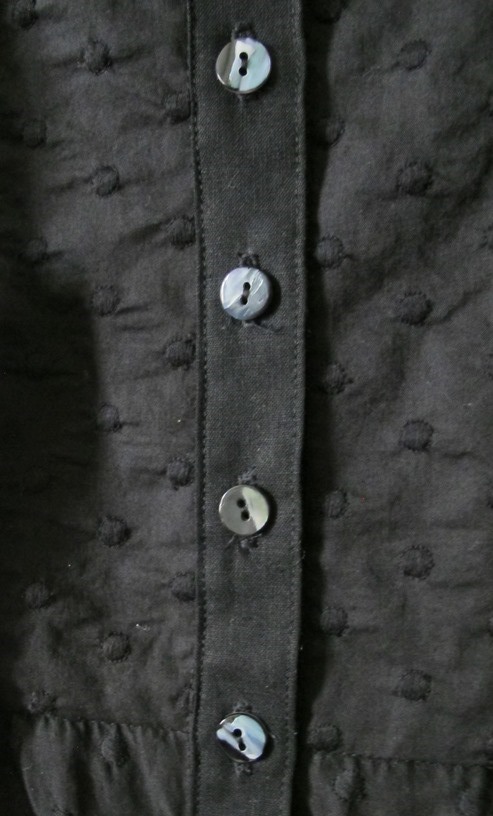
I didn’t take many progress shots but thought this one was worth sharing. On dark fabric you can mark the position of things like buttonholes using pins which then provide a nice defined hard backing to get quite an accurate chalk mark. On pale fabrics I use a soluble marker instead.
Obligatory button shot. Shell buttons, part black, part nicely irridescent. Prettier in reality, so hard to photograph.
The new bodice is a different shape, longer, less fitted, though it is gently darted.
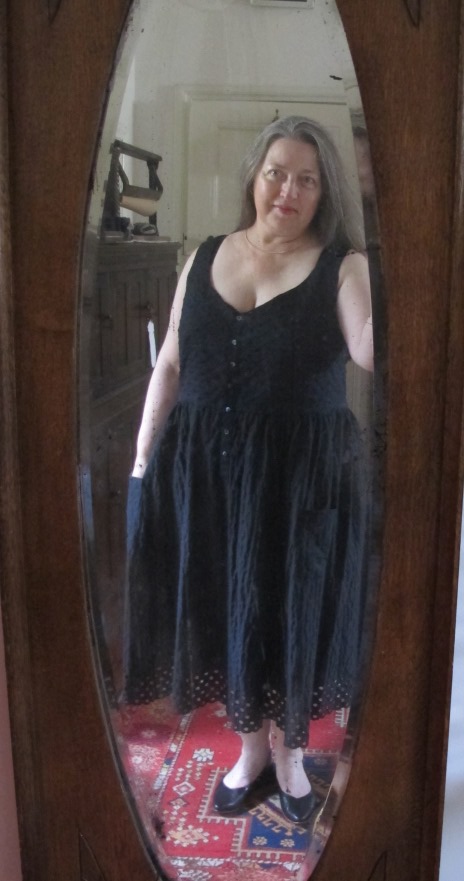
I stuffed up and cut the neckline too low. I could wear it as a cool party dress but I’d have to be feeling bolder than usual. Wearing a camisole is an option but would make the outfit warmer.
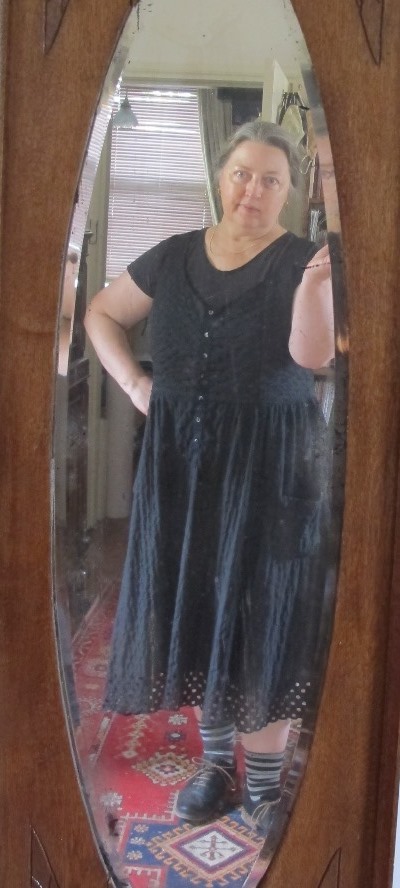
It’s likely to be styled more like this pic below most frequently. As a pinafore over a tshirt with socks and stompy shoes. That weird expression is what happens when I realise I’m not smiling, am not in the mood but try to anyway. Ha!
18mths ago there was a conversation or two with my friend Alan about me maybe making a shirt for him. “A nice linen shirt” was what he said he wanted. Some time earlier he had sent me home with some surplus fabric including a really nice piece of tiny checked linen in navy and white. This wasn’t enough for a whole shirt, but if I made the back from something else? Well I had an idea. You see, Alan has a strong fondness for mermaids and I’ve been having fun making stitched shibori pictures. So back in April, nearly a year after the above conversation, I made a mermaid for him.
First draw your mermaid. I wanted a vertical design and a cheerful elegant mermaid. I couldn’t find exactly what I wanted but I found a scary mermaid in a good pose and softened her
Then transfer the design to some nice linen with soluble pen and stitch the lines.
Then draw up all the strings tightly and knot them off. Doing that in pairs is much easier.
Then pop her in a dye bath and after rinsing, pull all the threads out (that takes longer than you might think!) to reveal your creation. This picture is slightly amended. All the lines came out pretty well except the one outlining her bosoms. That didn’t work at all. Bother. So I carefully painted that in with white fabric paint.
Then for his birthday I made a completely different shirt out of a fun elephant tablecloth. This was my cunning plan to get sizing information for the mermaid project.
Then we got popped back into lockdown. I went ahead and made up the mermaid shirt. Nice neat checked linen for most of it. Looking at the buttonhole distortion, maybe i should sew my shirt buttons on with stalks, hmm.
And a fun mermaid for the back
Yesterday I was finally able to deliver it, hurrah and well received it was.
There is actually a second mermaid shirt under construction. The stitched resist works better on two layers of cloth, but my design was not symmetrical so I did the whole thing on two layers of linen. So there was a second mermaid to do something with.
Back in 2014, 2 years prior to the advent of this blog, I made a fun skirt from scraps to wear to a folk music festival. Made mostly from sheeting and quilt backing leftovers. Full, colourful, and swirly. Foolishly I made it with a firm shaped waistband made from leftover half square triangles. Only a couple of years later I couldn’t wear it anymore. Big boo to perimenopause.
It’s been languishing in my wardrobe ever since. Too much potential to get rid of but unwearable as was. Today I finally got around to redoing the waist. I combined this rescue with my intention to experiment with the way I’m told 18thC underskirts worked. Splits both sides and ties from both halves of the waistband. Tie the back section in front of you and the front section in back. The size is hugely adjustable due to flexibility in the amount of overlap. I’ve designed this to have detatchable ties for minimising knots in laundry and with a 6cm overlap both sides for my current measurements.
I’m pretty happy with it. It’s a great experiment though not the most flattering of garments. It makes me look rather stumpy and dumpy, but everything kind of does ’cause I kind of am. This photo isn’t too bad but believe me it was very much the best of an unflattering bunch.
But the skirt is very fun and very huge. It’s way over a full circle.
WordPress tells me this little blog of mine has just hit 10,000 views. Yay? That’s probably not very much for the 5 years it’s been running. Still, I thank all of you who read this.
Some time ago I wanted a light weight wool cardigan. I made a lovely one and carelessly left it behind on an aeroplane. I made another, which I love but it’s “too good” to wear around the house. I made a pretty red one which I haven’t written up yet, but I’d also like to keep nice for at least a while. So I have made yet another deliberately for wearing while doing rather than with particular sartorial aims. I decided to make one dyed similarly to this skivvi .
Take an inexpensive length of soft teal wool knit fabric. Cut a baggy cardigan based on a tshirt pattern. Sew it up enough to put all the pieces together but without hems or other finishing. Torture it with pony beads and elastic bands.
Soak it for a short while in warm vinegared water. Using food dye set up in hot water so the dye takes fast, dye one side red and the other yellow/green. Fail to take pictures of this stage. Decide this result is nice but not yet interesting enough. Bundle the whole thing up kind of roughly pleated so only bits are exposed and dye that whole bundle black. Start taking the elastic bands off and finally remember to take a picture.
Finish taking the elastics off and impatiently wait for it to dry.
Decide there isn’t enough black and add extra donuts with a fabric ink felt tip. Sew the hems and the front bands. Find some leftover handspun that will make nice button loops.
Find some nice buttons, make the loops with the handspun plaited up. Sew all those on.
Here she is in all her messy glory
On me. I am pleased with it and I think this one I really will be willing to wear around the house while working on stuff, even somewhat mucky stuff. By happy accident it goes really well with this skirt.
From the back. Seeing as I was drawing things on it, there was no reason not to have a trefoil